
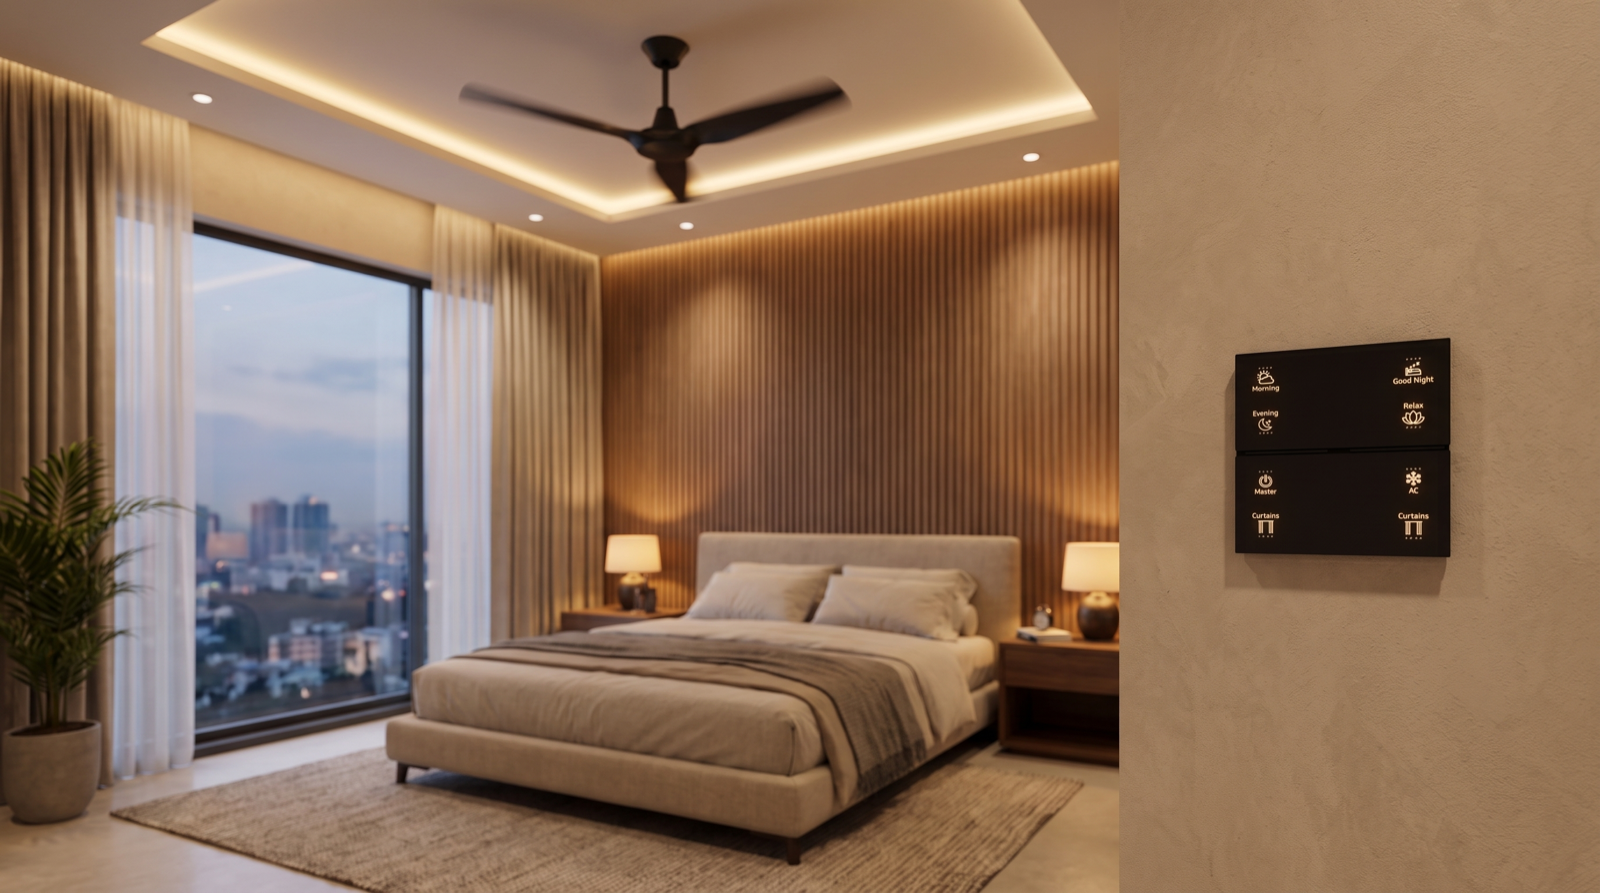
In this guide
- Why the fan belongs on the lighting drawing
- Sweep, room size and how many fans
- Heights, downrods and blade clearance
- The blade-shadow problem and how to design it out
- Controlling a BLDC fan without destroying it
- Getting fan speed onto a keypad and into scenes
- Points and provisions to leave before plastering
- How Pert delivers it (designed, not DIY)
- FAQs
This article is part of our wider coverage of home automation in Hyderabad, and it deals with the one ceiling-mounted object that almost every lighting consultant, interior designer and electrician assumes is someone else's problem. In practice the fan, the lights and the control system are a single system, and they fail together when planned separately.
Why the fan belongs on the lighting drawing
Three things happen when a fan is added to a ceiling after the light layout is fixed.
- The fan lands on top of a downlight. The fan box has to go on a structural point near the room centre, which is frequently where a symmetrical downlight grid already put a fixture. Something then gets moved on site, by an electrician, without the drawing — and the symmetry the designer spent a week on disappears.
- The blades cut through the light. A 1200mm fan sweeps a 1.2 metre circle at roughly 2.5 metres above the floor. Anything shining down through that circle gets chopped several times a second. This is the source of almost every “my lights flicker” complaint that turns out not to be a driver fault.
- The false ceiling drop is calculated wrong. The fan's mounting hook is on the slab; the fan hangs below the finished ceiling. If nobody accounts for the 150–250mm the ceiling takes, the fan ends up either too low for the room or with a downrod that cannot reach.
All three are free to fix on a drawing and expensive to fix afterwards. Putting the fan positions on the reflected ceiling plan before the light points are spaced is the whole trick — if that drawing is unfamiliar, how to read a reflected ceiling plan explains what you are looking at.
Sweep, room size and how many fans
Fan sweep is the diameter of the circle the blade tips trace, quoted in millimetres. The Indian standard sizes and where they belong:
- 900mm and below. Study, home office, utility, small kids room, or a compact balcony — rooms up to roughly 8 by 8 feet.
- 1200mm. The default for most Indian bedrooms and medium living rooms, comfortable up to about 12 by 12 feet. This is what the majority of flats in Hyderabad are built around.
- 1400mm. Larger master bedrooms and living rooms up to roughly 15 by 15 feet, and the better choice in a double-height or high-ceiling space where air has further to travel.
- 1500mm and above. Villa living rooms and large open-plan areas, usually with the ceiling at 3.3 metres or more so the larger blade does not visually dominate.
Two rules that matter more than the sweep chart. First, a room longer than about 18 feet wants two fans, not one big one. Air movement falls off sharply with distance from the hub, so one 1500mm fan in a 20-foot living room leaves the far seating still. Two 1200mm fans on a shared control give even coverage and look better against a long ceiling. Second, in an open-plan living-dining, plan the fans against the furniture, not the room rectangle — one over the seating, one over the dining table, each roughly centred on the thing people actually sit under. The same discipline applies to the light layers in that space, which we cover in living and dining room lighting layers.
Heights, downrods and blade clearance
This is pure arithmetic, and it is the part most often done on site by eye.
- Blade height above finished floor: 2.4–2.7 metres. Below 2.3 metres a fan feels oppressive and, in a bedroom, becomes a genuine hazard for anyone standing on the bed. Above about 3 metres airflow at seated height drops noticeably.
- Blade tip to nearest wall: 450mm minimum, 900mm preferred. A fan too close to a wall pushes air back at itself and is markedly noisier.
- Blade tip to any ceiling drop, beam or pelmet: at least 300mm. A curtain pelmet or a stepped ceiling edge inside the blade circle causes turbulence and a rhythmic thumping sound.
- Downrod length is measured from the finished ceiling. With a 3.0 metre slab and a 200mm false ceiling drop, the finished ceiling sits at 2.8 metres. A standard 250mm downrod plus the fan body then puts the blades at roughly 2.5 metres — correct. With a 3.3 metre slab and the same ceiling, you need a longer rod, typically 450–600mm, or the fan hangs too high to move air where people are.
One structural point: the fan hook or fan box must be cast or fixed into the slab, rated for the dynamic load of a running fan, and its exact position must be known before the false ceiling frame is built, because a neat circular cutout is far better than a patched one. This belongs on the same schedule as the rest of your provisions — see our electrical points checklist for a new home.
The blade-shadow problem and how to design it out
This deserves its own section because it is the single most common way a good lighting scheme is ruined by a fan.
When a blade passes between a light source and the floor, it interrupts the beam. At a typical fan speed with three blades you get roughly 10–15 interruptions per second — fast enough to be uncomfortable, slow enough to be clearly visible. People describe it as flickering lights, spinning shadows, or a headache they cannot place. Three design responses, in order of preference:
- Keep point sources outside the blade circle. The working rule is blade radius plus 300mm. For a 1200mm sweep fan that means no recessed spot within 900mm of the fan centre; for a 1400mm fan, within 1000mm. This alone solves most rooms and costs nothing on a drawing.
- Move the ambient layer above the blades. Cove lighting in the perimeter pocket throws light at the ceiling and walls, never down through the blade circle, so it cannot strobe. In a room where the fan sits centrally and the room is too small to clear 900mm, make the cove the main ambient layer and use spots only at the perimeter for tasks and accents. Our guide to planning cove lighting in a false ceiling covers the pocket dimensions this needs.
- Choose low-flicker drivers. Blade shadow and electrical flicker compound each other. An LED driver with high ripple already produces invisible flicker at mains frequency; add a chopping blade and the result is genuinely unpleasant. In fan rooms, insist on low-ripple dimmable drivers — the reasoning is set out in why LED lights flicker when dimmed.
A related detail: avoid putting a fan directly under or beside a strong downward accent such as a pendant over a dining table, because the moving blade edge catches the pendant's own light and produces a flicker on the table surface. Where both are wanted, offset them and reduce the pendant's downward component. Glare control in general is covered in how to plan glare-free lighting at home.
Controlling a BLDC fan without destroying it
Fan control has changed completely in the last few years, and a great deal of installation practice has not caught up. There are two fundamentally different kinds of fan in Indian homes, and they must be wired differently.
Conventional induction fans
The older type, typically 70–80W, with a capacitor-based or electronic step regulator giving five speeds. These can be run from a triac-based fan control module in the automation panel, which is what a “smart fan regulator” usually means. Speeds are discrete steps, not a smooth slider, and the module must be rated for the load with headroom.
BLDC fans
The modern type, typically 28–35W for the same air delivery, with a brushless DC motor and an electronic controller built into the fan. These must never be fed through a triac fan regulator or a phase-cut dimmer. Their onboard controller expects a clean, full 230V supply; chopping the waveform starves it, which shows up as humming, erratic speed, refusal to start, and frequently a dead controller board within months. It also voids most manufacturers' warranties.
The correct approach for a BLDC fan is:
- Give it a clean switched live from a relay channel — on/off only, full voltage, no dimming.
- Handle speed through the fan's own controller, integrated into the automation system via the manufacturer's automation-ready module, or an RF/IR bridge that reproduces the fan remote's commands.
- Confirm the fan model's integration path before it is purchased. Not all BLDC fans expose speed control to third-party systems, and discovering that after handover means either living with two controls or changing the fan.
In every case, keep fan loads on their own channels and off the lighting dimmer channels — the load types, protection and grouping are different. The channel planning logic is the same one we apply to lights, described in how to plan dimmer channels and lighting loads. And if you are adding automation to a finished home with existing fan regulators in the board, adding home automation to existing modular switches covers what can and cannot be retrofitted behind the plate.
Getting fan speed onto a keypad and into scenes
A control that needs a phone is a control people stop using. Fan speed is a comfort adjustment made several times an evening, often in the dark, often by someone who did not install the app — a guest, a parent, a child. It has to be on the wall.
On a Pert Stella wall keypad we handle it two ways depending on how many buttons the room can spare:
- A dedicated pair of buttons engraved Fan + and Fan −, stepping speed up and down with the current level shown by the backlight. This is what we specify at the bedside, where the fan gets adjusted most.
- A single stepping button engraved Fan, cycling off → low → medium → high → off. This suits a living room entrance keypad where scene buttons take priority and the fan is a secondary control.
Engraving matters here more than elsewhere, because a fan button that is not obviously a fan button gets pressed by mistake in the dark. Our guide to keypad layouts and engraving covers how to lay these out so that the same button does the same job on every plate in the house.
Then put the fan into the scenes. Four that earn their place in a Hyderabad home:
- Good Night — lights to 5 percent, curtains closed, fan to the family's preferred sleeping speed. This is usually speed 2 or 3, and it should be set with the family, at night, in the finished room.
- Morning — curtains open, fans off, lights off. In April and May the fan runs all night and nobody remembers to switch it off; this scene saves a whole day of unnecessary running.
- Away — every fan in the house off, alongside lights and other loads. Forgotten fans are one of the larger avoidable loads in an empty flat; what actually moves the electricity bill is covered in what actually reduces power use.
- Evening — warm lights at a comfortable level, curtains closed, fan at a low speed rather than off, so the room is already settled when people sit down.
One deliberate exclusion: do not put fans on motion sensors. Occupancy-driven lighting works in corridors and utilities because light is instantaneous and nobody minds it switching. A fan spinning up and down as people move through a room is irritating and wears the motor. Fans belong on explicit control and on scenes, not on sensors. For worked examples of how scenes are actually structured, see designing home automation scenes.
Points and provisions to leave before plastering
If you take one thing from this article to your electrician, make it this list.
- Fan hook or fan box at the slab, at the coordinated position from the ceiling plan, load-rated, with its location marked so the false ceiling cutout is made rather than patched.
- A dedicated 3-core fan point at each fan position, with its own neutral back to the automation panel — not looped from the nearest light point.
- Fan circuits separate from lighting circuits at the board, so a fan module can be swapped without disturbing a lighting channel.
- A spare 20mm conduit from the panel to each fan position. If a BLDC fan later needs a wired control module rather than an RF bridge, this is what makes it a one-hour job instead of a chase in a finished wall.
- Keypad back boxes positioned for fan control — bedside on both sides of a double bed, and at the room entrance, so the fan can be adjusted from where people actually are.
- Downrod length decided and the fan model confirmed before the ceiling is closed, because both the rod and the integration path depend on the specific fan.
If the bedroom is where most of this lands — and it usually is — our detailed guide to bedroom lighting and automation covers the rest of the room around the fan, and downlight spacing and beam angles gives the arithmetic for placing the spots that have to stay outside the blade circle.
How Pert delivers it — a designed solution, not a DIY kit
Pert is a solutions company: we design and install, we do not hand over a box of modules and a manual. On a project where fans and lighting have to coexist, that means a site visit to measure slab heights and false ceiling drops room by room; a coordinated ceiling plan that fixes fan centres, downrod lengths, blade circles and light points on the same drawing your ceiling contractor and electrician work from; a written check of each fan model's control path before it is purchased, so no BLDC fan is wired through a regulator that will damage it; professional installation and commissioning of the fan channels alongside smart lighting, motorised curtains and home security; and then scene configuration done in the finished home, at night, with the family present — because the right sleeping fan speed is not something anyone can specify on a drawing.
If you are comparing providers before you commit, our guide to the best home automation companies in Hyderabad covers what to check before you sign, and how to read a home automation quotation explains what should be itemised — including whether fan modules, relay channels and any RF bridges are priced explicitly or hidden inside a single line.
Planning a ceiling in Hyderabad? Get the fan centres, downrod lengths, blade clearances and light points coordinated on one drawing before the gypsum closes — moving a fan on a plan is free, moving it in a finished ceiling is not. Request a consultation →
Frequently asked questions
Why do my downlights flicker or cast moving shadows when the ceiling fan is running?
Because those downlights sit inside the circle the blades sweep, so each passing blade chops the beam and the eye reads it as flicker or a spinning shadow. It is a layout problem, not a faulty light. Keep recessed spots at least 300mm outside the blade tip circle — more than 900mm from the centre of a 1200mm fan. Where the room is too small for that, move the ambient layer into a cove above the blades. A low-ripple driver helps, because electrical flicker and blade shadow compound each other.
Can a BLDC ceiling fan be connected to a normal smart dimmer or fan regulator?
No. A BLDC fan has its own electronic controller and expects a clean, full 230V supply. Running it through a triac fan regulator or phase-cut dimmer causes humming, erratic speeds and often permanent damage to the controller board, and it usually voids the warranty. Give a BLDC fan a switched live from a relay channel and control speed through its own controller, integrated via the manufacturer's automation-ready module or an RF bridge. Step regulators belong to older induction fans only.
What size ceiling fan do I need, and how high should it hang?
A 1200mm sweep suits most Indian bedrooms and rooms up to roughly 12 by 12 feet; 1400mm suits larger rooms up to about 15 by 15 feet; 900mm or less suits a study or utility. Rooms longer than about 18 feet want two fans rather than one large one. Hang the blades 2.4 to 2.7 metres above the finished floor, never below 2.3 metres, with blade tips at least 450mm from the nearest wall and 900mm preferred. Calculate the downrod from the finished ceiling, remembering the false ceiling takes 150 to 250mm.
Can fan speed be controlled from a wall keypad and included in scenes?
Yes, and it is usually what decides whether a family keeps using their automation. Pert puts fan control on the Stella keypad as either an engraved Fan + / Fan − pair or a single stepping Fan button, so nobody needs an app. Fan state then goes into scenes: Good Night sets a sleeping speed while dimming lights and closing curtains, Morning switches fans off as the curtains open, and Away turns every fan in the house off. We set those speeds with the family in the finished home rather than guessing them on a drawing.