
In this guide
- The three ways to retrofit automation in a finished home
- The box-by-box survey: five checks behind every plate
- No neutral in the switch box: the most common problem
- Box depth, heat and how many modules fit
- Two-way switching, fans and heavy loads
- Dimming on existing lights and wiring
- Keep the switch plates or swap them for keypads?
- Seven retrofit mistakes
- How Pert delivers a retrofit (designed, not DIY)
- FAQs
This article is for homeowners who are already living in their home, or who have taken possession of a finished flat, and want automation without a renovation. It is part of our wider coverage of home automation in Hyderabad. If you are doing a larger renovation with walls and ceilings open, read can you add home automation during renovation first — the options there are broader. And if you are still choosing between wired and wireless systems in general, wired vs wireless home automation sets out the trade-offs. Everything below assumes the walls stay closed.
The three ways to retrofit automation in a finished home
There is no single "retrofit kit". There are three approaches, and a good design usually mixes them room by room.
| Route | What changes | Best for | Watch out for |
|---|---|---|---|
| A. Modules behind existing switches | Compact relay or dimmer modules go inside the existing switch box. The modular switches stay and act as inputs; the lights also respond to scenes, schedules and the app. | Bedrooms, kitchens, utility, secondary rooms where the family is happy with the current plates | Needs a neutral, enough depth and sensible heat margins; switch position no longer shows on/off state |
| B. Replace the plate with a scene keypad | The light switches in a box are removed and a touch keypad takes the same position; modules sit in the box, a nearby box or the ceiling. | Living room, dining, master bedroom, entrance — anywhere scenes will be pressed daily | Keypad back-box size may not match the old box; sockets in a mixed plate need a new home |
| C. Modules at the light point or false ceiling | Automation hardware is fitted above the false ceiling or near the fixture, where neutral and space are available; the wall switch is rewired as an input or replaced by a keypad. | Rooms with a false ceiling and access panels, cove and profile lighting, boxes with no neutral | Needs a service access point; must be documented so it can be found later |
In a typical 3BHK retrofit we end up with Route B in the two or three rooms where scenes matter, Route A in bedrooms and service areas, and Route C wherever a switch box turns out to be too shallow, too crowded or missing a neutral.
The box-by-box survey: five checks behind every plate
A retrofit quotation made from a floor plan and a walk-through is a guess. The quotation should come after the plates are opened — with the circuit isolated at the MCB, by a qualified electrician — and every box recorded against five checks:
- Is there a neutral in the box? Look for a blue or black conductor that is not connected to any switch. Many Indian installations only bring phase and the switched wires to the switch box; the neutral goes straight to the light point.
- How deep is the box, and how full? Measure the clear depth from the wall surface to the back of the box, and note how much of it is already taken by the switch mechanisms and wire loops. Older and budget installations often have shallow boxes packed with slack wire.
- What does each switch control, and how much? Record every switch: which fixtures, how many, total wattage, and the type — LED downlight, strip with a driver, fan, exhaust, geyser, socket. The survey sheet is also where odd wiring shows up, such as one switch feeding lights in two rooms.
- Is it one-way, two-way or intermediate? Bedroom entry-and-bedside pairs, staircases and long corridors are often two-way. These need a different wiring approach, covered below.
- What is the condition of the wiring? Conductor size (lighting circuits are typically 1.0–1.5 sq mm), insulation that has hardened or discoloured, loose terminals, missing earth, and whether the MCB for that circuit is correctly labelled. Retrofit is the moment to find a scorched terminal, not to hide one behind a new module.
The output is a simple sheet — one row per switch — that tells the designer which route each box needs before a single product is chosen. It is the same discipline as the electrical points checklist for a new home, just done in reverse on wiring that already exists.
No neutral in the switch box: the most common problem
Most automation modules need their own small, constant power supply to keep the radio or bus connection alive while the light is off. That supply needs phase and neutral. Where the switch box has no neutral, there are three options, in the order we usually prefer them:
1. Pull a neutral into the box
Socket boxes always have a neutral, and in many homes a socket box is within a metre or two of the switch box, often sharing the same conduit run. An electrician can usually draw a neutral of the correct size and colour through the existing conduit without touching the plaster. It must come from the same circuit — the same MCB and, where fitted, the same RCCB — or the RCCB will trip, and the circuit becomes confusing and unsafe to isolate. This is quick when conduits are clear and slow when they are packed or bent sharply.
2. Move the module to where the neutral already is
The neutral always reaches the light point. If there is a false ceiling with access, the module can sit above it, close to the fixture or driver, and the wall switch becomes an input. This is Route C, and it also frees up space in a crowded switch box.
3. Use a no-neutral module — carefully
No-neutral modules draw a tiny current through the lamp itself to power their electronics. With incandescent or larger loads that is invisible. With low-wattage LEDs it often is not: the "off" light glows faintly, flashes every few seconds, or the module behaves erratically. Some installations add a bypass component across the load to cure it. It can work, but it adds a variable to every circuit, and it is the first thing to fail when the family later swaps a fixture for a lower-wattage one. On most retrofits we treat no-neutral as a last resort for a single awkward box, not as the plan for a whole home.
Box depth, heat and how many modules fit
Retrofit modules are small, but they are not flat, and a switch box has to hold the switch mechanisms, the module and all the conductors without anything being forced. Three rules keep this safe and serviceable:
- Nothing should need force to close. If the plate has to be pushed hard to seat, or wires are folded tightly behind a module, the box is too full. Pressure on terminals loosens them over time, and loose terminals get hot. Move a module to the ceiling or an adjacent box instead.
- Mind the heat, especially with dimmers. Every relay coil and every dimmer dissipates some heat, and dimmers dissipate more as load rises. Several modules packed into one enclosed box, running near their rated load, on a sun-facing wall in a Hyderabad May afternoon, is the combination that shortens electronics' life. We keep each module comfortably below its rated load and spread modules across boxes rather than filling one.
- One module, one clear purpose. A common failure is to put a dimmer module, a fan regulator and a socket in the same crowded box. Keep power sockets and heavy loads physically separate from lighting modules wherever possible.
As a planning rule of thumb, a two- or three-switch lighting box can usually take one or two modules; a large eight- or twelve-module plate that controls a whole living room almost always needs some of its channels moved to the false ceiling or a small dedicated enclosure. How many channels a room really needs, and how to share load across them, is covered in how to plan dimmer channels and lighting loads.
Two-way switching, fans and heavy loads
Two-way and multi-way circuits
In a traditional two-way circuit, two switches share a pair of "strapper" wires and either can change the light. An automation module cannot simply be dropped into one end, because the other switch would still break the circuit. The clean retrofit is to make the light controlled by one module, and turn both switch positions into inputs to that module — usually by repurposing the strapper wires as signal wires, or by replacing the far switch with a keypad or wireless button. The result behaves better than before: both positions work, and the app and scenes always know the true state. Staircases and corridors are also where motion sensors often do a better job than any switch; see staircase and corridor lighting with motion sensors.
Fans
Ceiling fans should not be put on a lighting dimmer. Either leave the existing fan regulator in place, or use a module designed specifically for fan speed steps. Fans are also a good place to ask whether automation adds anything; many families are happy with a manual regulator and a Master Off that includes it.
Heavy loads
Geysers, high-wattage heaters and power sockets on 16A circuits need relays rated well above the actual load, their own circuits and, often, their own enclosure. Many retrofit modules are designed for lighting-level currents only. If a heavy load is worth automating at all — a geyser on a morning schedule, for example — it should be designed as a separate, correctly rated circuit, not squeezed behind a light-switch plate.
Dimming on existing lights and wiring
Adding on/off control behind existing switches is straightforward. Adding dimming to existing fixtures is where retrofits most often disappoint, because the fixtures were bought without dimming in mind. A realistic plan works like this:
- List every fixture type in the home — downlight model, panel, strip-and-driver, pendant, wall light.
- Test one of each type on the intended dimmer module before the full order is placed. Look for smooth dimming down to a low level with no flicker, buzz, step, or glow when off. Many ordinary LED downlights and panels are simply non-dimmable. The reasons are explained in why LED lights flicker when dimmed.
- Sort the results into three groups. Fixtures that dim well get dimmer modules. Fixtures that do not dim but are not scene-critical — bathroom, utility, wardrobe — get on/off relays. Scene-critical fixtures that fail the test — living-room downlights, cove, dining pendant — are replaced with dimmable smart COB, strip and spot lighting.
- Be realistic about tunable white. Tunable fixtures need two control channels per group, which usually means extra conductors that a finished home's wiring does not have. Add tunable white where a false ceiling or cove is being opened anyway; elsewhere, a warm-white dimmable fixture on good scenes achieves most of the effect.
This test-first approach costs a few days and saves the most common retrofit complaint: "the living room flickers at 20%".
Keep the switch plates or swap them for keypads?
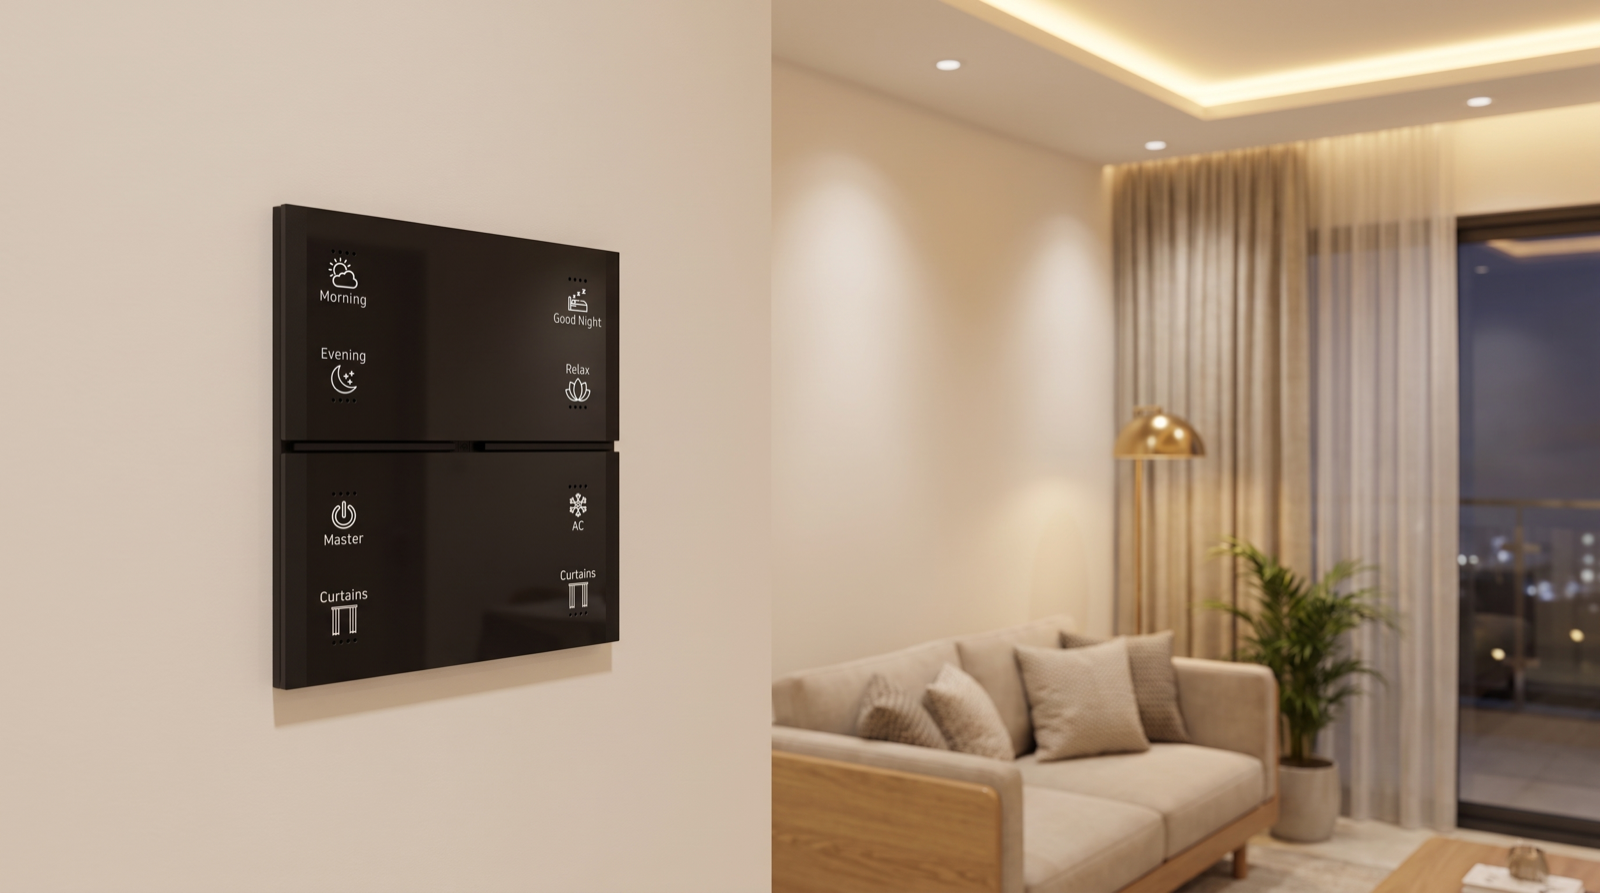
Route A keeps what you have and adds intelligence behind it. It is the least disruptive option, but a row of identical rocker switches can only ever turn individual circuits on and off — the scenes live in the app. For rooms where the family should press one button for Evening or Good Night, a scene keypad is the better interface. A useful way to decide, room by room:
| Room | Usual recommendation | Why |
|---|---|---|
| Living & dining | Replace light switches with a scene keypad | Scenes are used daily; four to eight circuits are too many for rocker switches |
| Master bedroom | Keypad at entry and bedside; bedside often replaces a two-way switch | Good Night and curtain control from bed are the most-used functions |
| Entrance | Keypad | Welcome and Master Off belong at the door |
| Other bedrooms | Modules behind existing switches, optional small keypad | Fewer circuits; families are often happy with familiar switches |
| Kitchen, utility, bathrooms | Modules behind existing switches | Task lights; wet hands; schedules and Master Off are enough |
Two practical points when swapping a plate. First, check the keypad's back-box requirement against the old box: a square touch keypad such as Pert's Stella keypad will not always sit neatly on a long horizontal modular box, so it may need a new box of the right size or a neat adapter arrangement. Second, if the old plate mixed switches and a socket, decide where that socket goes before anything is removed. The button counts, labels and gang sizes are worked through in how to plan keypad layouts and engraving.
Curtains follow the same logic. Where a curtain track can be replaced and there is a socket or a power point near the window, motorised curtains are one of the easiest retrofit additions, and their buttons belong on the room keypad rather than a separate remote.
Seven retrofit mistakes
- Quoting before opening the boxes. The neutral, depth and two-way findings change the design; a quotation without them will change on site.
- Using no-neutral modules everywhere to save a day. Glowing and flickering LEDs follow.
- Borrowing a neutral from a different circuit. RCCB trips, and a circuit that is not truly dead when its MCB is off.
- Forcing modules into a full box. Pressure on terminals, heat, and a failure hidden behind a plate.
- Assuming existing LEDs will dim. Test one of each type first.
- Automating geysers and sockets through light-switch modules. Heavy loads need correctly rated, separate circuits.
- Not documenting where modules went. A module above a ceiling panel that nobody recorded is a service call that takes an afternoon instead of ten minutes. Every retrofit should hand over a switch-by-switch map — part of a proper handover and testing checklist.
How Pert delivers a retrofit — a designed solution, not a DIY kit
Pert is a solutions company. We design and install; we do not sell smart switches in a box and leave a family to work out neutrals and two-way wiring. On a retrofit that means our team opens and surveys every relevant switch box with the circuit safely isolated, records the neutral, depth, loads and circuit type for each switch, tests your existing fixture types for dimming, and then designs the room-by-room mix of modules, keypads and ceiling-mounted hardware. We pull neutrals from the correct circuit, keep heavy loads out of lighting boxes, fit and engrave keypads where scenes matter, commission the scenes and schedules, and hand over a written map of where every module sits. Because the walls stay closed, most apartment retrofits are completed room by room with the family still living at home.
If you are comparing who should do this kind of work in a finished home, best home automation companies in Hyderabad sets out what to look for — including whether a company surveys the wiring before quoting or simply supplies hardware.
Living in a finished home in Hyderabad and want automation without breaking walls? We will open the boxes, tell you exactly what your existing wiring can support, and design scenes, keypads and curtains around it. Book a retrofit survey →
Frequently asked questions
Can I add home automation without changing my existing modular switches?
Often, yes. Compact relay or dimmer modules can sit inside the existing switch box so the switches keep working as inputs while the lights also respond to scenes, schedules and the app. It depends on five checks per box: a neutral, enough depth, the type and wattage of the loads, whether the circuit is two-way, and how many modules the box can hold without overheating.
What if my switch box has no neutral wire?
Pull a neutral from a nearby socket box on the same circuit through the existing conduit, move the module to the light point or false ceiling where the neutral already is, or — as a last resort — use a no-neutral module, which can make low-wattage LEDs glow or flicker when off.
Do I need to break walls to automate a finished home?
Usually not. Retrofits reuse existing boxes and conduits, with modules in switch boxes or above the false ceiling and keypads replacing switch plates in the same position. Chasing is only needed where there is no box at all, conduits are blocked, or tunable lighting needs extra conductors.
Can existing lights be dimmed after a retrofit?
Only if their LED drivers are compatible. Test one fixture of each type first: compatible ones get dimmer modules, non-dimmable ones get on/off relays, and scene-critical fixtures that fail can be replaced with dimmable ones. Tunable white is best added where a ceiling is being opened anyway.