
In this guide
- Why circulation spaces need their own plan
- The numbers: lux, heights and spacing
- Which fixture goes where — steps, handrails, walls, ceiling
- Sensors: PIR vs presence, and where they actually go
- The behaviour: timeouts, fades and the 5% night level
- Keypads, overrides and the scenes that matter
- Wiring points to leave before the plaster goes on
- How Pert delivers it (designed, not DIY)
- FAQs
A four-bedroom villa in Hyderabad typically has a staircase, an upstairs passage, a downstairs foyer link and a utility corridor. Together that is often 15 to 20 percent of the floor area and, on a lighting bill of quotations, usually less than 5 percent of the fixture count. This article is part of our wider coverage of home automation in Hyderabad, and it deals with the spaces between the rooms — where good automation is least visible and most useful.
Why circulation spaces need their own plan
Every habitable room is lit for a task: cooking, reading, eating, sleeping. Circulation spaces are lit for safe movement and orientation, and that is a genuinely different brief with three properties no other room has.
- You are moving, and your hands are usually full. A control you have to find, aim at or unlock is a control that does not get used. This is the one part of a house where automatic behaviour is not a luxury — it is the primary interface, and switches are the backup.
- Your eyes are adapting, in both directions. Stepping out of a bright living room into a dark passage, or out of a dark bedroom into a bright corridor, both cause several seconds of near-blindness. The light level in a circulation space has to be appropriate to what you just came from, which is why one fixed brightness can never be right at both 8pm and 2am.
- The consequence of a mistake is physical. A badly lit bedroom is unpleasant. A badly lit staircase is where falls happen — overwhelmingly on the top and bottom two steps, and overwhelmingly because the edge of a tread was not visible as a distinct line. Every other consideration in this guide is secondary to making tread edges legible.
These properties are why a staircase deserves the same drawing time as a living room, and why the answer is almost never "a downlight and a two-way switch".
The numbers: lux, heights and spacing
Fix these on paper and most of the installation resolves itself.
1. Light levels — two targets, not one
A staircase or corridor needs a daytime/evening level of about 100 to 150 lux at floor level, and a night level of roughly 10 to 20 lux. Treads specifically want 50 to 100 lux falling on the horizontal surface, with the critical requirement being contrast at the nosing: you need the front edge of each step to read as a distinct line, which is achieved by lighting the tread from the side or above at a shallow angle, not by flooding the whole stairwell.
The ratio between landing and flight matters too. If the landing sits at 150 lux and the flight at 40, your eyes are re-adapting mid-staircase. Keep the two within roughly 2:1 of each other.
2. Step-light height — 150 to 200mm above the tread
Recessed wall step lights belong 150 to 200mm above the tread nosing. Below about 120mm the fixture is in the path of a foot and gets scuffed; above about 250mm the throw lands on the tread above the one you are stepping onto, which defeats the purpose. Choose an asymmetric, downward-throwing fixture with the LED recessed behind a lip — a step light you can see the source of is a glare source at eye level when you are coming down the flight.
3. Step-light spacing — every second or third step
For a typical 250 to 300mm going, one fixture every second or third step is sufficient, which puts them roughly 600 to 900mm apart along the flight. Each needs only 1 to 3W. Keep them all on the same wall and keep the rhythm regular — an irregular pattern reads as a defect even when the light level is fine. On a flight with a mid-landing, add one fixture at the landing itself so the pivot point is never the darkest spot.
4. Corridor spacing — 1.2 to 1.5m, and off the centre line
In a 900 to 1200mm wide passage, small recessed spots at 1.2 to 1.5m centres give an even wash without scallop gaps. Set them 300 to 400mm off the wall rather than down the middle: washing the wall makes a narrow corridor feel wider and lights faces and door handles, whereas a centre line of downlights lights the floor and leaves the walls dark, which makes a passage feel like a tunnel. A continuous cove or a skirting-level strip is often better still — the detailing for the former is in our guide to planning cove lighting in a false ceiling.
5. Colour temperature — 3000K to 4000K by day, 2200K to 2700K at night
Circulation spaces read best at 3000K in a warm-toned home and 4000K where the finishes are cooler and the corridor connects to work areas. The night level is the one that must change: 2200K to 2700K, because a cool-white light at 2am both wrecks your dark adaptation and suppresses melatonin on the way back to bed. This is a strong argument for tunable fixtures here of all places — the full room-by-room logic is in our colour temperature guide.
Which fixture goes where — steps, handrails, walls, ceiling
Four options, and most good staircases use two of them rather than one of them heavily.
Recessed wall step lights
The classic, and still the best for making tread edges legible. Needs a 75mm deep back-box set into the wall during blockwork, which is the entire reason this decision has to be made before plastering rather than after painting. Best suited to a flight with a solid side wall.
Handrail or under-nosing strip
A continuous 5 to 7 W/m strip in an aluminium channel, either routed into the underside of the handrail or tucked under the tread nosing. This is the right answer for open-riser or glass-balustrade staircases where there is no side wall to recess anything into, and it produces a single unbroken line of light that photographs beautifully. Use a diffused channel — a bare strip visible from below is a row of dots, not a line.
Skirting-level corridor lights
Small recessed fixtures at 250 to 300mm above finished floor, every 2 to 3m along a passage. These are the night-time layer: at 1 to 2W each they are barely a load, they never shine into anyone's eyes, and they make a corridor navigable at midnight without waking anybody. Pair them with the ceiling layer, do not substitute for it.
Ceiling spots, cove or wall wash
The daytime layer that gives the space its 100 to 150 lux. Beam angles matter here: use 36° to 60° for general corridor wash and reserve narrow beams for deliberate accents like artwork. Our comparison of panel vs COB vs strip vs spot lights covers where each belongs; for corridors, the honest answer is fewer flat panels and more indirect light.
Sensors: PIR vs presence, and where they actually go
The sensor is what turns a well-lit corridor into a corridor that lights itself. Choosing and placing it is where most installations go wrong.
PIR — cheap, reliable, and blind to two things
A passive infrared sensor detects a warm body crossing its field of view. Mount at 2.2 to 2.4m, and expect useful detection of someone walking across the beam at up to 6 to 8m. Its two weaknesses are consistent and predictable: it is poor at detecting someone walking straight at it down a narrow passage, so you get the classic three-steps-in-the-dark delay, and it drops out when you stand still. Perfectly adequate for a pass-through corridor. Not adequate for a landing.
Presence (mmWave) — for anywhere people stop
A millimetre-wave presence sensor detects micro-movement — breathing, a shift of weight — so it holds the light for someone standing at a linen cupboard, a child sitting on the stairs, or a parent pausing on a landing. It also handles head-on approach properly. Mount it on the ceiling with a clear cone, typically covering a 5 to 6m radius, and keep it away from ceiling fans and AC vents, whose moving air and blades are the two most common causes of false triggering.
Placement rules that matter more than the sensor choice
- Two sensors on a staircase, one at each end. One sensor halfway up a flight means the first few steps are always dark, in whichever direction you are travelling. Sensors at the top and bottom landings both trigger the whole flight — that is the single most important rule on this page.
- Cover the approach, not just the space. A corridor sensor should see the doorway people come through, not only the middle of the passage. Light that arrives after you are already in the dark is a light that failed.
- Add a lux threshold. Configure the sensor to trigger only below roughly 30 to 50 lux of ambient light, so it does nothing at 11am when a landing window is already flooding the stairwell. Without this, a corridor with a skylight runs its lights all day.
- Do not point a PIR at a west-facing window or a hot surface. Direct afternoon sun sweeping across a floor is a moving heat signature, and a PIR will faithfully report it as a person.
The same sensor layer also has a security dimension: motion in a stairwell at 3am when the house is armed is meaningful information, and path lighting that comes up automatically on an alarm event helps far more than a siren does. We cover how sensors, cameras and locks fit together in smart home security in Hyderabad, and the hardware in our security range.
The behaviour: timeouts, fades and the 5% night level
Sensors are only half the job. What the lights actually do when triggered is what people either love or rip out within a month. Six settings decide it.
- Fade up over 0.5 to 1 second, not instantly. An instant switch-on at night is startling and slams your pupils shut; a half-second ramp is imperceptible as a delay and far more comfortable.
- Fade down over 3 to 5 seconds. A slow fade-out reads as the house being considerate. A hard cut-off in a stairwell is alarming, and it also gives you time to wave an arm and re-trigger if the timeout caught you mid-task.
- Timeout: 60 to 90 seconds for a corridor, 2 to 3 minutes for a stair flight. Stairs get the longer hold because people carry things up and down them slowly, and because a light dropping mid-flight is the worst possible moment for it.
- Two brightness levels by time of day. Daytime and evening trigger to 100 percent. After a set hour — usually around 10 or 11pm — the same trigger goes to 5 to 10 percent at 2200K to 2700K. This one setting is the difference between an automated corridor and a good one.
- Sunset-linked, not clock-linked, for the daytime threshold. Hyderabad's sunset moves by roughly an hour across the year; a fixed 6:30pm trigger is wrong for half of it.
- Stagger, do not blanket. On a long passage, triggering only the two or three fixtures nearest the person and letting them follow along uses less energy and looks considerably better than the whole corridor snapping on at once.
On the energy side, the arithmetic is small but real: six 7W corridor spots left on from 7pm to midnight is about 0.21 kWh a day, roughly 77 kWh a year. Sensor control plus a night level typically takes that down by 70 to 85 percent — not a reason on its own to automate, but a genuine one alongside the rest. We set out what actually moves the meter in can home automation save electricity.
One more behaviour worth specifying: what happens in a power cut. Circulation lighting is the one layer that should fail sensibly — the flight should come back at its low night level rather than at full brightness at 3am, and the sensor should resume without anyone re-arming anything. We cover that in do smart homes work during power cuts and internet outages.
Keypads, overrides and the scenes that matter
Automatic behaviour needs a manual escape hatch, or it becomes a cage. Three situations break every sensor setup ever installed: cleaning the stairwell, carrying furniture, and hosting people. All three want the lights on at full brightness for an hour or more with no movement in the sensor's cone.
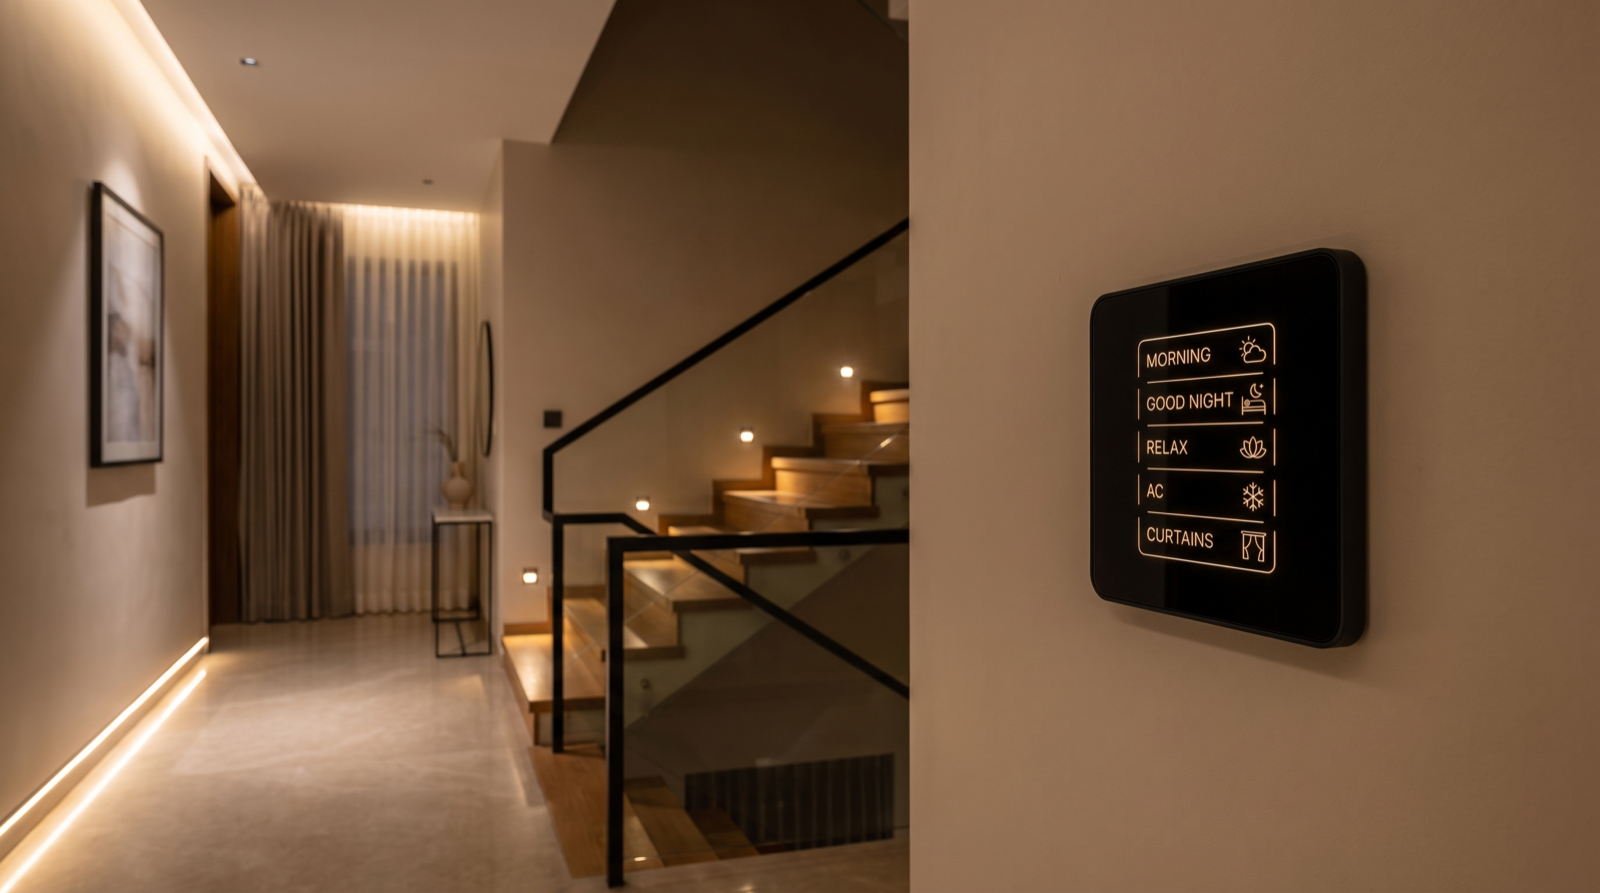
The answer is a wall keypad at each landing with a small number of engraved buttons that suspend the sensor rather than compete with it:
- Stair On — full brightness, sensor held off for 60 minutes, then automatic behaviour resumes on its own. Nobody has to remember to hand control back.
- Night Path — the 5 percent warm level held on continuously, for a night when someone is unwell or a guest is unfamiliar with the house.
- All Off — at the top landing, part of the Good Night scene: ground floor down, curtains closed, stairwell dropped to night level rather than dark.
Where those keypads sit is a planning decision made on a drawing, not on site — at the top and bottom of the flight, on the handle side of the nearest door, at standard switch height. The full logic is in how to plan keypads in a home, and the case for scene control over app-only devices in why scene-based automation beats app-only devices.
This is also the part of a house where automation does the most for people who need it most. A parent getting up at night does not want to find a switch, and a night path that appears the moment their feet touch the floor is worth more than most of the rest of a smart home put together — a point we develop in home automation for elderly parents in Hyderabad.
Wiring points to leave before the plaster goes on
Almost everything on this list is trivial during construction and expensive or impossible afterwards.
- 75mm deep back-boxes in the staircase side wall, at 150 to 200mm above each nominated tread, set during blockwork with the conduit already run. This is the single point of no return on the whole list.
- A conduit up the stair wall from the ground-floor panel to the top landing, with a draw wire left in it, whether or not step lights are being installed now.
- Separate dimmable circuits for the flight and each landing, so the 2:1 landing-to-flight balance can actually be set.
- Sensor points at both ends of the flight and at each corridor entry — ceiling boxes with a neutral, not just a live loop.
- Neutral at every switch and keypad position. Non-negotiable for any dimming or automation.
- Accessible driver locations at each landing — a service hatch or a reachable void. Drivers fail long before LED strips do, and a driver buried above a stairwell ceiling is a scaffolding job to replace.
- An aluminium channel with a diffuser specified for any handrail or nosing strip, coordinated with the carpenter before the handrail is fabricated.
- Keypad back-boxes at both landings, at standard switch height, handle side.
If the house is still at the structural stage, the sequencing for all of this is in when to plan home automation during construction, and the whole-house approach in how to plan smart lighting for a new home.
How Pert delivers it — a designed solution, not a DIY kit
Pert is a solutions company: we design and install. For circulation spaces, that starts with a site visit to measure the actual flight — riser and going dimensions, wall construction, whether there is a side wall to recess into at all, where the landing window is and how much daylight it throws down the stairwell at different hours. We then issue a drawing that fixes step-light positions tread by tread, the mounting height, fixture type and beam angle for every corridor position, sensor type and coverage cone for each location, the circuit split between flight and landings, driver locations and service access, and the keypad positions — handed to your electrician, false-ceiling contractor and carpenter together rather than one at a time. We supply the CRI 90+ tunable and dimmable fixtures, smart COB and cove lighting, sensors, motorised curtains for landing windows and the wall keypads, install and commission them, and then tune the behaviour in the finished house — walking the flight at night, adjusting timeouts, fade rates and the night level until nobody notices the system at all.
That final tuning visit is what separates a designed installation from a box of parts, because no sensor timeout is correct on paper. If you are comparing providers, ask each of them what timeout they would set for your stair flight and why — it is a fast test of whether they design or merely resell. Our guide to the best home automation companies in Hyderabad covers the rest of what to check before you sign.
Planning a staircase or new home in Hyderabad? Step-light back-boxes have to go into the wall before it is plastered, and sensor points before the ceiling closes — this is the one part of a lighting plan that genuinely cannot wait. Request a consultation →
Frequently asked questions
How high should step lights be mounted on a staircase, and how far apart?
Recess step lights into the side wall at roughly 150 to 200mm above the tread they are meant to light, measured from the nosing. Lower than about 120mm and the fixture is in the way of a foot; higher than about 250mm and the light lands on the tread above rather than the one below, which is exactly what causes a missed step. Horizontally, one fixture every second or third step is enough for a standard 250 to 300mm going, which works out to a fixture roughly every 600 to 900mm along the flight. Each fixture only needs 1 to 3W: the target is 50 to 100 lux on the tread at night, not a bright staircase. Always mount them on the same wall throughout a flight, and keep the vertical rhythm consistent, because an irregular spacing reads as a mistake even when the light level is correct.
Should staircase lights be on a motion sensor or a switch?
Both — and the mistake is treating it as a choice. A sensor should handle the automatic night behaviour: someone walks onto the landing after dark, the step lights fade up to a low level over about half a second, hold while there is movement, and fade out slowly after a timeout. A physical control still has to exist for everything the sensor cannot know about: cleaning the stairwell, carrying furniture up, a party where you want the flight lit at full brightness for three hours. In a designed system that override lives on a wall keypad at the landing, and pressing it suspends the sensor for a set period rather than fighting it. A sensor-only staircase with no override is one of the more frustrating installations to live with, and a switch-only staircase is the one everybody walks up in the dark rather than turning on.
What is the difference between a PIR and a presence sensor for corridors?
A PIR (passive infrared) sensor detects the heat signature of a body moving across its field of view. It is inexpensive and reliable for corridors where people walk past it, but it is poor at detecting someone approaching head-on down a narrow passage, and it drops out completely once you stand still. A presence sensor — usually mmWave radar — detects micro-movement such as breathing, so it holds the light on for someone standing at a linen cupboard or a child sitting on the stairs, and it responds to head-on approach. For a straight corridor that people simply pass through, a PIR at 2.2 to 2.4m mounting height is perfectly adequate and cheaper. For stair landings, dead-end passages, and anywhere people linger, a presence sensor avoids the classic complaint of lights switching off while somebody is still standing there.
What brightness and colour temperature should night-time corridor lighting be?
After about 10pm, aim for roughly 10 to 20 lux at floor level — around 5 to 10 percent of the fixture's output — at 2200K to 2700K. That is enough to see a step edge and a doorway clearly and nothing more. The reason to go this low is physiological: eyes adapted to a dark bedroom take several minutes to recover from a corridor light at full daytime brightness, which is precisely how people end up disoriented on a night trip to the bathroom, and the bright cool light also suppresses melatonin and makes it harder to fall back asleep. The correct behaviour is time-aware: the same corridor fixtures run at 100 percent and 4000K during the day, and the automation drops them to a warm 5 percent night level after a set hour, without anyone having to think about it.