
In this guide
- Why this room defeats a single grid
- The numbers: lux, CRI, CCT and spacing
- The five layers of a living room
- The television: reflection zones and bias light
- The dining table: the one fixture that must be right
- Open plan: two zones, one language
- Control: circuits, keypads and lamps
- Five scenes with real dim levels
- Points to leave before plastering
- How Pert delivers it (designed, not DIY)
- FAQs
This article is part of our wider coverage of home automation in Hyderabad, and it deals with the room your guests judge the house by — and the one where a single lighting circuit does the most visible damage.
Why this room defeats a single grid
A bedroom has one dominant activity. A kitchen has two. A living and dining area routinely has six, and they have contradictory requirements:
- Conversation wants soft, even, low-level light with no glare and light on people's faces rather than the tops of their heads.
- Television wants the room dark but not black — roughly 30 to 50 lux — with nothing at all reflecting in the screen.
- Reading wants 300 lux landing on a page in one specific chair, and nowhere else.
- Dining wants a bright, warm, high-CRI pool on the tabletop and a dimmer surround.
- Cleaning and festivals want the whole room at full output, cooler and brighter than any other setting.
- Homework or laptop work at the dining table wants 500 lux and a neutral white, which is the exact opposite of a dinner setting on the same table.
No single brightness satisfies two of these, let alone six. And because the room is usually open to the entrance, the kitchen and a balcony, whatever you do here is visible from most of the house. The fix is not more fixtures or better fixtures — it is separately dimmable layers driven by scene buttons, which is the same principle that governs kitchen lighting and automation, applied to a room with three times as many uses.
The numbers: lux, CRI, CCT and spacing
Fix these on a drawing and most of the room resolves itself.
1. Light levels by activity
- Living, general ambient: 150 to 200 lux at floor level. Twice a bedroom, about half a kitchen.
- Reading chair: 300 lux measured on the page, from a floor lamp or a narrow-beam spot aimed over the shoulder — not from the general layer turned up.
- Television viewing: 30 to 50 lux of ambient. Watching in a fully dark room causes eye strain from the contrast; watching at 200 lux washes the picture out.
- Dining, normal meal: 200 to 300 lux on the tabletop, dimmable to around 100 lux for a long dinner.
- Dining table as a work or homework surface: 500 lux at 4000K. The same table, a completely different setting.
- Cleaning and festival setting: 300 to 400 lux everywhere, everything on.
For total connected load, budget 10 to 12W per square metre of floor area across all layers. A 20 sq m living and dining area lands around 200 to 240W installed and will run at a small fraction of that on an ordinary evening.
2. CRI — the number that matters most over a table
Specify CRI 90 or above for the dining pendant and for any fixture that lights food or people's faces. This is not a refinement. Colour rendering is what decides whether a plate of biryani looks appetising or grey and whether skin tones look healthy, and low-CRI light collapses reds first — which is nearly everything on an Indian table. A CRI 80 fixture costs a little less and gets noticed every single meal. In the living layers you can accept CRI 80+ on general downlights if the budget is tight, but never on the dining pendant, never on an accent spot over artwork, and never on a mirror.
3. Colour temperature — warm by default, neutral on demand
Run 2700K as the evening default across both zones and 3000K at most for the general layer. Reserve 3500K to 4000K for the cleaning setting, the morning setting and the table-as-desk setting. A living room fixed at 4000K reads as an office showroom after dark; one fixed at 2700K makes it hard to clean properly or work at the table. Both problems disappear with tunable and dimmable fixtures, and our room-by-room colour temperature guide sets out how this fits the rest of the house. The one rule you cannot break in an open plan: every fixture visible in the same sightline must be at the same colour temperature at the same moment. Mixed whites in one view look like a fault, not a mood.
4. Spacing and beam angles
- General downlight spacing: roughly equal to the mounting height above the work plane — on a typical 2.7m ceiling, about 1.2 to 1.5m centres. Wider than 1.8m and you get visible scallops of bright and dark.
- Distance off walls: 300 to 450mm for general fixtures. For a deliberate wall wash, pull out to 600 to 900mm and use a wide beam.
- Beam angles: 60° or wider for general ambient, 24° to 36° for wall grazing and furniture accents, 15° to 24° for artwork and objects.
- Cove output: 6 to 10W per metre of run in a diffused aluminium channel.
- Anti-glare: use deep-recessed downlights with a black or dark baffle, not flush plastic discs. In a room where people spend hours seated with their eyes at roughly 1.1m, a shallow bright fixture at 2.7m is directly in the field of view.
Which fixture type belongs where — panel, COB, strip or spot — is covered in our comparison of panel vs COB vs strip vs spot lights.
5. The heights that decide everything
- Dining tabletop: 750mm above finished floor — the datum for the pendant.
- Pendant, bottom of shade: 750 to 900mm above the tabletop, so roughly 1,500 to 1,650mm above the floor.
- Seated eye level on a sofa: about 1.1m. Anything bright and unshielded at or near this height across the room will be a glare source.
- Wall-mounted accent or picture light: centre at 1.6 to 1.8m, aligned to the centre of the artwork.
- Keypads: 1,150 to 1,250mm, handle side of each entry point.
- Curtain track: in a ceiling pocket, or at least 100 to 150mm above the window head, running 150 to 250mm past each reveal.
- TV centre: around 1.1m for a seated viewer — which is what makes the ceiling in front of it a reflection problem.
The five layers of a living room
Each is a separate dimmable circuit. This is the whole design; everything else is detail.
1. Ambient — cove first, downlights second
A warm cove line around the false-ceiling perimeter is the best ambient source a living room can have, because the light arrives after bouncing off the ceiling and no source is ever visible. Budget 6 to 10W per metre. Channel depth, strip setback and the lip that conceals the source matter more than the strip specification itself, and are covered in how to plan cove lighting in a false ceiling. Add general downlights as a second, separately controlled ambient layer for when you need real brightness — not as the primary source.
2. Task — only where a task happens
One reading position, usually one chair, wanting 300 lux on the page. A floor lamp on a switched 5A socket is the flexible answer; a narrow-beam spot aimed over the shoulder from 400 to 500mm forward of the chair back is the architectural one. Either way it is its own circuit, because reading while others watch television is precisely the case that a single-layer room cannot serve.
3. Accent — where the room stops looking flat
Grazing light on a fluted or stone feature wall, narrow spots on artwork, a strip inside the crockery unit or open shelving, an uplight behind a large plant. This is the layer that separates a designed room from a lit one, and it is also the cheapest layer to add at construction stage and the most expensive to add later. Keep artwork spots at 15° to 24° and aim them at roughly 30° from vertical so the beam lands on the art rather than reflecting back at the viewer.
4. Decorative — the fixtures people actually look at
The dining pendant, table lamps, a floor lamp beside the sofa. These are furniture as much as lighting, and their job is to be attractive and to provide a warm low-level glow at eye height — not to light the room. The critical planning move is to put every lamp on a switched 5A socket so it can join a scene instead of needing to be turned on by hand, which is covered below.
5. Night and circulation
A low warm level for crossing the room late — a skirting strip, or the cove at 5 to 10 percent at 2200K. In an apartment where the living room is the route between bedrooms and the kitchen, this earns its place quickly, on the same logic as staircase and corridor lighting with motion sensors.
The television: reflection zones and bias light
A large glossy screen on a wall is a mirror, and almost nobody plans for it.
The reflection zone
Sit on the sofa and look at the switched-off television. The patch of ceiling you can see reflected in it — typically a band 0.6 to 1.2m in front of the TV wall — must have no downlights in it at all. Any fixture there shows up as a bright disc on the panel every evening, and dimming reduces it without removing it. Mark this band on the ceiling drawing as a no-fixture zone in the same way you would over a bed, and check it against the actual sofa position rather than the centre of the room. The same logic bans a bright unshielded fixture on the wall opposite the television.
Bias light
A low-level light behind the television, washing the wall around it, measurably reduces eye strain during long viewing because it lifts the surround out of pure black and shrinks the contrast your eyes have to keep adapting to. Target roughly 10 percent of the screen's brightness on the wall behind. The reference standard for accurate viewing is 6500K, which matches the white point televisions are calibrated to; in practice most Indian living rooms run warm and a 3000K bias light sits far more comfortably with the rest of the room. Either is defensible — a fixed 4000K is the one to avoid. Leave a concealed conduit behind the TV position for it before the wall panelling goes up. Deeper treatment of dedicated viewing rooms is in home theatre and media room automation.
Daylight glare, which is worse than any fixture
In Hyderabad the real enemy of a west-facing living room is the sun between roughly 3pm and sunset, landing straight on the screen and on anyone facing it. This is a curtain problem, not a lighting problem: a sheer layer that closes automatically in the mid-afternoon cuts the glare and the heat gain while keeping the room daylit. Track selection, fabric weight and measurement method are covered in measuring windows and choosing tracks and motors, and what the shading does to a summer bill is in smart curtains and energy savings. Specify a dual track — motorised sheer and drape — on any large living-room glazing.
The dining table: the one fixture that must be right
The dining pendant is the most looked-at fixture in most homes and the most commonly misplaced.
Centre it on the table, not the room
This is the single most frequent dining error, and it is permanent. The ceiling point goes at the centre of the final table position, which in an open plan is very rarely the geometric centre of the space. Set it from the furniture layout drawing, confirm it against the table you have actually ordered, and mark it on site before the false ceiling grid is fixed. A pendant 400mm off the table centre is visible to everyone forever and cannot be moved without opening the ceiling.
Height and length
- Bottom of shade: 750 to 900mm above the tabletop, 800mm as the default. Add 50 to 75mm for ceilings above 3m.
- Linear pendant length: about half to two-thirds the table length. A 1,800mm table takes a 900 to 1,200mm fitting.
- Multiple round pendants: three over a 2,400mm table at roughly 600mm centres, with the outer two at least 300mm inside the ends of the table.
- Sightlines: nothing may block the view between people sitting opposite each other. If in doubt, hang it higher.
Always set the final drop on site with the table in place. Manufacturers supply generous cable and the correct height is a judgement made by eye, seated.
What the pendant cannot do alone
A pendant lights the tabletop and nothing else. Without a second layer the diners sit in a bright pool inside a dark room, which flatters no one and makes the space feel smaller than it is. Add either a pair of narrow-beam downlights washing the wall behind the table, a strip in the crockery unit, or the dining-end cove, all separately dimmed. As a target, keep the surrounding surfaces at roughly one third the tabletop level — visible, but clearly secondary.
Dimming quality shows here first
A dining pendant is 1.5m from a seated person's eyes and is often run at 20 to 40 percent output. That is the exact condition under which cheap LED drivers reveal themselves as visible flicker, buzz or a hard cut-off at low levels. Specify good drivers and check them at the low end, not just at full output; the mechanism and what to ask for are in why LED lights flicker or buzz when dimmed.
Open plan: two zones, one language
Most Hyderabad apartments and many villas put living and dining in one continuous space, often with the kitchen open to it as well. The goal is two readable zones that never look like two different projects.
- Give each zone an anchor. A cove line or a dropped ceiling raft over the living seating; the pendant over the table. The anchor does the zoning, not a partition.
- Never run a downlight grid straight through. A continuous grid crossing both zones is precisely what erases the distinction. Break the layout at the zone boundary.
- Match colour temperature at every moment. Both zones at 2700K, or both at 4000K. Never one of each.
- Hold the brightness ratio to about 3:1. The dining pool can be the brighter zone, but if the living end drops below roughly a third of it, half the room becomes a dark hole and the space feels smaller.
- Bind both zones to the same scene buttons. In an open plan the two zones are always seen together, so one press should set both. Separate control for each zone is still available on the app or a second keypad, but the daily interaction should be one button.
- Coordinate with the kitchen. If the kitchen is open to the dining area, its under-cabinet layer will be visible from the table. Put it on the dinner scene at a low level rather than leaving it glaring at 4000K behind the host.
Control: circuits, keypads and lamps
How many circuits
A properly layered living and dining area needs seven to nine separately dimmable circuits: living cove, living general downlights, feature-wall wash, artwork spots, reading spot, dining pendant, dining surround, plus switched 5A socket circuits for lamps and a night or skirting strip. That sounds excessive next to the two circuits a builder provides, until you try to construct a film-watching setting out of "all on" and "all off".
Put the lamps on switched 5A sockets
The most under-used planning move in an Indian living room. A table lamp plugged into a normal socket has to be switched by hand, so it never joins a scene and usually gets left off. Put every intended lamp position — both ends of the sofa, the console, the corner floor lamp — on a switched 5A socket controlled by the automation. Suddenly the evening scene can include three warm lamps at eye height, which is the single biggest contributor to a living room feeling comfortable rather than merely illuminated, and none of them need touching.
Keypad positions
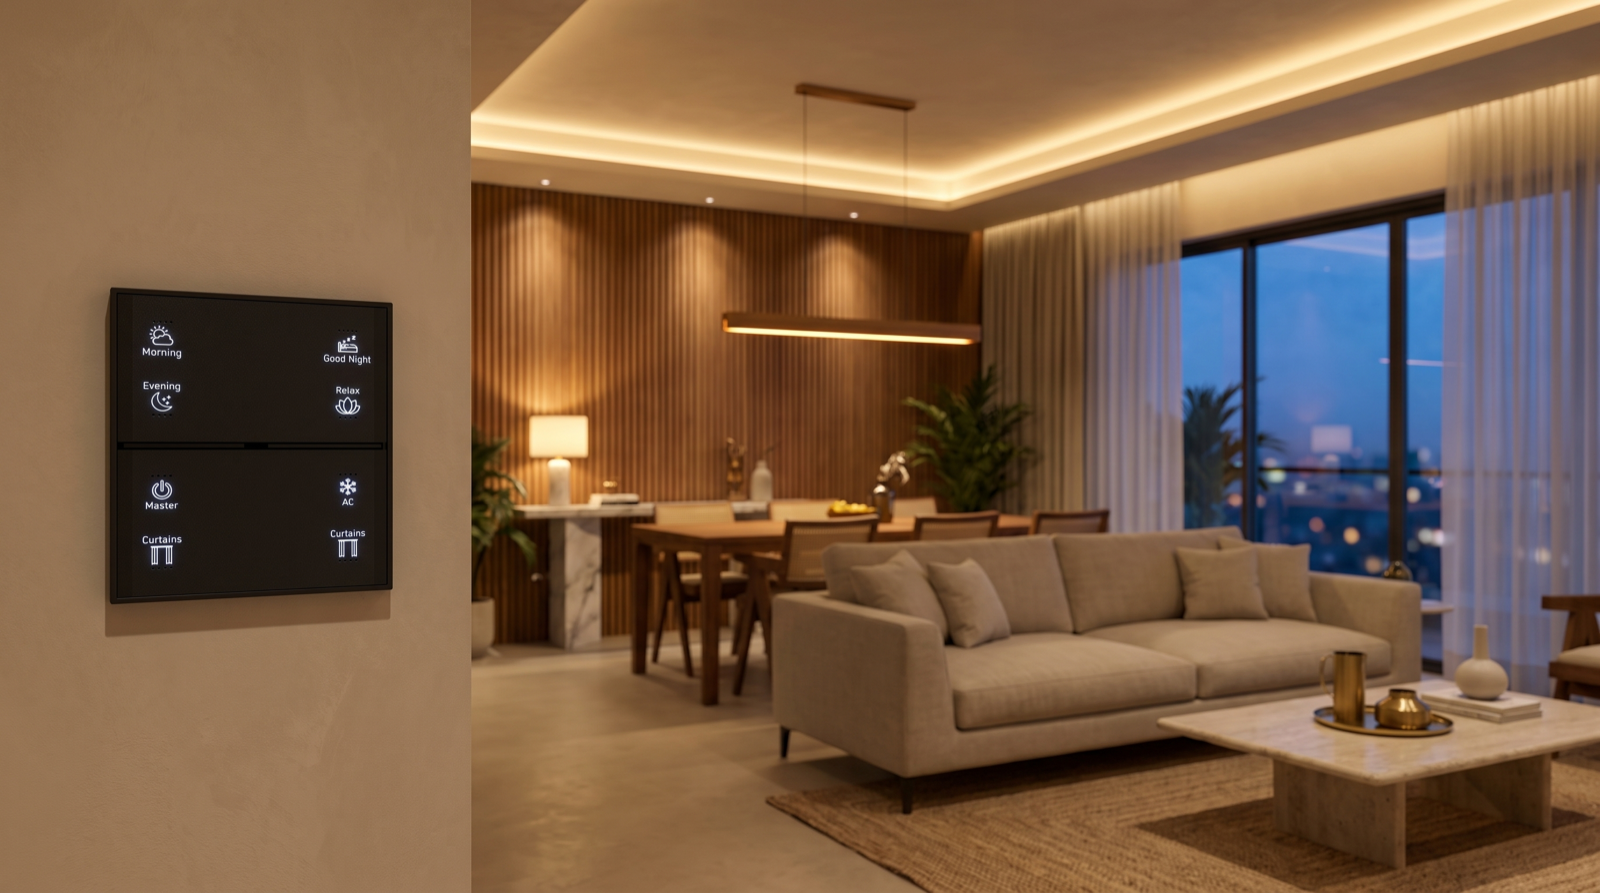
Three wall keypads is the usual answer for an open-plan living and dining area: one at the main entrance, one at the seating end within reach of the sofa, one at the dining end or on the route to the kitchen. All at 1,150 to 1,250mm, all with engraved labels, all able to run the whole space. The seating-end keypad is the one that gets used most and the one most often left out of a drawing — nobody wants to walk across a room mid-film to change the light. Placement logic for the rest of the house is in how to plan keypads in a home.
Scenes, not switches
Nine circuits cannot be exposed as nine switches; that is worse than what you started with. Four or five engraved scene buttons is the interface, with the app kept for schedules, remote checks and occasional fine tuning. The reasoning is set out in why scene-based automation beats app-only smart devices. A guest, a parent or a house-help should be able to run the room correctly on the first attempt, in the dark, without being taught.
Five scenes with real dim levels
Starting values, to be tuned in the finished room at night with the furniture in place.
- Evening (the default, used most) — living cove 40% at 2700K, general downlights 25%, feature wall 30%, artwork spots 40%, table and floor lamps on, dining pendant 20%, sheers closed. Roughly 100 to 150 lux, warm, with light at several heights.
- Dinner — dining pendant 70% at 2700K, dining surround 25%, living cove 30%, living downlights off, accents 40%, lamps on, curtains closed. The table is clearly the brightest thing in the room and everything else supports it.
- Movie — all general downlights off, living cove 10% at 2200K, TV bias light on, accents off, dining pendant off, one lamp at 20% behind the seating line, drapes closed. Around 30 to 50 lux, nothing in the reflection zone, nothing in anyone's eye line.
- Entertain — cove 70%, general 60%, feature wall 70%, artwork 100%, dining pendant 60%, all lamps on, everything at 3000K. Bright, warm and generous, for a room full of people.
- Bright / Clean — everything at 100% at 4000K, curtains fully open. Used for cleaning and for the morning, and deliberately unlike every other setting.
More worked examples with real dim levels across the rest of the house are in how to design home automation scenes.
Points to leave before plastering
Everything below is inexpensive before the walls close and expensive or impossible afterwards. This is the list for your electrician at conduit stage.
- A pendant point at the centre of the final dining table position — taken from the furniture layout, confirmed against the ordered table, and marked on site before the false-ceiling grid is fixed.
- Seven to nine dimmable circuits split as above, each with its neutral terminated at the switchboard. Without a neutral there is no dimming and no automation.
- Three keypad back-boxes — entrance, seating end, dining end — at 1,150 to 1,250mm, positioned against the furniture plan rather than the bare walls.
- Switched 5A sockets at every intended lamp position: both ends of the sofa, the console, the corner floor lamp.
- A marked no-fixture zone on the ceiling drawing covering the TV reflection band, 0.6 to 1.2m in front of the TV wall, so it survives contact with the site.
- A concealed conduit behind the TV position for the bias light, plus CAT6 and power in the AV niche.
- A cove detail agreed with the false-ceiling contractor — channel size, strip setback and concealing lip — at grid stage, not after boarding.
- A curtain pocket in the false ceiling, roughly 150 to 200mm wide and 200mm deep for a dual sheer-plus-drape track, with a 5A point at the motor end of each track at window-head height.
- Accent-lighting points at the feature wall, artwork positions and inside the crockery unit — coordinated with the carpenter for the joinery-mounted ones, since those wires arrive too late if left to the electrician alone.
- Driver and relay locations with service access — above a corridor false ceiling behind a hatch, never sealed above the living room.
Sequencing this against the build programme is covered in when to plan home automation during construction and how to plan smart lighting for a new home.
How Pert delivers it — a designed solution, not a DIY kit
Pert is a solutions company: we design and install. For a living and dining area that work starts from the furniture layout, never the ceiling, because the sofa position fixes the reflection zone and the general downlight grid, the table position fixes the pendant point, and the lamp positions fix the switched sockets. Every one of those is wrong if it is set from a symmetrical drawing of an empty room. We visit the site, work from the actual furniture plan and the table you have ordered, and issue a drawing that fixes fixture positions and beam angles, the TV no-fixture zone, the cove detail and channel setback, pendant point, height and length, the circuit split across all layers, switched 5A socket positions, curtain track type, pocket dimensions, overlap and motor selection, driver and relay locations with service access, and keypad positions with their engraving — issued to your electrician, carpenter, false-ceiling contractor and curtain vendor together, before plastering, rather than one trade at a time.
We supply the tunable and dimmable COB, strip and spot lighting, motorised curtain tracks and motors, security and sensor hardware and the wall keypads, install and commission them, and then tune the result in the finished room — setting real dim levels for each scene after dark, with the furniture and the television in place. That last step is what separates a designed installation from a box of parts, and it cannot be done from a drawing. If you are comparing providers, ask each one where they intend to put the pendant point and how they will keep the TV reflection zone clear: it takes thirty seconds and reliably distinguishes a designer from a reseller. Our guide to the best home automation companies in Hyderabad covers the rest of what to check before you sign.
Building or renovating in Hyderabad? The dining pendant point, the TV reflection zone and the switched sockets for your lamps all have to be set before the ceiling closes and the walls are plastered — and they have to be set from your actual furniture plan, not a standard drawing. Request a consultation →
Frequently asked questions
How high should a pendant hang over a dining table?
The bottom of the shade should sit 750 to 900mm above the tabletop, with 800mm the safe default. Since a dining table is around 750mm high, that puts the bottom of the pendant at roughly 1,500 to 1,650mm above the finished floor. Higher than 900mm and the light spreads thin across the room instead of pooling on the table; lower than 750mm and it blocks the sightline between people sitting opposite each other, which is the one thing a dining pendant must never do. Length matters as much as height: a linear pendant should be about half to two-thirds the length of the table, and if you are using multiple round pendants, plan three over a 2,400mm table at roughly 600mm centres, keeping the outer two at least 300mm inside the ends of the table. Add 50 to 75mm of height for ceilings above 3m, and always set the drop on site with the actual table in place rather than fixing it from a drawing.
How much light does a living room and dining room need?
A living room wants 150 to 200 lux of general ambient light measured at floor level — roughly twice a bedroom and about half a kitchen — with task light added only where a task actually happens: 300 lux on the page at a reading chair, and a deliberately low 30 to 50 lux for television viewing. A dining table wants 200 to 300 lux on the tabletop for a normal meal, dimmable down to about 100 lux for a long dinner and up to 500 lux if the table doubles as a homework or laptop surface. The number most people miss is colour rendering: specify CRI 90 or above over the dining table, because food photographs and, more importantly, looks appetising or grey depending almost entirely on how well the light renders reds. For connected load, budget roughly 10 to 12W per square metre across all layers, which puts a typical 20 sq m living and dining area at around 200 to 240W installed — and running at a fraction of that on a normal evening.
Where should downlights not go in a living room?
Three zones. First, the television reflection zone: the strip of ceiling roughly 0.6 to 1.2m in front of the TV wall, whose mirror image from the sofa lands directly on the screen. Any fixture there will appear as a bright blob on the panel every evening and no amount of dimming fully hides it. Second, directly above where heads sit on the sofa — a downlight there lights the top of a person's head, drops their eyes into shadow and is unflattering to everyone in the room. Third, tight against the walls: set general downlights 300 to 450mm off a wall, and if you want to wash a wall deliberately, pull the fixtures out to 600 to 900mm and use a wide beam. On a 2.7m ceiling, space general downlights at roughly 1.2 to 1.5m centres, and check the layout against the furniture plan rather than against the shape of the room — a symmetrical grid that ignores where the sofa goes is the most common living room lighting failure.
How do you light an open-plan living and dining room without it looking like one big room?
By treating them as two lighting zones that share a language rather than one continuous grid. Give each zone its own anchor — a cove line or a change of ceiling level over the living area, a pendant over the dining table — and put each on its own dimmable circuit so the dining end can drop to a warm pool while the living end stays usable, or the reverse. The rules that keep it coherent are simple: run both zones at the same colour temperature at any given moment, because two different whites in one sightline reads as a fault rather than a design choice; keep the two zones within roughly a 3:1 brightness ratio of each other so neither becomes a dark hole; and never let a downlight grid run straight through from one zone into the other, since a continuous grid is exactly what erases the distinction. Then bind the whole thing to scene buttons — one press should set both zones together, because in an open plan they are always seen at the same time.