
In this guide
- Start with the screen: size, viewing distance and mounting height
- Bias lighting: what it is, how bright, what colour
- Keeping light out of the screen: the reflection zone
- Lighting the TV unit: panels, grooves, niches and the console
- The points to leave behind the TV before the panel goes up
- Four viewing scenes with real dim levels
- Seven TV wall mistakes we are asked to fix
- How Pert delivers it (designed, not DIY)
- FAQs
This guide is for homeowners, architects and interior designers finalising a living room, family lounge or upper-floor TV area, and it is part of our wider coverage of home automation in Hyderabad. It deals with a TV in a shared living space. If you are building a dedicated, fully darkened media room with a projector and acoustic treatment, read home theatre and media room automation instead — the rules there are stricter.
Start with the screen: size, viewing distance and mounting height
Every lighting decision on the TV wall hangs off the screen's outline, so fix that first — before the carpenter draws the panel. Ask the family what size they are buying now and what size they will buy in five years, and plan the wall for the larger one. TVs in Hyderabad living rooms have moved from 55 to 65 and 75 inches in a single replacement cycle, and a panel cut-out, niche or bias strip built tight around a 55-inch screen becomes a problem the day the 75-inch arrives.
| Screen (16:9) | Approx. width x height | Comfortable viewing distance (4K) | Bottom edge if centre at ~1050mm |
|---|---|---|---|
| 55 inch | 1220 x 685mm | 1.4 – 2.1m | ~705mm |
| 65 inch | 1440 x 810mm | 1.7 – 2.5m | ~645mm |
| 75 inch | 1660 x 935mm | 1.9 – 2.9m | ~585mm |
| 85 inch | 1880 x 1060mm | 2.2 – 3.2m | ~520mm |
Three rules follow. Mount for seated eyes, not for the console. The centre of the screen should sit close to seated eye height, typically 1000 to 1100mm off finished floor. The most common error we see is a TV lifted to 1300mm or more because a tall console or a decorative slab was drawn first; it looks balanced in a render and causes neck strain in real life. Allow a clear margin around the screen of at least 150 to 200mm on every side for the bias glow to read and for the next, larger TV. Mark the screen outline on the elevation drawing as a dashed rectangle, because the panel, grooves, lights and points all set out from it.
Bias lighting: what it is, how bright, what colour
A bias light is a dimmable LED strip behind the TV that lights the wall around the screen. It exists for one reason: your eyes set their exposure to the average brightness of what they see. A bright screen on a black wall forces them to keep adjusting, which is where evening viewing fatigue comes from, and it makes the black parts of the picture look grey. A soft, even glow around the screen reduces both. Done properly it is barely noticed; done badly it becomes a coloured halo that competes with the film.
Where to mount it
We prefer to mount the bias strip on the wall or panel behind the TV rather than stuck to the back of the TV itself. Wall-mounted, it is wired to the automation system, dimmed with everything else, and it survives the TV being replaced. Set it roughly 75 to 100mm inside the screen outline so the strip itself is never visible from the sofa or from a standing position at the side of the room, and keep it facing out towards the wall, not towards the viewer. With a slim wall bracket the TV stands 40 to 75mm off the wall, which is enough for the light to spread; if the TV sits flush in a recess, the glow has nowhere to go and a recessed perimeter profile around the niche does the job instead.
How bright
Far dimmer than most people expect. The target is roughly a tenth of the screen's typical brightness — enough that the wall immediately around the TV is visibly lit, not enough that it draws the eye. In practice a low-output 24V strip of around 4 to 5 watts per metre, dimmed to 15 to 30 percent in the TV scene and 5 to 15 percent in the Movie scene, is ample. A 65-inch screen needs only about 3.5 to 4 metres of strip around its inset perimeter. Use a dense or COB strip in a diffused channel so the wall shows an even wash, not a row of dots; why LED lights flicker or buzz when dimmed explains why the driver matters so much at those low levels, where cheap drivers flicker first.
What colour
The industry reference for colour-accurate viewing is a neutral daylight white of about 6500K, because that is the white point the picture is mastered to; a warm bias light makes the screen look slightly blue by comparison. That is why we specify bias lighting as tunable white: around 5000 to 6500K in the Movie scene for anyone who cares about picture quality, and warmer, 3000 to 4000K, for everyday TV in the evening when the rest of the room is warm too. Colour-changing RGB bias light is possible and some families want it for parties, but it should be an option in a scene, never the default. How to plan RGB and colour-changing lighting covers when colour earns its place.
Keeping light out of the screen: the reflection zone
A TV screen is a dark mirror. Anything bright that sits at the mirror angle from the viewer's eyes shows up in it: a downlight, a pendant, a lit window, even a white wall lit by a spot. Most glare complaints we are called in to fix come from lights that were placed on a neat grid over the whole living room before anybody drew the sofa.
- Draw the sightlines first. On the reflected ceiling plan, draw lines from the main seat positions to both edges of the screen and reflect them back. The ceiling area those lines pass through, roughly above and slightly in front of the seating, is the zone where a downlight will appear in the screen. Either keep lights out of it or put the ones inside it on a separate circuit the TV scene switches off. How to read a reflected ceiling plan shows how to check this on the drawing.
- Keep the first row of downlights 600 to 900mm off the TV wall. Closer than that, a narrow beam scallops down the panel and across the screen face. If the TV wall needs light, it gets a wall washer or grazing profile, not a downlight directly above the screen.
- Choose deep-recessed, low-glare fixtures for the living room so the lamp is not visible from the sofa at all. A cut-off angle of 30 degrees or more, with the source set well back behind a black or dark reflector, solves most of it. The detail is in how to plan glare-free lighting at home.
- No pendant between the sofa and the TV. Pendants belong over the dining table or at the side of the seating, not in the line of sight.
- Treat windows as the biggest light source in the room. A west-facing window opposite or beside the TV will wash out the screen for two hours every afternoon in a Hyderabad summer. That is a motorised curtain problem, not a lighting one: a sheer layer that closes automatically on the TV scene during the day, and a blackout or dim-out layer that closes on the Movie scene. How to choose curtain fabrics for motorised curtains covers which weights actually cut screen glare.
- Avoid gloss finishes directly opposite the screen. A high-gloss lacquered wall or glass shutter behind the sofa reflects the lit TV wall back into the screen.
Lighting the TV unit: panels, grooves, niches and the console
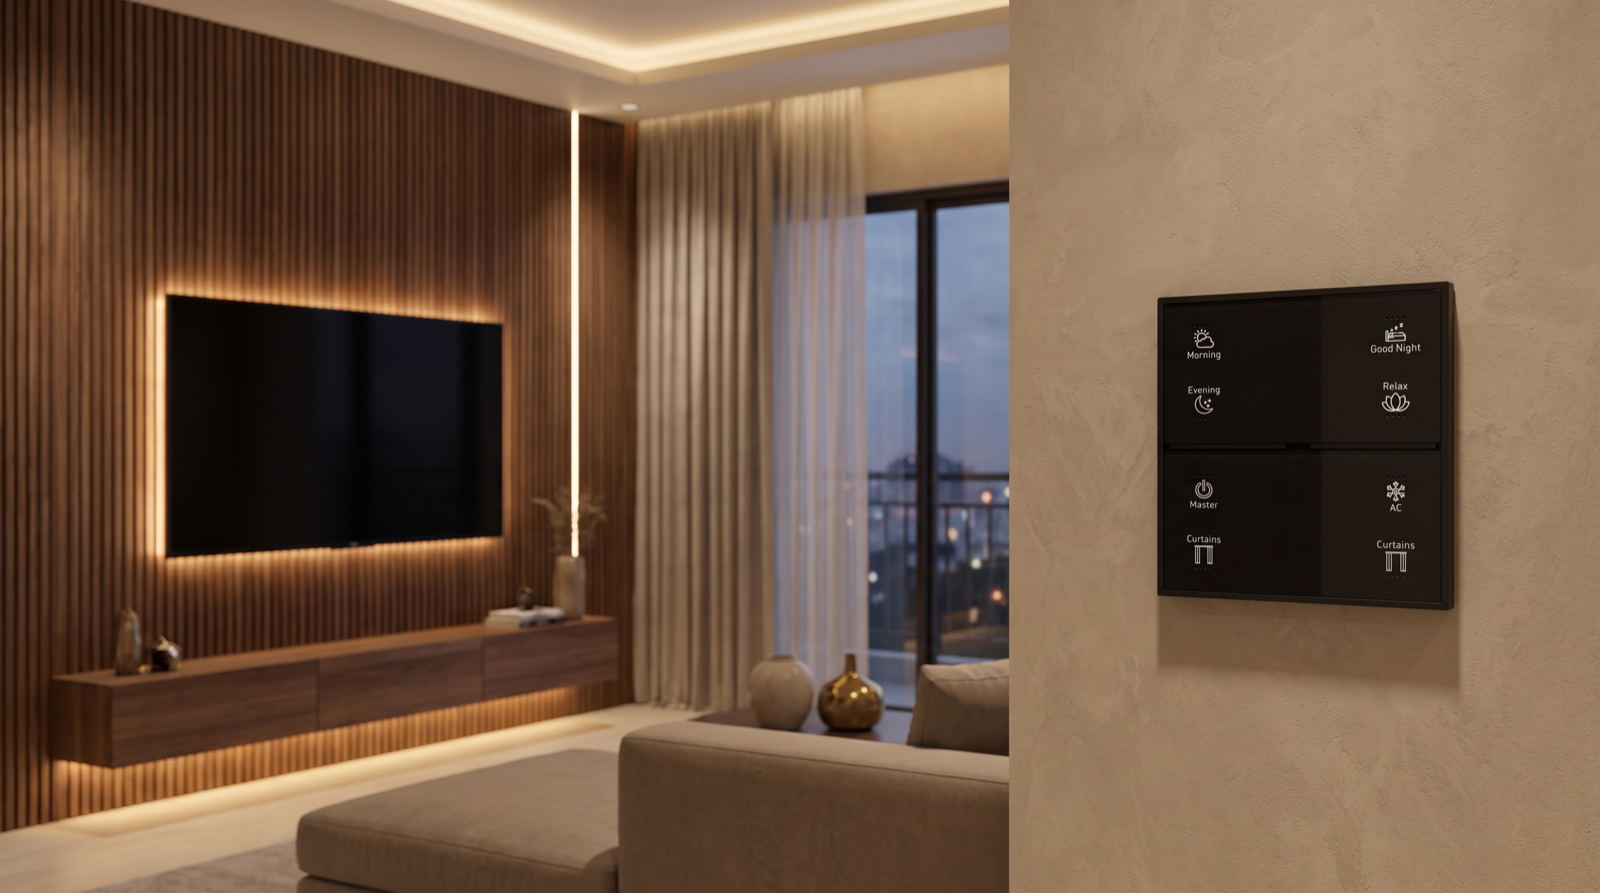
The TV wall usually carries the most expensive joinery in the living room, and it deserves its own light — on its own dimmer channel, separate from the bias strip and separate from the room's downlights, so each can be set independently in a scene.
| Element | How to light it | Key dimension | Notes |
|---|---|---|---|
| Fluted or textured panel | Recessed linear profile at the top of the panel, grazing downward | Profile 50–100mm off the panel face | Grazing reveals the texture; too far off and it becomes a flat wash. Keep the ends 150mm short of the panel edges. |
| Stone, marble or plain panel | Wall washers in the ceiling | Setback 600–900mm, spacing about equal to setback | Even wash rather than grazing, so joints and uneven stone faces do not exaggerate. See wall washing and accent lighting. |
| Vertical grooves or shadow gaps | Recessed profile inside the groove | Groove at least 20–25mm wide and 20mm deep | Narrow grooves show dots. Diffused cover mandatory; decide groove size with the carpenter before the panel is cut. |
| Open niches and display shelves | Profile at the front underside of each shelf | Set 30–50mm back from the shelf lip | Keep it warm, 2700–3000K, and on its own channel so it can stay on low when the TV is on. |
| Floating console | Strip under the console, facing the wall or floor | Console lifted 150–250mm off the floor | A soft under-glow is an ideal night level. Keep it off the floor tiles' reflection line if the floor is polished. |
All of these are 24V constant-voltage strips feeding from drivers that must be reachable. Never bury a driver behind a screwed-shut TV panel; put it in the automation panel or behind a removable service hatch in the console, and keep individual 24V runs to around 5 metres per feed to avoid the far end looking dimmer than the near end. Count the channels at this stage: a typical well-lit TV wall uses three to four dimming channels — bias, panel profile, niches or console, and sometimes the wall washers — which feeds straight into how to plan dimmer channels and lighting loads. The room around it is layered in how to plan living and dining room lighting layers.
The points to leave behind the TV before the panel goes up
Once the panel is fixed, every missing point means dismantling it. This is the list we give the electrical contractor for a living-room TV wall:
- A recessed TV box behind the screen, centred behind the TV at roughly screen-centre height, deep enough (at least 60 to 90mm) for plugs to sit inside it so the TV can still hang close to the wall. Two to four sockets inside.
- A 32 to 40mm empty conduit from the TV box down to the console, with gentle bends, for HDMI and any cable you have not thought of yet. HDMI cables do not pull through 20mm conduit with elbows.
- A wired Cat6 point at the console and one at the TV box. Streaming is more reliable on cable than on Wi-Fi at the far end of a living room; see how to plan Wi-Fi and home network for a smart home.
- Power at the console for a set-top box, soundbar, streaming box and consoles: four to six sockets, on a surge-protected circuit.
- Separate controlled feeds for the bias strip, the panel profile and the niches or console light, each returning to its own dimmer channel. Do not share one feed across all three — it takes the scenes away.
- Feeds for any motorised curtain on a window that sees the screen, with the pelmet or ceiling pocket drawn at the same time.
- A keypad point at the seating side, not only at the living-room entrance, so the family does not have to get up to start a film. Planning its buttons is covered in how to plan keypad layouts and engraving.
The same provisions appear, room by room, in the electrical points checklist for home automation, which is the document to hand the contractor before plastering.
Four viewing scenes with real dim levels
Scenes are what turn a well-lit TV wall into a room that works. These are the starting levels we commission in a typical living room with a cove, downlights, a panel profile, bias light and motorised curtains. They are then tuned on site with the family watching an actual film.
| Scene | Bias light | Panel / niches | Cove | Downlights | Curtains |
|---|---|---|---|---|---|
| TV (everyday evening) | 25%, 3500–4000K | 20% | 30%, 2700–3000K | Off in the reflection zone; 20% at the rear | Sheer closed |
| Movie | 10%, 6000–6500K | 5% or off | 5% or off | All off | Sheer and blackout closed |
| Sports / daytime TV | Off | 40% | 50% | 50%, rear only | Sheer closed on the sunny side only |
| Guests (TV off) | Off | 70% | 70% | 60–70% | Open or as time of day |
Two details make these scenes feel finished. First, fade times: two to three seconds into Movie so the room dims like a cinema rather than snapping to black, and one second back out. Second, a pause behaviour: many families like a second press of Movie to bring the console glow and cove to around 20 percent, so someone can walk to the kitchen without switching the whole room back on. More worked examples, including how scenes interact with the rest of the house, are in how to design home automation scenes.
Control is a wall keypad by the sofa with TV and Movie on dedicated buttons, the same scenes on the app, and voice as a convenience. Linking the scene to the TV being switched on is possible with some integrations, but it depends on the TV and its firmware, so we never make it the only way to dim the room.
Seven TV wall mistakes we are asked to fix
- The TV mounted too high. Screen centre at 1300mm or more because the console was drawn first. Fix: fix screen centre at seated eye height, then design the joinery around it.
- A downlight grid over the sofa that reflects in the screen. Fix: draw sightlines on the ceiling plan and circuit the lights in the reflection zone separately.
- Bias light too bright or coloured by default. A saturated blue halo is tiring and distorts the picture. Fix: dim, neutral-to-cool, tunable, and colour only as a party scene.
- A cut-out sized for today's TV. Fix: allow for the next size up, with 150 to 200mm margin all round.
- Drivers sealed behind the TV panel. Every failure means unscrewing the joinery. Fix: drivers in the panel or behind a service hatch.
- All TV wall lights on one circuit. Nothing can be set independently, so there are no real scenes. Fix: bias, panel and niche on separate channels.
- An unshaded west window beside the screen. Fix: a motorised sheer layer on the TV scene, blackout on Movie.
How Pert delivers it — a designed solution, not a DIY kit
Pert is a solutions company: we design and install. A TV wall that is lit and automated properly is not a strip from a box stuck to the back of a television; it is a small piece of coordinated design between the interior designer, the carpenter and the electrical contractor. On a typical project we mark the screen outline for the current and next TV on the elevation; draw the sightlines on the reflected ceiling plan and move or re-circuit the downlights that would sit in the reflection zone; specify the bias, panel and niche lighting with profile sizes, groove dimensions and tunable-white strips for the carpenter; list the TV box, conduit, data and control points for the electrician before the panel is fixed; place the drivers where they can be serviced; set the motorised curtains for the windows that see the screen; and commission the TV, Movie, Sports and Guests scenes on a Stella keypad by the sofa, tuned with the family on site. Where the living room also has cameras or door sensors on the same system, the security side is set up so an evening film is never interrupted by a notification the family did not ask for.
If you are still comparing who should design and install this, best home automation companies in Hyderabad sets out what to check — including asking to see a finished living room at night, with the TV on.
Finalising a living room or TV wall in Hyderabad? Send us the elevation and ceiling plan. We will mark the reflection zone, size the bias and panel lighting, list the points to leave behind the TV, and set up TV and Movie scenes that work at one touch. Request a consultation →
Frequently asked questions
Is bias lighting behind a TV worth it?
Yes, if it is a soft, even glow rather than a coloured effect. A dimmable strip behind the TV lights the wall around the screen so your eyes are not constantly adjusting between a bright screen and a dark wall, which reduces eye strain in evening viewing and makes blacks look deeper. Keep it dim — roughly a tenth of the screen's typical brightness — neutral to cool white for serious viewing, and part of the TV and Movie scenes so nobody has to think about it.
Where should downlights not go near a TV?
Out of the screen's reflection zone: the band of ceiling roughly above and just in front of the main seating, where a light appears mirrored in the screen from the sofa, and directly above the TV, where a narrow beam scallops across the screen face. Do not hang a pendant between the sofa and the TV. As a working rule, keep the first row of downlights 600 to 900mm off the TV wall and put any lights inside the mirror zone on their own circuit so the TV scene can switch them off.
At what height should a TV be mounted on the wall?
For a sofa, aim the centre of the screen at seated eye height, usually about 1000 to 1100mm from finished floor. That puts the bottom edge of a 55-inch TV around 700 to 750mm and a 65-inch around 600 to 700mm. Mounting higher, above a tall console, causes neck strain over long viewing. The recessed power and data box should sit behind the screen so no cable shows.
Can TV wall lighting be controlled from the TV remote or a keypad?
The dependable approach is a scene keypad by the seating plus the app, with voice as a convenience. TV and Movie buttons set the bias light, panel profile, cove, downlights and curtains in one touch, and the same scenes are on the phone. Triggering a scene when the TV turns on is possible with some systems but depends on the TV's integration, so we treat it as an extra, never the only way to dim the room.