
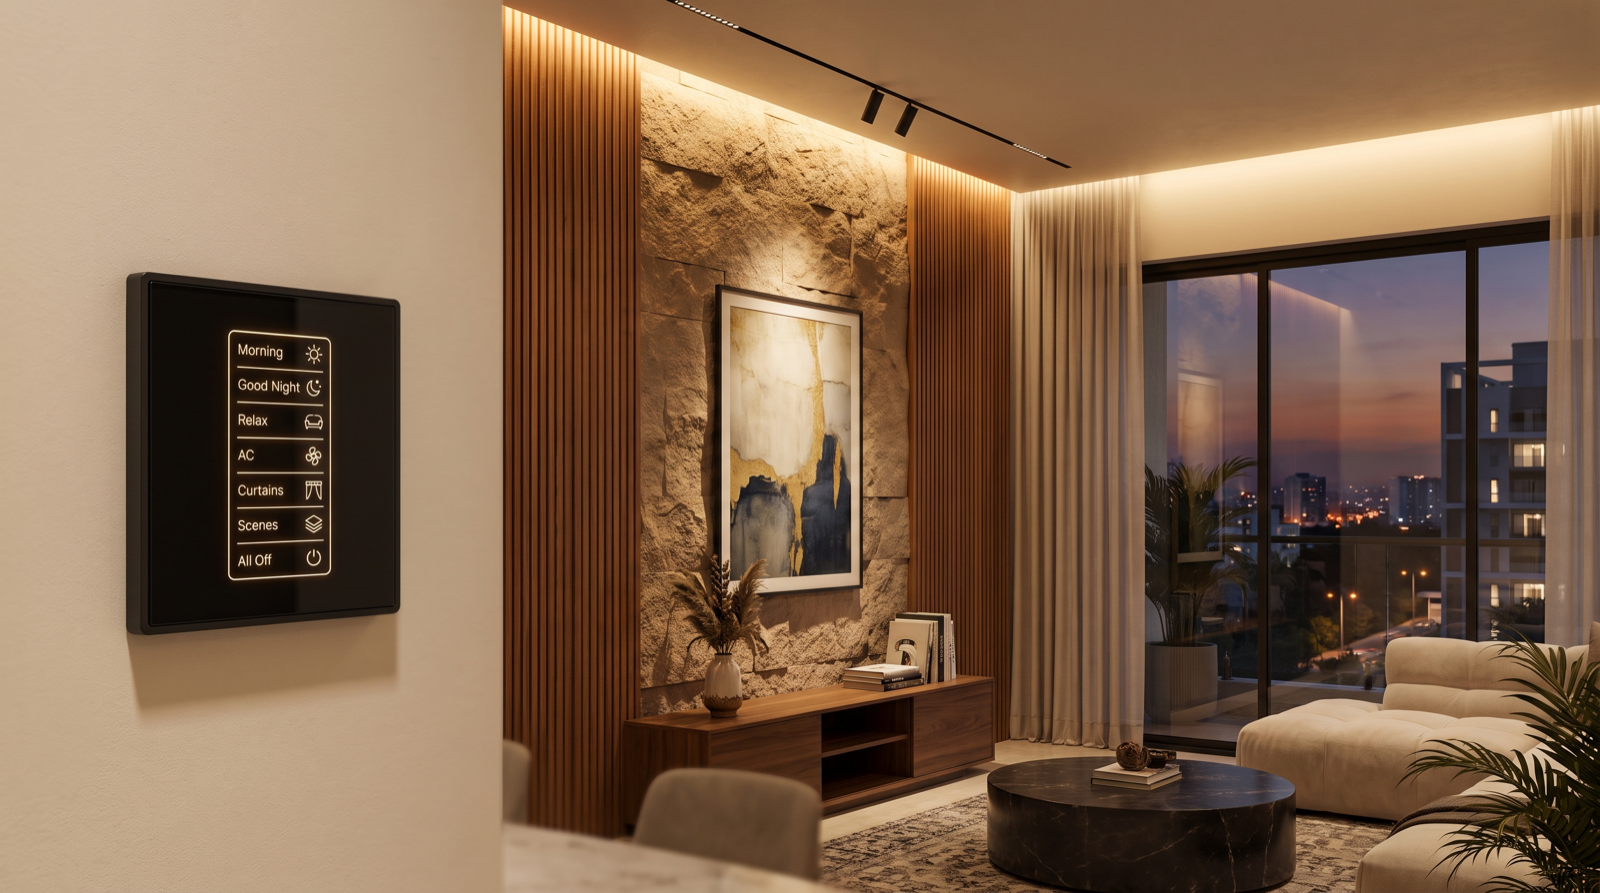
In this guide
- Why feature walls usually look wrong
- Washing vs grazing: two opposite techniques
- The numbers: setback, spacing and beam angle
- Lighting artwork, TV walls and niches
- Contrast ratios and CCT that make it look intentional
- Putting accent walls on scenes
- Pre-construction checklist
- How Pert delivers it (designed, not DIY)
- FAQs
Accent lighting is the cheapest luxury in a home. The fixtures are small, the wattage is tiny, and the difference between a wall that is lit and a wall that is designed is usually 100mm of setback and a beam angle written on a drawing. It is also the layer most often lost between the interior designer, who specifies the stone, and the electrician, who has already drilled the ceiling. This article is part of our wider coverage of home automation in Hyderabad, and it deals specifically with getting vertical surfaces right — the surfaces your eye actually reads when it judges a room.
Why feature walls usually look wrong
Four mistakes account for nearly all of them, and every one is a drawing problem rather than a product problem.
- The fixture is too close to the wall — or too far. A downlight 200mm off a smooth painted wall produces a hard, bright arc near the ceiling that fades to nothing at waist height. A downlight 1500mm off the wall barely touches it at all. The setback is the single most important number on the drawing and it is almost never dimensioned.
- Scallops. Those repeating half-moon arcs of light on a wall come from narrow-beam fixtures spaced too far apart. They look like a mistake because they are one. Even spacing at the correct pitch, or a proper asymmetric wall-wash optic, eliminates them.
- The wrong technique for the surface. Grazing a smooth painted wall reveals every trowel mark and joint the plasterer left behind. Washing a rough stone wall flattens the exact texture you paid for. The two techniques are opposites and swapping them undoes the finish.
- No separate circuit. The accent lighting is wired to the same switch as the ceiling lights, so it is either all on or all off, at one brightness, forever. The whole point of an accent is the contrast between it and everything else — and contrast needs its own dimmer.
None of this is expensive to solve. It costs nothing to move a fixture on a drawing, and a great deal to move it after the false ceiling is closed and the stone is up.
Washing vs grazing: two opposite techniques
Decide which one you want before you place a single fixture, because the setback for one is roughly five times the setback for the other.
Wall washing — for smooth surfaces
Fixtures set well off the wall (typically 600–900mm) throw light at a shallow angle that spreads evenly from ceiling to floor. Texture disappears, the wall reads as one continuous plane, and the room feels wider and taller because the eye can see the boundary clearly. Use it on paint, wallpaper, large-format tile, a gallery wall of framed pieces, or any flat plaster surface. Purpose-built wall washer fixtures with an asymmetric optic do this far better than a standard downlight pressed into service. This is the safe, forgiving choice — and importantly, the one that hides minor plastering defects rather than advertising them.
Wall grazing — for textured surfaces
Fixtures set very close to the wall (typically 100–250mm) rake the light almost parallel to the surface. Every ridge, joint and undulation casts its own small shadow, and the texture becomes the subject. Use it on stone and ledge cladding, fluted or louvred wood panels, exposed brick, ribbed concrete, moulded MDF and rough lime plaster. Grazing is dramatic and unforgiving: it will show a badly laid stone course as ruthlessly as it shows a well-laid one, so only specify it where the workmanship is worth revealing.
A useful sanity check: run your hand over the wall. If you can feel relief, graze it. If it is smooth, wash it. For which fixture type suits each job — linear profile, COB spot or strip — our guide to panel vs COB vs strip vs spot lights is the companion piece to this one.
The numbers: setback, spacing and beam angle
These are the specifications worth dimensioning on the reflected ceiling plan rather than leaving to the site electrician.
- Wash setback: 600–900mm from the wall face on a standard 10ft (3m) ceiling. The general rule is a setback of roughly one quarter to one third of the wall height. On a 12ft ceiling, push it to 900–1100mm.
- Wash spacing: equal to the setback. If your fixtures sit 750mm off the wall, space them 750mm apart on centre. This 1:1 relationship is what produces overlap at the right point and eliminates scallops. Spacing wider than about 1.5× the setback is where scallops begin.
- Graze setback: 100–250mm from the wall face. Closer for deep texture like stone cladding, slightly further for shallow fluting. Below 100mm you risk the fixture trim being visible in the beam and a very hot band at the top of the wall.
- Graze spacing: 200–400mm on centre, or better, a continuous linear profile so the light is uniform along the full run. Individual spots close to a wall almost always scallop.
- Beam angle for washing: 40°–60°, or a dedicated asymmetric wall-wash optic. Asymmetric optics throw more light at the bottom of the wall than the top, which is what compensates for distance and gives genuinely even coverage top to bottom. They cost slightly more and are worth it.
- Beam angle for grazing: 10°–24°. Narrow, tight, aimed almost straight down the face.
- Beam angle for a single artwork: 15°–24°, aimed at 30° from vertical (see below).
- Output: 150–300 lumens per running foot of washed wall for a comfortable feature effect in a living room, at the top of that range for dark stone or dark wood, which can absorb well over half the light that hits them. A pale wall needs noticeably less than a charcoal one for the same apparent brightness.
- Leave the top 150mm alone. The junction where the wall meets the ceiling should not be the brightest part of the wash. If it is, your setback is too small.
If you are unsure how these numbers land on an actual drawing, how to read a reflected ceiling plan shows what to look for, and downlight spacing and beam angles covers the same geometry for general ceiling lighting.
Lighting artwork, TV walls and niches
Three specific cases come up in nearly every Hyderabad home, and each has its own rule.
Artwork: the 30-degree rule
Aim an accent spot so the beam strikes the centre of the artwork at approximately 30° from vertical. Shallower than about 20° and the frame casts a shadow across the top of the canvas; steeper than about 35° and the light bounces straight back into the viewer's eyes as glare, particularly off glass or a varnished surface. In practice, on a 10ft ceiling with the artwork centred at about 5ft 6in, that puts the fixture roughly 750–900mm out from the wall. For a large canvas, two spots at the third points beat one in the centre. Use adjustable, narrow-beam smart spot lights so the aim and the level can both be set once the piece is actually hung.
TV and media walls
The screen itself is a light source, so the goal here is to reduce contrast, not create it. A soft, even wash on the wall behind and around the television at roughly 10–20% of the screen's own brightness dramatically reduces eye fatigue during long viewing. Keep every fixture out of the reflection zone — nothing directly opposite the screen, and never a spot aimed at the wall the screen is mounted on from the front. A concealed strip behind the TV unit or a graze on the cladding beside it works far better than a downlight. Our home theatre and media room automation guide goes further on this.
Niches, shelving and display units
Light niches from within the niche, not from the room. A concealed strip behind a 25–40mm front lip, at the top of each shelf, is the standard detail — the objects glow and the light source is invisible. Ask for the rebate at the carpentry stage; retrofitting a lip into finished joinery is a rebuild. Keep the driver outside the unit at an accessible service point, because drivers fail long before LEDs do.
Contrast ratios and CCT that make it look intentional
An accent only exists relative to its surroundings. These are the ratios worth designing to:
- 3:1 for a feature wall you want noticed — the wall reads about three times brighter than the general room level. Comfortable, and works at all times of day.
- 5:1 for genuine drama — a single sculpture, a statement artwork, or an entrance wall you want to be the first thing a guest sees.
- Below 2:1 is invisible. If the accent is not at least twice the ambient level, nobody will perceive it as an accent and the money is wasted.
- Above 10:1 looks like retail. Museum-level contrast in a living room feels theatrical rather than warm.
On colour temperature: keep accent lighting at the same CCT as the ambient layer or very slightly warmer — 2700K accent against 3000K ambient looks deliberate and rich, while 4000K accent against 3000K ambient looks like two different fixtures were bought at two different times, which is usually exactly what happened. For stone, wood and warm-toned art, 2700K is the right anchor. Our colour temperature (CCT) guide works through it room by room.
CRI matters more here than anywhere else in the house, because accent lighting exists specifically to render colour and material. Specify CRI 90+ and ask for the R9 (deep red) value to be above 50 — that single number is what carries teak, terracotta, red stone and skin tones in a portrait. LED specs explained covers what these numbers mean and which ones vendors quietly omit.
Putting accent walls on scenes
The correct brightness for a feature wall is not one number — it changes completely between 4pm and 10pm. That is why accent circuits should always be separate, dimmable channels rather than being ganged onto the room's main lighting. Once they are, a typical configuration we set up looks like this:
- Welcome — the entrance feature wall to 100%, ambient at 60%. Triggered by the door or a keypad press as you walk in; the first thing anyone sees is the wall, not a bare bulb.
- Entertain — accent wall at 100%, artwork spots at 100%, general lighting pulled back to about 30%, cove at 40%. Maximum contrast, and the room instantly looks twice as expensive.
- Dinner — accent at 40%, artwork at 60%, ambient at 25%. Enough definition on the walls that the room does not feel like a cave, without competing with the table.
- Everyday evening — accent at 25–30%. Present but quiet. This is the level the wall actually spends most of its life at, and it is the one people forget to plan for.
- Goodnight — all accent circuits off. There is no reason to light a stone wall at 2am, and this is where a meaningful share of the energy saving comes from.
An external or balcony feature wall can also run on an astro schedule, coming up at sunset and off at a set hour without anyone touching anything. These scenes belong on a wall keypad at the room entrance, not buried in an app — the argument for which is in why scene-based automation beats app-only devices, and our worked examples of scene design shows how these link into whole-home scenes that also drive motorised curtains and home security.
Getting a wall from 100% down to a clean 25% without flicker or a visible colour shift is entirely a function of the driver and dimming method, not the LED. This is where cheap fixtures fail most visibly — accent lighting spends most of its life at low output, which is exactly where poor drivers stutter. Why LED lights flicker when dimmed covers how to avoid it, and dimmable, tunable smart lighting is what makes one set of fixtures serve all five scenes above.
Pre-construction checklist
If your false ceiling is not yet closed, take this list to your interior designer and electrician:
- Every feature wall identified on the drawing, with its final material named — this is what decides wash versus graze.
- Setback dimensioned from the finished wall face, not the brickwork. Stone cladding and panelling can add 40–75mm, and a graze setback of 150mm becomes 90mm if you measure from the wrong surface.
- Fixture spacing marked on centre, with the wash spacing set roughly equal to the setback.
- Beam angle and optic type written against each fixture — asymmetric wall-wash optics called out explicitly where used.
- A separate dimmable circuit for each accent group, never ganged with the room's general lighting.
- A continuous ceiling slot or pocket detailed where a linear profile is used, coordinated with the ceiling contractor before framing.
- Driver locations marked outside the joinery at named, accessible service points.
- Artwork positions and heights confirmed with the client before the ceiling closes — a spot aimed at where a painting might go is a spot aimed at nothing.
- Rebates and lips (25–40mm) drawn into any niche or shelving joinery that will carry concealed lighting.
- A keypad point in the room so the accent scenes have somewhere to live.
If this is part of a larger lighting exercise, how to plan smart lighting for a new home is the wider sequence, and how to plan cove lighting in a false ceiling covers the ambient layer these accents sit against. For living areas specifically, living and dining room lighting layers shows how accent, ambient and task work together.
How Pert delivers it — a designed solution, not a DIY kit
Pert is a solutions company: we design and install, we do not hand over a box of parts and a manual. On accent and wall-wash lighting that means a site visit to measure the actual walls and confirm the finished materials, a lighting layout that dimensions setbacks from the finished face along with spacing, beam angles, optic types, circuit grouping and driver locations on the same drawing your ceiling contractor and electrician work from, coordination with your interior designer before the ceiling is closed and the cladding goes up, professional installation and aiming, and then scene tuning done in the finished room after dark — because a contrast ratio that reads correctly as a number on paper almost never reads correctly at 8pm with the furniture in place.
Aiming in particular is not a DIY step. Adjustable spots need to be set with the artwork hung and the room dressed, then locked; a spot aimed during construction will be pointing at the wrong place by handover. If you are adding this during a renovation rather than new construction, read can you add home automation during renovation in Hyderabad. And if you are still comparing providers, our guide to the best home automation companies in Hyderabad covers what to check before you sign.
Planning a feature wall in your Hyderabad home? Get the setbacks, spacing, beam angles and dimming circuits designed before the false ceiling is closed and the cladding goes up — it costs nothing to move a fixture on a drawing and a great deal to move it afterwards. Request a consultation →
Frequently asked questions
How far from the wall should wall washers be placed?
For a smooth, even wash on a standard 10ft (3m) ceiling, set fixture centres roughly 600–900mm out from the face of the wall and space them apart at about the same distance — a setback of roughly one quarter to one third of the wall height. Closer than 400mm gives hard scallops and a hot band near the ceiling; beyond about 1200mm it stops reading as a wall wash at all. Grazing is the deliberate opposite: 100–250mm, to rake light across texture.
What is the difference between wall washing and wall grazing?
Washing places fixtures well off the wall (600–900mm) so light spreads evenly and texture disappears — right for paint, wallpaper and gallery walls. Grazing places them very close (100–250mm) so light rakes down the surface and every ridge casts a shadow — right for stone, fluting, brick and rough plaster. Using the wrong one is the most common mistake we see, because grazing a smooth painted wall exposes every plastering defect on it.
How bright should accent lighting be compared to the rest of the room?
Aim for about 3:1 for a feature wall you want noticed and 5:1 for real drama. Below 2:1 nothing registers as an accent; above roughly 10:1 the room starts to look like a retail display. Since the right ratio changes through the evening, accent circuits must be dimmable and separate from ambient — the wall that wants 100% at a dinner party wants 25–30% on a quiet weeknight.
Can feature wall and artwork lighting be automated?
Yes, and it is one of the changes homeowners notice most. Pert keeps accent and wall-wash circuits on their own dimmable channels so they can be recalled at different levels per scene — a Welcome scene at full, an Entertain scene with the wall at 100% and general lighting at 30%, a Dinner scene at 40%, and a Goodnight scene with accents off. External feature walls can run on an astro schedule at sunset, and everything sits on a wall keypad rather than in an app.