
In this guide
- Lumens, watts, and the chip-lumens trick
- Efficacy: lumens per watt, heat and honesty
- CRI, R9 and colour rendering you can see
- SDCM binning: why one ceiling looks like two
- L70, LM-80 and what 50,000 hours really means
- The driver page: dimming, power factor, flicker, surge
- Two 8W downlights compared on paper
- What changes when the fitting joins an automation system
- How Pert delivers it (designed, not DIY)
- FAQs
This guide sits alongside our wider coverage of home automation in Hyderabad. If you have already decided which type of fitting goes where, our guide to panel vs COB vs strip vs spot lights covers that, and how to plan downlight spacing & beam angles covers where each one physically goes. This article is about the fitting itself — how to tell a good one from a cheap one before it is in your ceiling.
Lumens, watts, and the chip-lumens trick
Start by separating the two numbers everyone confuses. Watts are what the fitting consumes. Lumens are what it produces. In the incandescent era they moved together, so "60 watt bulb" was shorthand for a brightness. With LEDs that link is broken, and wattage has become the least useful number on the box.
Worse, the lumen figure itself is quoted two different ways:
- Chip or source lumens — the raw output of the bare LED before it goes into the fitting. This is the bigger, friendlier number, and it is what most low-cost Indian datasheets print.
- Luminaire or delivered lumens — what actually leaves the fitting after the reflector, diffuser, trim and heat have taken their cut. This is the number that lights your room.
The gap between them is typically 15–25%, and considerably more in a deep anti-glare fitting with a honeycomb louvre, where the optic that kills glare also absorbs light. A fitting advertised at 1,080 lumens can easily deliver 780. Ask specifically for delivered luminaire lumens, backed by an LM-79 photometric report — and treat the absence of one as an answer in itself.
How many lumens you need is a separate calculation from a lux target and floor area, worked through in how to plan downlight spacing & beam angles. As a sanity check for Hyderabad flats: a living room of about 17–18m² needs roughly 4,200 installed lumens of ambient light in total, spread across the whole ceiling grid.
Efficacy: lumens per watt, heat and honesty
Divide delivered lumens by input watts and you get efficacy, in lm/W. It is the single most revealing number on a datasheet, because it is very hard to fake without also faking the lumen figure.
- Below 80 lm/W — a budget fitting, an inefficient driver, or a lumen figure quoted at the chip. Expect it to run hot.
- 100–130 lm/W — the realistic band for a good residential COB downlight at CRI 90, measured at the luminaire.
- Above 150 lm/W claimed at CRI 90 in a sealed recessed downlight — treat as a paperwork number until you see the LM-79 report.
There is a genuine trade-off to understand here: higher colour quality costs efficacy. Moving from CRI 80 to CRI 90 typically costs 10–15% of output at the same wattage, because the phosphor that fills in the red end of the spectrum also absorbs light. A fitting that boasts both CRI 95 and 160 lm/W is almost certainly wrong about one of them. When you see a modest efficacy number sitting next to a high CRI, that is usually a sign of an honest datasheet, not a weak product.
Efficacy also tells you about heat. Every lumen not produced leaves as heat, and heat is what kills LEDs and drivers. A 12W fitting at 65 lm/W is dumping meaningfully more heat into a sealed plenum than an 8W fitting at 100 lm/W producing the same light — which matters a great deal in a Hyderabad false ceiling in May. Look for a cast aluminium heatsink rather than a painted steel can, and check the Ta rating, the maximum ambient temperature the fitting is certified for.
CRI, R9 and colour rendering you can see
CRI — often written Ra — scores how faithfully a light source renders colour against a reference, on a 0–100 scale. Two things about it are routinely misunderstood.
First, CRI is an average of only eight pastel test colours (R1–R8). It deliberately excludes the saturated ones. Second, and consequently, R9 — deep red — is not in the average at all. A great many CRI 80 fittings score an R9 close to zero, or even negative. That single missing number is why a room can measure "fine" on paper and still make skin look grey, teak look washed out, and food on a dining table look thoroughly unappetising.
What to specify, room by room
- Living, dining, kitchen — CRI ≥ 90, R9 ≥ 50. This is where people, food and wood finishes are looked at.
- Bathroom mirror, dressing, wardrobe — CRI ≥ 90, R9 ≥ 90. Anywhere make-up is applied or clothes are matched, deep red rendering is not optional.
- Bedrooms, corridors, utility — CRI ≥ 80 acceptable, though we specify 90 throughout for colour consistency between rooms.
- Anywhere at all — never below CRI 80.
If the manufacturer publishes the newer TM-30 metrics, they are more informative: look for Rf (fidelity) ≥ 85 and Rg (gamut) between 95 and 105. An Rg well above 105 means colours are being oversaturated rather than rendered accurately — punchy in a showroom, exhausting at home.
Colour rendering is a different question from colour temperature, which is about how warm or cool the white is. Our colour temperature (CCT) guide works through the right CCT room by room, and tunable and dimmable lights explains why we specify tunable fittings on most projects rather than freezing a house at 3000K. One caution: on a tunable fitting, always ask for the CRI figure at both ends of the range — plenty of tunable products hold CRI 90 at 3000K and drop below 80 at 6000K.
SDCM binning: why one ceiling looks like two
This is the specification that produces the most complaints and appears on the fewest quotations. LED chips vary in colour even within a single model and production run, so manufacturers sort them into bins. The tolerance is expressed in SDCM, or MacAdam ellipse steps — effectively, how far the fitting's actual colour may drift from its nominal one.
- 1–2 SDCM — indistinguishable to the eye. Premium.
- 3 SDCM — the practical residential standard. Specify this as your minimum.
- 5 SDCM — clearly visible when two fittings sit side by side. Common in budget product, and the usual cause of "one downlight looks pink".
- 7 SDCM or unstated — expect an obviously mismatched ceiling.
Three practical rules follow, and all three are about procurement rather than product:
- Order each room in a single batch. Even a 3 SDCM product can show variation across production runs months apart.
- Buy 5–10% spares at the same time and store them. A replacement fitting bought two years later, even the identical model number, will very likely not match its neighbours — a straight run of corridor downlights makes this painfully obvious.
- Do not mix brands within one visual field. 3000K from two manufacturers can sit at opposite edges of the same tolerance band and read as two different colours in one room.
L70, LM-80 and what 50,000 hours really means
LEDs rarely fail outright; they fade. So lifetime is quoted as L70 — the hours until output falls to 70% of the original, the point at which most people notice a room has gone dim. You will also see L80 and L90, which are stricter and therefore shorter.
The claim is usually incomplete in three ways:
- No failure percentage. "L70, 50,000 hours" should properly be written L70B10 — 70% output remaining, with no more than 10% of units having fallen below that. Without the B figure the claim is unbounded.
- Measured at 25°C. Standard test ambient is 25°C. A sealed gypsum plenum in Hyderabad routinely sits at 40–50°C through summer, and as a rule of thumb every 10°C rise roughly halves useful life. A genuine 50,000 hours at 25°C can become 12,000–25,000 hours in your actual ceiling. Ask for a Ta rating of 45–50°C and lifetime data at that temperature.
- No test data behind it. Real figures come from LM-80 measurements with a TM-21 projection. If a supplier cannot produce an LM-80 report, the lifetime number was written by a marketing department.
And the honest caveat: in Indian homes, the driver usually fails long before the LEDs fade. Electrolytic capacitors are the weak point and they degrade fast in heat. So the questions that actually determine how long your ceiling lasts are: is the driver external and field-replaceable without pulling down gypsum, is it covered by the warranty, and will the same driver still be available in three years? A five-year warranty that excludes the driver is a one-year warranty in practice. Ask for it in writing — the same discipline we apply to reading a quotation in how to read a home automation quotation.
The driver page: dimming, power factor, flicker, surge
Most datasheets give the LED two pages and the driver two lines, yet in an automated home the driver decides almost everything you will actually experience. Six specifications matter.
1. Dimming protocol and minimum dim level
A fitting is not "dimmable" as a yes-or-no property — it is dimmable by a particular method. TRIAC (leading-edge) drivers work with conventional wall dimmers but dim poorly at the bottom of the range. 0–10V, DALI and PWM constant-current drivers dim far more smoothly and are what we specify on controlled projects. The number to ask for is the minimum stable dim level: budget drivers bottom out at 10–20% and then snap off, while a good one holds a stable 1%. That difference is the entire distinction between a working Movie scene and a lounge you cannot take below "bright". Why LED lights flicker when dimmed goes through the driver selection in detail.
2. Flicker
Ask for percent flicker below 5% and a PWM frequency above 3 kHz — ideally above 20 kHz. Low-frequency PWM causes eye strain and headaches over long evenings, and shows up as rolling bands in phone videos of the room. Critically, flicker must be measured at low dim levels, not at full output, because that is where cheap drivers misbehave.
3. Power factor and THD
Look for power factor ≥ 0.9 and THD below 15%. A 0.5 power factor driver draws roughly twice the current for the same useful power, which loads your wiring and your dimmer channels far harder than the wattage on the box suggests.
4. Inrush current
Rarely published and frequently the cause of tripping. LED drivers draw a very large, very brief current spike at switch-on, so a relay channel rated 10A may only reliably carry 15–20 drivers. This is a real constraint on how the ceiling is grouped — see how to plan dimmer channels & lighting loads for channel capacities, minimum loads and grouping rules.
5. Surge protection
Specify at least 2.5kV line-to-neutral indoors and 4kV for balcony, façade and outdoor fittings. In Hyderabad's monsoon months this is the difference between a warranty claim and a quiet season.
6. IP, IK and the physical fit
IP20 is fine for dry indoor ceilings; IP44 minimum for bathroom zone 2; IP65 for balconies, façades and anywhere exposed, ideally with IK08 impact rating outdoors. And do not overlook the mechanical numbers: cutout diameter (typically 65–75mm residential) and required plenum depth (typically 90–120mm) have to be fixed before the ceiling contractor marks out, because neither can be changed afterwards without patching gypsum. Add UGR below 19 with a 30–40mm deep matte-black baffle for glare control.
Finally, confirm BIS registration under the CRS scheme — it is a legal requirement for LED luminaires sold in India, and its absence tells you something about everything else on the sheet.
Two 8W downlights compared on paper
The same two showroom fittings from the opening, as their datasheets actually read:
Fitting A — ₹420
- Marked 12W; 1,080 lumens quoted at the chip, roughly 780 delivered
- Efficacy about 65 lm/W; painted steel body, no Ta rating stated
- CRI 80, R9 not published (measured close to 0)
- 5 SDCM, no batch control offered
- "50,000 hours" claimed, no LM-80 report, no B figure, no ambient stated
- TRIAC driver, integrated (not replaceable), minimum dim about 15%, flicker unstated
- Power factor 0.5, no surge protection, 1-year warranty
Fitting B — ₹1,250
- 8W input, 760 delivered lumens per LM-79 report
- Efficacy about 95 lm/W; cast aluminium heatsink, Ta 50°C
- CRI 92, R9 > 55, held across the tunable range
- 3 SDCM, single-batch supply with spares
- L70B10 at 50,000 hours with LM-80 data at Ta 50°C
- External, field-replaceable driver; 0–10V / DALI, 1% minimum dim, flicker under 3% at 5% output
- Power factor 0.95, THD 12%, 2.5kV surge, 5-year warranty including driver
Read side by side, the arithmetic is not close. Fitting B produces the same light on the floor from two-thirds of the power, renders skin and wood properly, matches its neighbours, survives a hot plenum, and is the only one of the two that can actually reach a 10% evening scene level. Across a 34-fixture 3BHK the price difference is roughly ₹28,000 — a small fraction of an automation budget, against a ceiling that has to be lived under for a decade and is expensive to revisit once the gypsum is closed.
None of which means the most expensive fitting is automatically right. It means you compare on delivered lumens, efficacy, CRI with R9, SDCM, Ta-rated lifetime, dim floor and driver warranty — and a fitting that publishes all seven is usually a better bet than one that publishes a bigger wattage.
What changes when the fitting joins an automation system
A fitting that is merely acceptable on a wall switch can be genuinely unusable on a controlled system, because automation asks more of it. Four specifications get promoted from "nice to have" to load-bearing:
- The dim floor sets the bottom of every scene. A Movie scene at 10% and a night path at 3% simply do not exist on a driver that bottoms out at 15%. Every scene table we design, like the worked examples in how to design home automation scenes, assumes a 1% floor.
- Colour consistency becomes group-wide. When six fittings dim together as one channel, any bin mismatch is exposed at every level rather than only at full output — and cheap drivers drift in colour as they dim, so ask about colour shift across the dimming range, not just at 100%.
- Driver behaviour has to be uniform per channel. Fittings from two brands on one dimmer channel will track differently and reach visibly different brightnesses from the same command. One channel, one driver type.
- Inrush limits the group size, as above — which is why fitting selection and channel planning have to happen together, not in sequence.
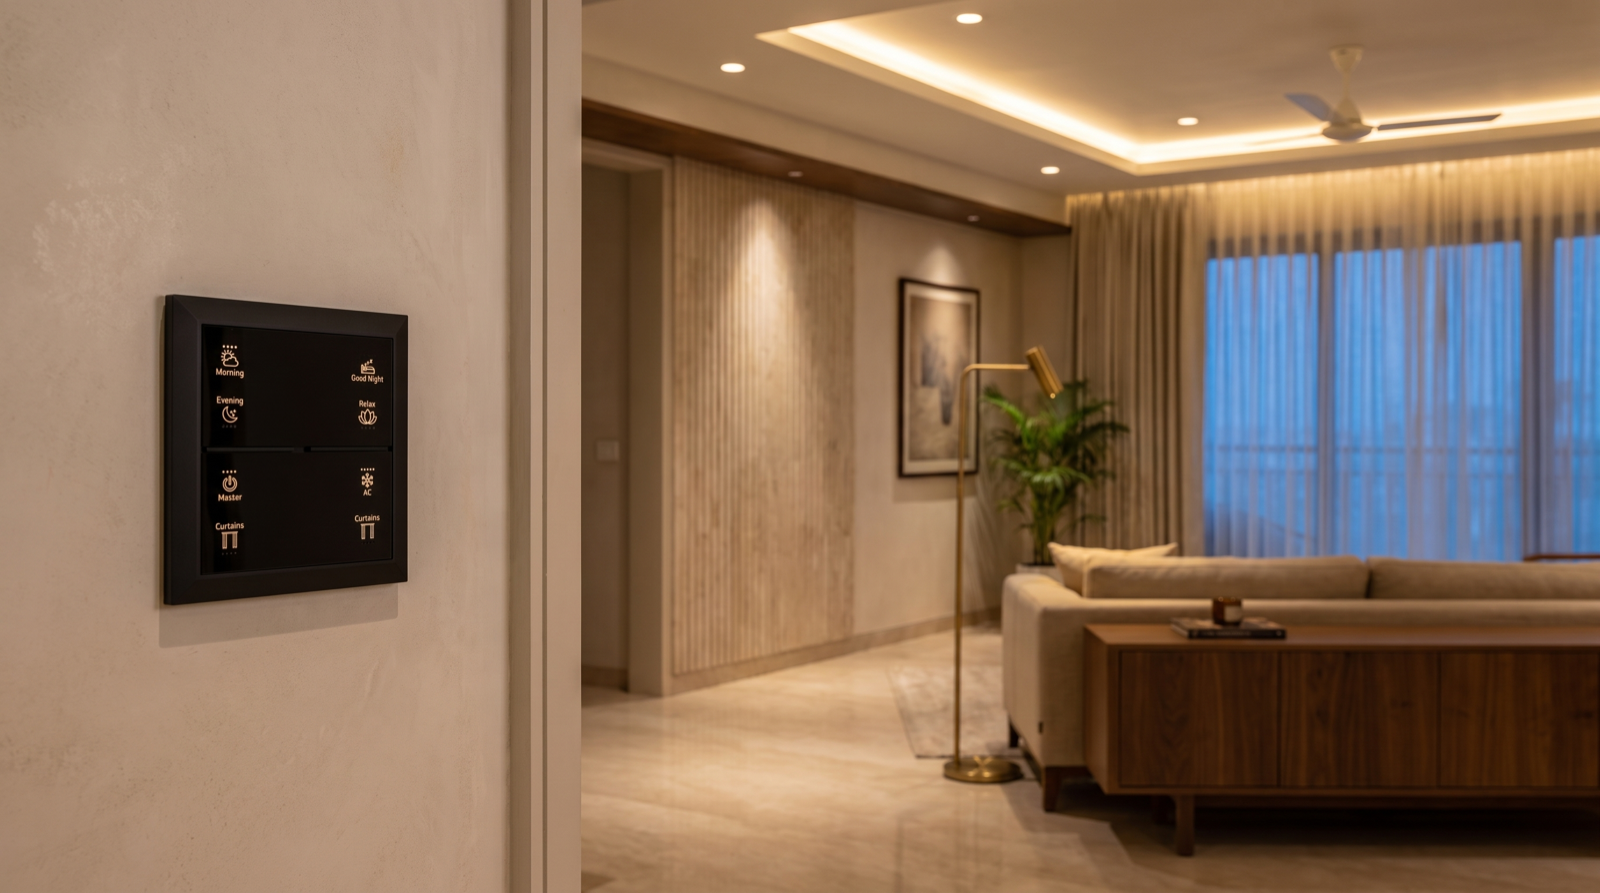
Get those right and the ceiling becomes something you set rather than switch: dimmable, tunable smart lighting grouped into scenes, run from a wall keypad at the room entrance, alongside motorised curtains and security on a Good Night button. Get them wrong and you have a very expensive way to turn lights on.
How Pert delivers it — a designed solution, not a DIY kit
Pert is a solutions company: we design and install. We do not hand over a carton of fittings and a spec comparison chart and wish you luck. On the lighting hardware itself that means a written fixture schedule for your home listing every fitting by room with its delivered lumens, wattage, efficacy, CCT, CRI and R9, beam angle, cutout diameter and required plenum depth; LM-79 photometric and LM-80 lifetime data available on request rather than on trust; a single-batch, 3 SDCM supply per room with spares set aside; driver selection matched to the control system so every channel dims to 1% without flicker; the channel grouping designed around real inrush and load limits; installation coordinated with your ceiling contractor before the gypsum closes; and scene commissioning done after dark in the finished, furnished room, because a level that looks right on a datasheet rarely looks right at 9pm.
If you are still choosing a partner for the work, our guide to the best home automation companies in Hyderabad covers what to check before you sign — and asking a prospective supplier for the R9 value and the SDCM binning of the fittings they are quoting is one of the fastest ways to find out how they buy.
Comparing lighting quotations in Hyderabad? Send us the fitting list and we will tell you what the datasheets leave out — delivered lumens, R9, binning, dim floor and driver warranty — before the order is placed and the ceiling is cut. Request a consultation →
Frequently asked questions
Is a higher wattage LED light brighter?
No. Watts measure power consumed; lumens measure light produced, and efficacy (lm/W) links the two. A good 8W COB at 100 lm/W delivers about 800 lumens, while a cheap 12W at 65 lm/W delivers roughly 780 from 50% more power. Also check whether the lumen figure is measured at the luminaire or quoted from the bare chip — chip lumens typically overstate real output by 15–25%.
What CRI should home lighting have, and what is R9?
CRI 90+ for living, dining, kitchen and mirror areas, and never below 80 anywhere. CRI averages eight pastel test colours and excludes saturated red; R9 is that missing deep red, and many CRI 80 fittings score near zero on it — which is why skin looks grey and food looks flat. Ask for R9 ≥ 50 in living areas and R9 ≥ 90 at mirrors and dressing units.
Why do some LED downlights in the same ceiling look different colours?
Different colour bins. Chips vary within a model, so they are sorted by SDCM (MacAdam steps). At 5 SDCM the difference is visible side by side; specify 3 SDCM or better, order each room in one batch, and keep spares from that same batch so a replacement two years later still matches.
Do LED lights really last 50,000 hours?
Rarely as quoted. L70 claims are measured at 25°C ambient, while a sealed Hyderabad plenum sits at 40–50°C, and every 10°C rise roughly halves useful life. Ask for LM-80 data with a TM-21 projection, a Ta rating of 45–50°C, and an L70B10 figure. In practice the driver fails first — so confirm it is external, field-replaceable and covered by the warranty.