
In this guide
- Why one room has to do four jobs
- The study desk: 500 lux, and which side it comes from
- Flicker, CRI and glare — the specs that matter more for children
- The night tier that replaces the hall light
- Scenes, keypads and control a child can actually use
- Curtains, blackout and the 5:30am Hyderabad sun
- Wiring points to leave so the room can grow up
- How Pert delivers it (designed, not DIY)
- FAQs
Most children's rooms in new Hyderabad homes get one central ceiling light, one fan point, and a bedside socket that eventually holds a plug-in night light with a cracked casing. Everything else — the study lamp, the fairy lights, the extension cord snaking to the desk — arrives later as a workaround for a plan that was never made. This guide is part of our wider coverage of home automation in Hyderabad, and it sets out the light levels, geometry, quality specifications and control decisions that let one room serve a three-year-old and a fifteen-year-old without being rewired in between.
Why one room has to do four jobs
Write the brief down before anyone draws a ceiling, because the four jobs conflict with each other.
- Sleep. The room must be able to go genuinely dark, and to hold a very low, very warm level for a child who wakes at night. This is the job most rooms fail, which is why so many households simply leave the corridor light on all night.
- Study. A bright, even, glare-free 500 lux on a defined work surface, with no shadow from the writing hand and no reflection on a screen. This is a demanding task-lighting problem and it is the one most often solved with a desk lamp bought in a hurry.
- Play and floor time. Soft, wide, shadow-free light across the whole floor, because for the first several years the floor is the room. This wants diffuse ambient light, which is the opposite of the tight task light the desk needs.
- Parenting at odd hours. Nappy changes, a 2am fever, checking on a sleeping child without waking them. This needs a level nobody thinks to specify: enough to see a face clearly, low enough not to end the night.
You cannot serve four jobs with one switch and one fixture. You can serve all four with three or four modest dimmable, tunable circuits and a scene controller — which usually costs less than the pendant light chosen for the same room.
Design against these targets: 150–200 lux ambient across the room, 500 lux on the desk (750 lux for fine work), 100–150 lux for a wind-down reading level, and 1–5 lux at floor level for the night tier. That last number is not a typo — it is roughly the light of a full moon, and it is all you need to cross a room safely.
The study desk: 500 lux, and which side it comes from
Homework lighting is where a child's room most resembles an office, and the same rules apply — we cover the adult version in how to plan home office lighting for work from home. Two things decide whether a desk is comfortable: the level, and the direction.
The level
500 lux measured on the desk surface, rising to about 750 lux for drawing, model-making or anything with fine detail. Crucially, do not deliver that as a bright pool in an otherwise dark room. A desk at 500 lux with the rest of the room at 20 lux forces the eye to re-adapt every time the child looks up, and that is what produces fatigue during a long study session. Keep the ambient level at 150–200 lux so the contrast ratio between task and surround stays around 3:1.
The direction
Light must arrive from the side opposite the writing hand — from the left for a right-handed child, from the right for a left-handed one. Ask which, and mark it on the drawing; it is the cheapest decision in this article and the one most often skipped. Light from directly behind the child puts their own head and shoulders across the page. Light from directly in front puts it in their eyes. Light from directly above the chair does both, which is exactly what a centrally placed ceiling downlight delivers.
For a screen, add a second constraint: no fixture should sit in the 60-degree cone in front of the monitor, or it reflects off the glass. Place the linear task light or downlight above and slightly forward of the front edge of the desk, so the light falls onto the work surface and away from the screen face rather than bouncing off it.
The fixture
A slim linear task light concealed under a shelf or wall-mounted above the desk, roughly the width of the desk, is far better than a downlight or a clamp lamp. It is wide, so it produces soft-edged shadows instead of hard ones; it is fixed, so it cannot be knocked out of alignment; and it can be dimmed and tuned as part of the room rather than left as an orphan appliance on a switch. Aim for 4000K during study hours, on the same tunable channel as the rest of the room. Beam-angle and spacing arithmetic for the ceiling layer is in how to plan downlight spacing and beam angles.
Flicker, CRI and glare — the specs that matter more for children
Adults tolerate poor light quality by not noticing it. Children sit under it for hours and have no vocabulary for what is wrong. Three specifications deserve more attention here than anywhere else in the house.
- Flicker below 5% at every dimmed level. This is the one to hold firm on. Cheap drivers and mismatched dimmers produce invisible modulation that is associated with headaches, eye strain and reduced concentration, and many of them are worst at low dim levels — precisely where an evening study light sits. Ask for the flicker percentage across the whole dimming range, not just at 100%, and insist the driver and dimmer are a tested pair. A quick field test: point a phone camera at the dimmed light; rolling bands on the screen mean visible modulation, and that fixture should be rejected. The full explanation is in why LED lights flicker when dimmed and how to choose drivers.
- CRI 90 or better. A child's room is full of colour tasks — reading printed colour, drawing, matching a school uniform, judging whether a graze looks infected. CRI 80 strips flatten reds and make skin tones look grey. The datasheet vocabulary is unpacked in LED light specs explained: lumens, CRI and efficacy.
- Glare control: UGR below 19, and nothing bare overhead. Children spend a lot of time lying on their backs — on the floor, on the bed, being changed. A bare bulb or an unshielded downlight directly above the bed or the play mat is looked at straight-on far more often than the same fixture in a living room. Use deep-recessed or honeycomb-baffled downlights, diffused linear fixtures and concealed cove light, and keep every fixture out of the direct sightline from a pillow.
- Colour temperature: tunable 2200K–4000K. Around 4000K for study and daytime, 2700K–3000K for the wind-down hour, 2200K or warmer for the night tier. Cool 5000K–6500K white in a child's room in the evening is the most common specification mistake we are asked to correct. See the colour temperature (CCT) guide for home lighting and tunable and dimmable lights.
The night tier that replaces the hall light
Most Indian households solve the night problem the same way: leave the corridor light on, or leave the child's own light on at full brightness. Both wreck sleep quality, and both are unnecessary.
Build the night tier into the room's own lighting instead. The specification is precise and cheap:
- 3–8% output at 2200K or warmer, which reads as a soft amber presence rather than as a light that is on.
- Mounted low. A skirting-level strip, a recessed step light under the bed frame, or a soft wash near the doorway. Light at floor level illuminates the surface a child actually walks on and never enters the eye directly from a lying position. A dimmed ceiling light does the opposite.
- Triggered by the house, not by a switch. The night tier should engage automatically when the home goes into Good Night mode, and clear itself in the morning — no one should have to remember it.
- Paired with a motion sensor for the 2am route. A sensor at the doorway can bring the bedroom, corridor and bathroom to that same 3–8% warm level as the child moves, then fade back out after two to three minutes. The sensor placement and timeout logic is the same discipline set out in how to plan staircase and corridor lighting with motion sensors.
There is a second, less obvious level worth configuring: a parent tier at roughly 15–20% at 2700K, reachable from a single button, for feeding, a nappy change or a night when a child is unwell. Bright enough to see a face and read a thermometer; low enough that everyone goes back to sleep afterwards.
Scenes, keypads and control a child can actually use
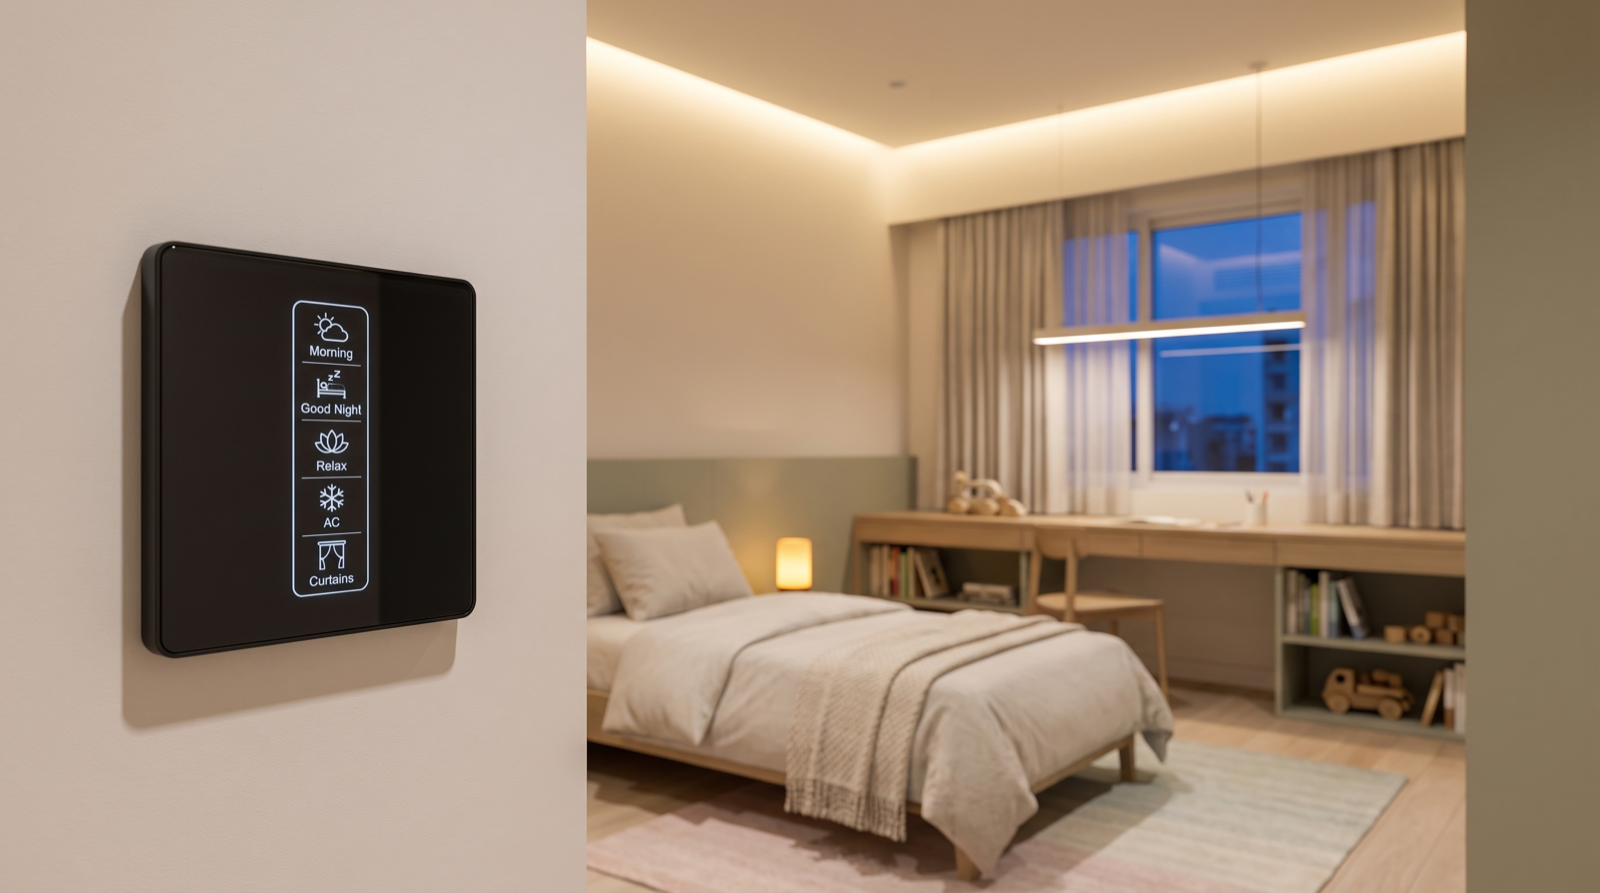
An app is the wrong primary control for a child's room. A young child does not have a phone; an older one has one full of better things to do than dim a light. Voice is inconsistent in a room with a closed door and a child who mumbles. The correct primary control is a wall keypad — a fixed, labelled, always-in-the-same-place button that works for a four-year-old and a grandparent equally. The trade-offs are laid out in do you need a smart home app, a wall keypad, or both.
Two practical placement rules. Put one keypad at the door at normal adult switch height (about 1.2m) so it stays out of reach in the toddler years and becomes usable naturally at about age seven. Add a second keypad or a single button at the bedside, roughly 700mm above floor level, so nobody has to cross a dark room to turn anything off. Do not mount the main keypad low “for the child” — they outgrow it within a couple of years and it looks wrong for the rest of the room's life.
Four scenes cover almost everything:
- Study — desk task light 100% at 4000K, ambient 60%, cove 40%, curtains open.
- Play — ambient 100% at 3500K, cove 100%, desk light off.
- Wind Down — ambient 25% at 2700K, cove 30% warm, desk off. Run this on a schedule about 45 minutes before bedtime and it does more for a bedtime routine than any amount of negotiation.
- Good Night — everything off except the 5% night tier at 2200K, motorised curtains closed, and the house's security armed as part of the same press.
Add a gentle Wake routine on school mornings: the cove fading from 0 to 60% over ten minutes at 2700K rising to 4000K, with the curtains opening at the end of the fade. It works considerably better than an alarm, and it is the automation families keep. Worked examples for a whole home are in how to design home automation scenes, and getting the button count and engraving right is covered in how to plan keypad layouts and engraving. All of this depends on dimmable, tunable smart lighting — one set of fixtures cannot otherwise do the 8pm job and the 3am job.
One more thing worth configuring rather than arguing about: a schedule that returns the room to Wind Down if the Study scene is still running at 11pm on a school night. It is not surveillance and it is not a lock — the keypad overrides it instantly — but it is a quiet, repeatable prompt that costs nothing to set up.
Curtains, blackout and the 5:30am Hyderabad sun
In Hyderabad, first light lands between about 5:30am and 6:15am depending on the season, and an east-facing children's window will wake a small child an hour before anyone in the house wants to be awake. Lighting design in this room is incomplete without controlling daylight.
- Specify a dual track. A sheer layer for daytime privacy and glare control on the desk, plus a genuine blackout layer behind it. A single “dim-out” fabric usually satisfies neither requirement.
- Plan the light leak, not just the fabric. Most of the light that wakes a child arrives around the curtain rather than through it. A ceiling-recessed track with the blackout layer returning to the wall at both ends, plus 150–200mm of overhang past each side of the opening, matters more than the fabric's stated blackout rating.
- Choose a quiet motor and check the specification. Anything above about 35–38 dB is audible in a sleeping room. Ask for the figure; do not accept “it's silent.”
- Automate both ends of the day. Blackout closes with Good Night, sheer opens with the Wake routine. The full measuring and motor-sizing method is in how to measure windows and choose tracks for motorised curtains.
Wiring points to leave so the room can grow up
The single largest saving in a children's room is not choosing cheaper fixtures — it is leaving the right points so the room never has to be opened again. Put these on the electrical drawing:
- Four separately dimmable circuits, not one. Perimeter cove, general ceiling, desk task light, and the low night-tier circuit. Ganging the desk onto the ceiling light is the decision that forces every later workaround. Load grouping is covered in how to plan dimmer channels and lighting loads.
- A study-desk provision on the correct wall — a switched point plus data, positioned for the handedness you confirmed, and placed for the desk position the room will have at age ten, not the cot position it has now.
- A skirting-level low-voltage run from the door to the bed for the night tier, and an accessible driver location with a removable access panel. Drivers fail long before LEDs do; never seal one permanently into joinery.
- A keypad back-box at the door and a second at the bedside, both with control cable back to the automation panel, even if only one is populated on day one.
- Curtain provision at the window head — a 5A point at the track end and a ceiling pocket of 120–150mm depth for a dual track, decided before the false ceiling closes.
- Sensor cabling at the doorway, at about 2.2m, for the night-route motion sensor.
- Two spare conduits from the room to the panel. In ten years this room will want something nobody has specified yet, and a spare conduit is the difference between an afternoon and a re-plaster.
Every one of these is free to specify at drawing stage and expensive to add later — the general argument we make in when to plan home automation during construction in Hyderabad, and applied to the whole house in how to plan smart lighting for a new home.
How Pert delivers it — a designed solution, not a DIY kit
Pert is a solutions company: we design and install, and we do not hand over a box of parts for someone else to figure out. On a children's room that means a site visit to confirm the window orientation, the bed and desk positions the room will actually settle into, and which hand the child writes with; a lighting layout marking circuits, fixture positions, keypad heights, sensor locations, driver access and curtain pockets on the same drawing your electrician, carpenter and interior designer work from; professional installation and commissioning of the fixtures, dimmers, keypads, sensors and curtain motors; and scene tuning done in the finished room at night as well as in daylight — because a night tier that looks correct on a dimmer chart at 3pm is almost never the level you want at 3am.
If you are comparing providers on this level of detail rather than on headline price, our guide to the best home automation companies in Hyderabad covers what to check before you sign.
Planning a children's room in Hyderabad? Get the four circuits, the desk-side task point, the night-tier run and the curtain pocket onto the drawing before the false ceiling closes — it costs nothing now, and it is the difference between a room that grows with your child and one that gets extension cords. Request a consultation →
Frequently asked questions
How much light does a child's study table need?
500 lux on the desk surface for homework and reading, around 750 lux for fine work like drawing, against an ambient of 150–200 lux so the desk is not an island of brightness in a dark room. Direction matters as much as level: light should come from the side opposite the writing hand, and never from directly above the chair or directly in front of a screen.
Does light flicker actually matter in a child's room?
Yes, more than for adults. Invisible flicker from cheap drivers and mismatched dimmers is linked to headaches, eye strain and poor concentration, and children sit under it for hours without being able to say what is wrong. Specify below 5% flicker at every dim level, and use a driver and dimmer tested as a pair. Point a phone camera at the dimmed light — rolling bands mean reject it.
What colour temperature should a kids' room be?
Tunable: roughly 4000K for study and daytime, 2700K–3000K for the wind-down hour, and 2200K or warmer for the night tier. If only one fixed value is possible, use 3000K for the general lighting and give the desk its own 4000K task light. Avoid 5000K–6500K cool white in the evening.
Should a child's room have a night light or a night scene?
A night scene built into the room's own lighting — 3–8% output at 2200K or warmer, mounted low at skirting or under-bed level so it lights the floor rather than the eyes. Trigger it automatically with Good Night mode and pair it with a motion sensor for the 2am route to the bathroom. It uses a fraction of a watt and replaces the corridor light left burning all night.