
In this guide
- Why a study is not lit like any other room
- The four numbers: lux, CCT, CRI and glare
- Fixture geometry — where each light actually goes
- Killing reflections: the window, the monitor and the ceiling
- Lighting your face for video calls
- The four scenes a study needs
- Electrical points to leave before the ceiling closes
- How Pert delivers it (designed, not DIY)
- FAQs
Work from home stopped being temporary somewhere around 2021, and in a city where a large share of households has at least one person on calls for part of the week, the study has quietly become the most-used room in the house on a weekday. It is also the room most often left out of the lighting plan — treated as a spare bedroom with a desk in it. This article is part of our wider coverage of home automation in Hyderabad, and it deals specifically with getting one small, high-use room right.
Why a study is not lit like any other room
Every other room in a home has one visual task. A bedroom needs to be restful. A dining room needs to make food and faces look good. A study has three simultaneous tasks that pull in different directions, and that is the whole reason it is hard:
- A self-illuminated screen. Your monitor makes its own light. Adding more room light does not make it clearer — it makes it worse if any of that light lands on the glass. The screen needs a controlled, moderate surround, not more brightness.
- Reflective paper and objects. Notes, printed documents, a keyboard, a signature on a form. These need light on them, at a decent level, from an angle that does not put your own head's shadow across the page.
- Your face, on camera. A camera has far less dynamic range than your eye. Lighting that feels perfectly comfortable to sit in can still render you as a dark shape, because the fixtures are all behind or above you.
You cannot satisfy all three with one light. You need layers, and each layer needs to be independently dimmable — which is the point at which lighting design and automation stop being separate conversations.
The four numbers: lux, CCT, CRI and glare
Fix these four on paper and most of the room designs itself.
1. Illuminance — 500 lux on the desk, 300 lux in the room
Office standards put sustained screen-and-paper work at around 500 lux measured on the desk surface, rising to roughly 750 lux for fine detail — drawings, small print, jewellery or craft work. The surrounding room should sit near 300 lux. That ratio matters as much as the absolute figures: a very bright desk in a dim room forces your pupils to readjust every time you look up, and that is what "eye strain by 4pm" actually is.
To put that in fixture terms for a typical 10 ft × 12 ft study: general ambient of roughly 300 lux usually needs about 1,800–2,200 lumens of well-distributed light, and the desk task layer adds another 600–900 lumens concentrated over a 1.2m work surface. Both layers dimmable, because the evening requirement is a fraction of the daytime one.
2. Colour temperature — 4000K by day, 2700K after dark
Neutral white at 4000K is the right working value. It keeps you alert, renders a screen and printed paper honestly, and avoids the hospital feel of 5000K and above that people install once and quietly stop using. After sunset, the same room should drop to 3000K or 2700K, because a study that stays at daylight white until 11pm is one of the more effective ways to wreck your sleep.
That is precisely the argument for tunable-white fixtures rather than two separate installations — one set of lights that shifts across the day. We have set out the room-by-room values in our colour temperature guide and the case for the technology in tunable and dimmable lights.
3. Colour rendering — CRI 90+, non-negotiable
Colour rendering is what decides whether a printed proof, a fabric sample or your own face on camera looks like itself. Specify CRI 90 or above for every fixture in a study, and ask for R9 (deep red) above 50 — that is the value that governs whether skin tones look healthy on a video call. Cheap fixtures quote a CRI figure and stay silent on R9.
4. Glare — UGR below 19, and no bare source in view
Unified Glare Rating below 19 is the office benchmark for screen work. In practical residential terms that means: no exposed LED source visible from the seated position, deep-recessed or honeycomb-louvred spots rather than flush panel lights near the desk, and as much of the ambient layer as possible delivered indirectly — bounced off the ceiling or out of a cove — where it cannot be seen directly at all. Our guide to panel vs COB vs strip vs spot lights covers which fixture belongs where; for a study, the short answer is fewer panels and more indirect light.
Fixture geometry — where each light actually goes
This is the part that gets skipped, and it is the part that decides whether the room works. Four layers, each with a position rule.
Layer 1 — indirect ambient (cove or wall wash)
A perimeter cove, or a wall-washing line of light, running along the wall the desk faces or the adjacent one. This is the layer that lifts the room to 300 lux without putting a single visible source into the monitor's reflection. It also softens the contrast between a bright screen and a dark wall behind it, which is the most underrated comfort improvement in a home office. Detailing, depth and driver placement for this layer are covered in how to plan cove lighting in a false ceiling.
Layer 2 — task light over the desk
A linear fixture or a pair of narrow-beam COB spots sitting above and slightly in front of the desk edge, not above your chair. The rule: the light should reach the work surface from the front quarter, so that your head and shoulders never sit between the source and the page. If you write with your right hand, bias the source slightly to the left; the shadow of your own hand is otherwise cast straight across what you are writing.
Mounting height matters. On a standard 750mm desk, an adjustable task fixture wants to sit roughly 400–450mm above the surface if it is a desk-mounted bar, or be aimed from the ceiling at about a 30° angle from vertical if it is a recessed spot. Straight down from directly overhead is the one aim to avoid.
Layer 3 — the front key light
One dimmable, diffused source aimed at the seated position from the front, offset to one side. Nine hours a week of video calls justifies a fixture of its own, and it costs almost nothing to add at the drawing stage. More on the angles below.
Layer 4 — accent and low-level
A shelf or bookcase wash, and something at low level for the evening. This is the layer that turns the room back into part of the house after work, and it is what a Wind Down scene actually dims to.
One geometry rule to carry away from all four: draw the monitor's reflection cone on the ceiling plan. Sit at the desk position, look at the screen, and mark the region of ceiling that the screen can see. Nothing bright goes in that region. It takes two minutes on a drawing and cannot be fixed afterwards without moving fixtures.
Killing reflections: the window, the monitor and the ceiling
Daylight is the best light in the room and the most common source of the problem. Three rules.
- Window to the side, never in front or behind. A window directly behind the monitor forces your eyes to sit between a bright rectangle and a darker screen all day. A window behind your chair reflects off the screen. Perpendicular is correct: daylight rakes across the desk without entering the reflection cone.
- Diffuse rather than block. A sheer motorised curtain scatters direct sun into soft, usable light while keeping the view and the daylight. This matters most on the west-facing windows so common in Hyderabad apartments, where the 3pm to 6pm sun is both blinding and a heat load. A dim-out layer on the same track handles the harshest hour without turning the room into a cave.
- Automate the shading, do not rely on remembering. Curtains that close on a schedule or a sun-position trigger get used; curtains that need a decision at 3pm every afternoon do not. The cooling-load side of this is quantified in smart curtains and energy savings, and the hardware options in motorised curtains.
On the monitor itself, two small things help more than they should: keep the screen's own brightness matched to the room rather than at maximum, and consider a low-output warm strip behind the monitor washing the wall. That "bias light" lifts the wall immediately behind the screen so your eye is not swinging between a bright display and a dark surface — the same contrast principle as the 500:300 lux ratio, applied at close range.
Lighting your face for video calls
A webcam has a fraction of your eye's dynamic range, which is why a room that feels fine looks terrible on camera. Four things fix it, and all four are lighting-plan decisions, not gadget purchases.
- Key light from the front quarter. Roughly 30° to 45° off the camera axis, and slightly above eye level so the shadow under the nose falls downward and short. Straight-on light is flat; overhead-only light puts shadows in the eye sockets and is the single most common home-office look.
- Soft, not point. A wall wash, a diffused spot or light bounced off a light-coloured wall in front of you. A bare narrow-beam source produces hard-edged shadows that a camera exaggerates.
- Nothing bright behind you. A window or a bright cove directly behind your head makes the camera expose for the background and turn you into a silhouette. If the room's layout forces a bright backdrop, the key light has to be strong enough to balance it — easier to simply not sit that way.
- 3500K to 4000K, and consistent. Mixing 2700K lamps with 5000K daylight through a window gives one warm cheek and one cool one, and no camera white balance can fix a split like that. Tunable fixtures let you match the room to whatever the daylight is doing.
Set that combination once, save it as a Meeting scene, and the entire arrangement becomes one button pressed thirty seconds before the call.
The four scenes a study needs
Individual dimmers for four layers means twelve small decisions every time you sit down, which in practice means nobody adjusts anything and the room runs at one setting forever. Scenes are what convert a good lighting plan into a room people actually use properly. Four cover almost every study:
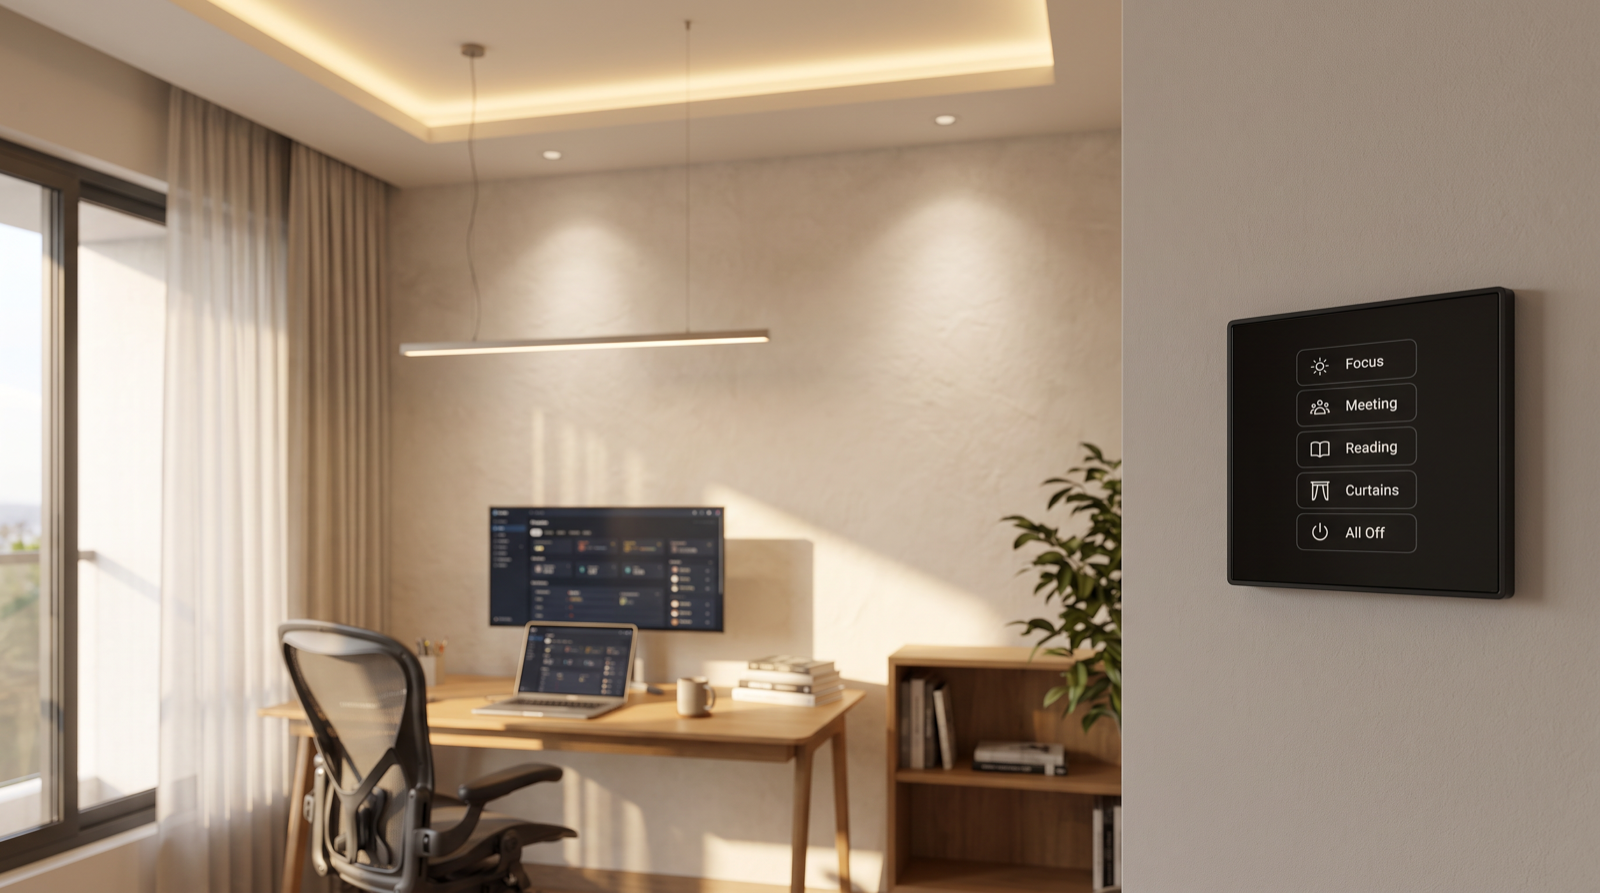
- Focus — ambient cove at 70% and 4000K, task layer at 100%, accent off, sheer curtain closed. Bright, neutral, glare-free. The default weekday setting.
- Meeting — key light on at 80%, ambient at 60% and 3500K, task layer down to 40% so it does not blow out the desk in frame, curtains to the diffusing position. One press before a call.
- Reading — ambient at 40% and 3000K, task layer at 70% but aimed at the chair rather than the desk, accent shelf wash on. For the part of the day that is not screen work.
- Wind Down — everything at 20–25% and 2700K, accent only, task off. The room stops being an office. Followed by All Off at the door.
Where those scenes live matters as much as what is in them. A study is a room you enter with a laptop in one hand and a coffee in the other, which is exactly the situation in which unlocking a phone to find an app is worse than a switch. A wall keypad at the door with engraved scene labels is the right control surface here, with the app as a secondary. That argument in full is in why scene-based automation beats app-only devices, and the placement logic for keypads room by room is in how to plan keypads in a home.
Electrical points to leave before the ceiling closes
Everything on this list is inexpensive during construction or renovation and disproportionately expensive afterwards.
- Four separately switched, dimmable circuits to the study ceiling — ambient cove, desk task, key light, accent — not one lighting circuit split at the switch.
- A neutral at every switch point, and control cabling pulled back to the automation panel for each dimmable circuit.
- Driver locations that stay accessible — a service hatch or a reachable void above a wardrobe. Drivers fail long before LED strips do.
- A 5A point behind the desk, at desk-back height, for a monitor bias strip and desk accessories — not at skirting level where the cable then runs up the wall.
- Power at the top of the window for the curtain motor: a point within about 300mm of the track end, with neutral, on the correct side for the motor's chosen orientation.
- A keypad back-box at the door, at standard switch height, on the handle side rather than the hinge side.
- Data cabling to the desk if the room is going to carry calls — a wired connection is still the cheapest fix for a call that keeps freezing.
If the house is at the structural stage, the sequencing for all of this is set out in when to plan home automation during construction, and the broader room-by-room approach in how to plan smart lighting for a new home.
How Pert delivers it — a designed solution, not a DIY kit
Pert is a solutions company: we design and install. For a study, that starts with a site visit to measure the room, the window orientation and the actual seated position — because the monitor's reflection cone cannot be guessed from a floor plan. We then issue a lighting drawing that fixes the four layers, the lumen and CCT target for each, fixture type and beam angle, the aim angles for task and key lights, driver type and service access, and the control cabling, all handed to your electrician and false-ceiling contractor together rather than separately. We supply CRI 90+ tunable and dimmable fixtures, smart COB and cove lighting, motorised curtain tracks and the wall keypads, install and commission them, and then calibrate the scenes in the finished room — seated at the desk, at the times of day the room is actually used, because a Focus level that reads correctly on a drawing rarely reads correctly at 3pm in August.
That last step is where a designed installation separates itself from a box of parts. If you are evaluating providers, asking each one to name the lux target, the CCT and the aim angle for your desk is a fast test of whether they design or merely resell — our guide to the best home automation companies in Hyderabad covers the rest of what to check before you sign.
Planning a study or home office in Hyderabad? Get the layers, lux targets, fixture positions and control points fixed on the drawing — reflections and glare are geometry problems, and geometry cannot be changed after the ceiling closes. Request a consultation →
Frequently asked questions
How many lux do you need on a home office desk?
Aim for about 500 lux measured on the desk surface for normal screen and paperwork, rising to around 750 lux if you regularly read fine print or do detailed drawing work. The rest of the room should sit around 300 lux so the contrast between the bright desk and the surrounding walls stays comfortable. A common mistake is chasing a single very bright ceiling light: that gives a hot pool under the fixture, a dark perimeter, and eye strain by mid afternoon. The correct approach is layered — indirect ambient light to lift the whole room, plus a dedicated dimmable task layer over the desk.
What colour temperature is best for a home office?
Use 4000K neutral white for the working part of the day. It keeps you alert without the clinical blue-white feel of 5000K and above, and it renders both a screen and printed paper accurately. In the evening, shift the same fixtures down to 3000K or 2700K so the room stops signalling that it is still a workplace. This is exactly what tunable-white fixtures are for — one set of lights that runs at 4000K during work hours and warms up automatically after sunset, rather than two separate installations.
How do I stop lights and windows reflecting in my monitor?
Three rules solve almost every case. First, place the desk so the window is to your side rather than in front of or behind you — a window behind the monitor makes the screen look dark against a bright background, and a window behind your chair reflects straight off the glass. Second, never put a ceiling fixture directly behind your head in the monitor's reflection cone; move spots forward and to the sides so they light the desk at an angle. Third, control the window itself with a sheer motorised curtain that diffuses direct sun without blacking out the room, which matters most for west-facing Hyderabad windows between 3pm and 6pm.
What is the best lighting setup for video calls from home?
You need a soft key light in front of you, roughly 30 to 45 degrees off the camera axis and slightly above eye level, at around 3500K to 4000K. Ceiling light alone is the single most common problem: it comes straight down, casts shadows into the eye sockets and under the nose, and makes everyone look tired. In a planned study we handle this with a wall-washing fixture or a diffused spot aimed at the seated position from the front quarter, dimmable and saved into a Meeting scene together with a slightly warmer ambient level, so one button on the keypad sets up the whole room before the call starts.