
In this guide
- Why homes skip the false ceiling — and what it really costs
- Four ways to light a bare slab ceiling
- How a 48V magnetic track system actually works
- The numbers: heights, spacing, setbacks and loads
- Where the wiring and drivers go when there is no void
- Keeping full scene control on a slab ceiling
- Retrofitting into a finished home
- Pre-wiring checklist
- How Pert delivers it (designed, not DIY)
- FAQs
A false ceiling is a technique for hiding fixtures, not a prerequisite for good lighting and certainly not a prerequisite for automation. The intelligence in a modern lighting system lives in the driver and the control layer, not in the plasterboard. This article is part of our wider coverage of home automation in Hyderabad, and it deals with the case we are asked about constantly and that almost no lighting guide addresses: what to do when there is nothing above you but a painted slab.
Why homes skip the false ceiling — and what it really costs
The decision is usually driven by one of four things, and it is worth being honest about which one applies to you, because it changes the answer.
- Height. This is the big one. A full gypsum ceiling built to house recessed downlights drops the finished level by 200–350mm: you need roughly 100–150mm of clearance above the fixture body, plus framing and board. In a Hyderabad apartment with a 9ft 6in (2.9m) slab-to-slab height, that finishes you at about 8ft 6in, which is exactly where a room starts to feel low and slightly oppressive. A surface-mounted track costs you only the profile height, typically 25–40mm.
- Cost and time. Framing, boarding, taping, two coats of putty and paint on a full ceiling is a meaningful line item and adds one to two weeks to the programme, plus a dusty trade in a finished flat.
- Design intent. Some interiors genuinely want the slab expressed — a flat white plane, or a fine skim over concrete, with the lighting reading as slim black hardware rather than as invisible holes.
- You do not own the building. In a rented flat a false ceiling is not on the table at all. Our guide to home automation for rented apartments in Hyderabad covers that case more broadly.
What you actually give up is not brightness or control. It is concealment and service space. With no void you lose the place where drivers sit, where cables cross a room freely, where a cove hides a strip, and where you can open a small hatch and reach a failed component. Every one of those has a solution, but each has to be designed rather than assumed — which is precisely why slab-ceiling homes go wrong when they are left to a site electrician working without a lighting layout.
One middle path worth knowing: a peripheral drop. Instead of a full false ceiling, run a 250–450mm wide gypsum band around the room's perimeter only, dropped 150–200mm. The centre of the room keeps its full height, you get a proper cove for indirect light and a small void for drivers and cabling at the edges, and you have lost almost nothing. For homes that want that route, how to plan cove lighting in a false ceiling covers the detailing.
Four ways to light a bare slab ceiling
Good lighting is layered regardless of what is overhead. On a slab, these are the four tools you build the layers from, and a well-planned room uses at least three of them.
1. Magnetic track — the workhorse
A slim aluminium rail, surface-mounted or suspended, carrying interchangeable magnetic modules. This one system gives you narrow spots for accent, wide floods for ambient, linear bars for a soft general wash, grille heads for low glare and small pendants — all on the same rail, all dimmable together or in groups, and all repositionable later without touching the ceiling. For a home with no void, smart magnetic track lighting is usually the backbone of the plan, because it concentrates all the ugly problems (cable routes, feed points, module positions) into one clean line instead of twenty separate holes.
2. Surface-mounted linear profiles
A continuous linear profile fixed directly to the slab gives even, comfortable light over a dining table, a kitchen counter, a corridor or a work desk. Choose an opal diffuser rather than a bare strip: on a low ceiling the fixture sits close to the eye and a bare LED strip becomes a visible line of dots. A profile with a 30° or 45° cut-off louvre is even better in a room where people will be lying down or reclining.
3. Surface-mounted COB spots and cylinders
Individual surface downlights and cylinder fittings do the job of recessed spots where a track run would be awkward — a bathroom, a small utility, a single wardrobe wash. Body depths run roughly 50–110mm, so they are more visible than a track module, but they need only one ceiling point each. Pair them with proper dimmable and tunable smart lighting so they behave the same way as everything else in the scene.
4. The vertical layer — wall lights, pendants and floor lamps
This layer matters far more without a false ceiling than with one, and it is the trick most people miss. When the ceiling cannot do everything, push light onto walls. Wall-mounted uplights, a wall washer on the feature wall, pendants at 750–900mm above a dining table, and switched lamp circuits at sofa and bedside all reduce how hard the ceiling has to work — which in turn lets you use fewer, gentler ceiling fixtures and avoid the harsh, over-lit look that plagues surface-mounted schemes. Our guide to wall washing and accent lighting covers the geometry, and panel vs COB vs strip vs spot lights compares the fixture families.
How a 48V magnetic track system actually works
Worth understanding properly, because it is unlike a traditional 230V track and the differences are the reason it suits homes.
- The rail carries 48V DC, safe extra-low voltage, along two conductors. Modules are safe to handle and can be moved with the system live, which is a genuine practical difference when you are aiming lights in a finished room.
- A remote driver feeds the rail. Typical residential drivers are rated 100W, 150W or 200W. Size to about 80% of connected load — a run drawing 120W wants a 150W driver, not a 150W run on a 150W driver. Headroom is what keeps it cool and long-lived.
- Modules clip on magnetically anywhere along the rail. Spots are usually 6–12W at beam angles of 15°, 24° or 36°; linear bar modules run 10–20W; grille and multi-head modules sit between. You can change the mix a year later without an electrician.
- Mounting comes in three forms: surface (screwed to the slab, profile height 25–40mm — the default with no false ceiling), suspended (dropped on adjustable wires, excellent over dining tables and in double-height spaces), and recessed (needs a 35–45mm deep slot, so only if you do have a partial drop).
- Long runs need more than one feed. Beyond roughly 4–5 metres, voltage drop starts to show as a visible dimness at the far end. Plan an additional feed point, or split the run into two driven sections.
- Budget the load per metre. Most 48V rails are rated around 100–150W per metre maximum, but a residential run rarely needs more than 30–50W per metre. If your layout needs more than that, the problem is usually too many spots rather than an undersized track.
The flexibility is the real argument for it in a home. Furniture moves, artwork changes, a dining table shifts 400mm during the final layout. On a recessed scheme that means new holes and a patched ceiling. On a magnetic track it means sliding a module along the rail.
The numbers: heights, spacing, setbacks and loads
These are the specifications worth dimensioning on the drawing rather than leaving to site judgement.
- Track position for a wall wash: 600–900mm off the finished wall face, with spot spacing roughly equal to the setback. Grazing a textured wall is the opposite — bring the rail to 150–250mm.
- Spot spacing along the rail: 600–900mm on centre for general lighting on a 9–10ft ceiling. Closer than about 450mm and you are paying for overlap; wider than 1200mm and you get visible pools with dark gaps between.
- Suspended track over a dining table: bottom of the fixture 750–900mm above the table top, and keep the rail within the table footprint so nobody walks into it.
- Corridor track: a single central run, modules at 900–1200mm centres, aimed straight down or gently towards one wall. Corridors read better lit on the walls than on the floor.
- Ambient target: 100–150 lux in living areas, 300–500 lux on kitchen and study work surfaces, 50–100 lux in bedrooms at the ambient layer. These do not change because the ceiling changed.
- Glare is the real risk. A surface fixture sits 25–40mm lower and is directly in view, so specify deep-recessed or honeycomb-louvred modules with a cut-off of at least 30°. This single choice is the difference between a scheme that looks like a boutique and one that looks like a showroom floor.
- Beam angle: 24°–36° for general, 15° for accent, 60°+ flood for a soft wash. On a low ceiling, err wider than you would with a false ceiling — narrow beams from a low mounting height produce hard, small pools.
- CCT: 2700K–3000K in living and bedrooms, up to 4000K for kitchen and study task areas. Keep one CCT per room. Our colour temperature guide works through it room by room.
- CRI 90+ with R9 above 50. Surface fixtures are visible objects in the room, and the light they throw lands on your walls and furniture without a diffusing cove to soften it, so quality of colour rendering shows more, not less. LED specs explained covers what to check.
For the underlying geometry — how spacing, mounting height and beam angle interact — downlight spacing and beam angles applies to surface fixtures just as it does to recessed ones, and how to read a reflected ceiling plan shows how all of this should appear on paper before anyone drills.
Where the wiring and drivers go when there is no void
This is the section that decides whether the installation is a quiet success or a permanent irritation, and it is where most slab-ceiling jobs fail.
Cable routes
With no void, cables must be either chased into the slab soffit and plastered over (only feasible before finishing, and limited by how much you may cut into a structural slab — always check with the structural consultant, and never cut across reinforcement), run inside the track profile itself, which is the elegant option and another argument for consolidating onto rails, or run in slim surface casing painted to match, which is honest and acceptable in a utility area but rarely acceptable in a living room. The right answer is almost always to design the layout so that a single wall-to-ceiling entry point feeds a rail, and everything else travels inside the rail.
Driver locations
Drivers fail long before LEDs do. Every driver needs to be reachable without breaking anything. The positions that work in practice:
- The loft space above a wardrobe or above kitchen overhead units — the single most useful service void in an Indian home, and usually already there.
- A dedicated ventilated service box above a door, in a utility, or inside a store, with a removable cover.
- A local drop box — a small gypsum box over one corner or along one short edge, 200mm deep, doing the job of a false ceiling in the 2% of the room where it does not matter.
- The electrical panel niche or a distribution box, when the run is short enough that voltage drop is not an issue.
What fails: casting drivers into the slab, sealing them behind fixed panelling, or stacking several tightly into an unventilated pocket. Heat is what kills drivers, so give each one air and access. And whatever the choice, it belongs on the drawing with a name and a location, not decided by whoever is holding the drill. Poor driver selection is also the usual cause of low-level flicker, which is far more visible on a low, surface-mounted fixture — why LED lights flicker when dimmed covers how to avoid it.
Keeping full scene control on a slab ceiling
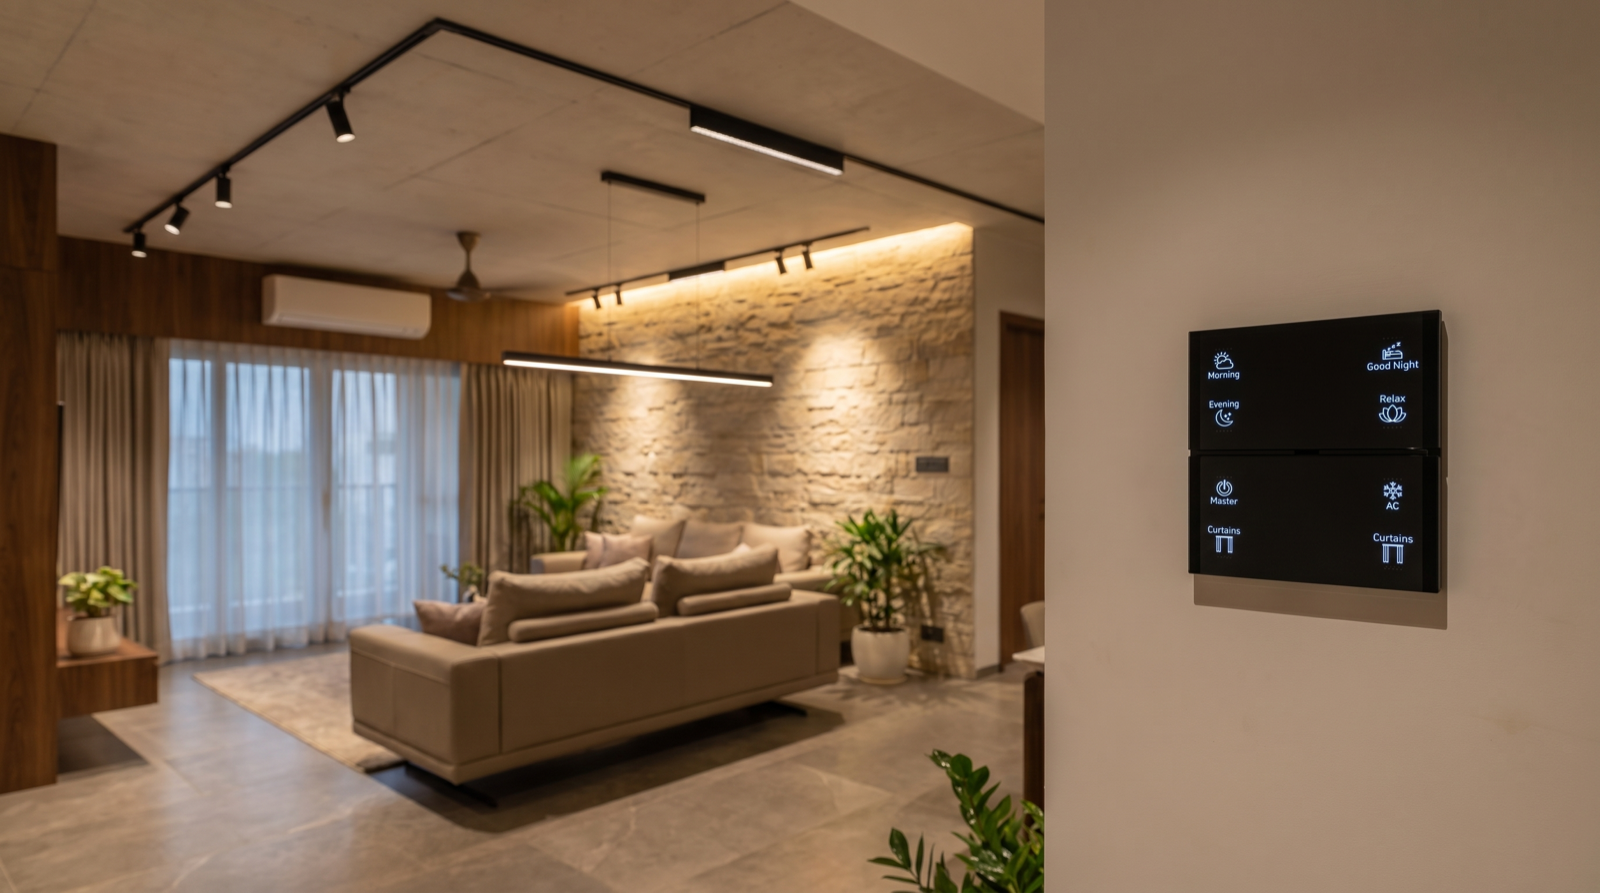
Nothing about automation changes. The control layer sits between the wall and the driver, so it is entirely indifferent to what is above your head. What does change is that grouping matters more, because you typically have fewer, more visible fixtures and each one is doing more work.
A typical living room on a magnetic track is wired as three dimmable channels rather than one: the ambient floods, the accent spots on the feature wall, and the linear or pendant layer over the seating or dining area. That is the minimum that lets a single rail behave completely differently across the evening:
- Morning — floods at 80% at 3500K, accents off, curtains open. The room reads bright and neutral.
- Evening — floods at 35%, accents at 100% on the stone wall, linear over the dining table at 60%. This is the scene that makes a surface-mounted scheme look designed.
- Movie — floods off, accents at 15%, everything warm at 2700K, blackout curtains closed.
- Goodnight — all lighting off, a 5% path level left on the corridor rail, curtains closed and home security armed.
These belong on a wall keypad at the room entrance, not buried in an app — a point argued in full in why scene-based automation beats app-only devices, with the layout mechanics in how to plan keypad layouts and engraving. The same scenes drive motorised curtains, and in a slab-ceiling home the curtain track deserves early attention too, since there is no pelmet void to hide it in: plan for a slim ceiling-fixed track or a wall-mounted bracket with a fascia, decided at the same time as the lighting.
Retrofitting into a finished home
Most slab-ceiling enquiries we get are for homes that are already occupied, and this is where surface systems genuinely shine. Because a magnetic track needs one electrical point per run rather than one per fixture, an entire living room can often be converted from a single existing ceiling rose or fan point, with the rail concealing the cabling from that point outward. There is no cutting, no dust beyond a few anchor holes, and a room can typically be done in a day.
Two constraints to know going in. First, the existing ceiling point dictates where the run can start, so the layout is designed around it rather than the other way round; occasionally one short surface conduit run is unavoidable, and it is better to agree that up front than to discover it mid-installation. Second, wireless control becomes more attractive in a finished home because pulling new control wiring to keypad positions may not be practical — the trade-offs are set out in wired vs wireless home automation. If the retrofit is part of a broader renovation, can you add home automation during renovation in Hyderabad covers the sequencing.
Pre-wiring checklist
If your slab is still bare, take this to your interior designer and electrician before any conduit is laid:
- A lighting layout drawn on the slab plan, with every track run dimensioned from the finished wall face — not from brickwork, since cladding and panelling can add 40–75mm.
- Mounting method named per run: surface, suspended (with drop height) or recessed into a partial drop.
- Feed points marked, with an additional feed on any run beyond 4–5m.
- Every driver location named, accessible and ventilated — loft, service box, drop box or panel niche.
- Circuit grouping shown: at minimum ambient, accent and task as separate dimmable channels per room.
- Module schedule per run — spot, flood, grille, linear — with wattage, beam angle and CCT against each.
- Anchor points confirmed against the structural drawing where fixing into the slab soffit.
- Curtain track fixing method decided at the same time, since there is no pelmet void to fall back on.
- Keypad points at every room entrance and bedside, with wall boxes at the right height before plastering.
- Total connected load per run calculated, and drivers sized at roughly 80% of it.
If this is part of a larger exercise, how to plan smart lighting for a new home is the wider sequence to follow, and living and dining room lighting layers shows how the layers work together once the fixtures are chosen.
How Pert delivers it — a designed solution, not a DIY kit
Pert is a solutions company: we design and install, and we do not hand over a carton of rails and modules with a manual. On a home with no false ceiling that means a site visit to measure actual slab heights and find the real service voids, a lighting layout that dimensions every run, feed point, module position, beam angle, CCT and driver location on the same drawing your electrician and interior designer work from, coordination with the structural consultant before anything is chased into a slab soffit, professional installation and aiming, and scene tuning done in the finished room after dark.
That last step matters more here than anywhere. Surface fixtures are aimed by hand, and the correct aim depends on where the sofa actually ended up and where the artwork was actually hung. A track aimed during construction is a track pointing at the wrong thing by handover. If you are still comparing providers, our guide to the best home automation companies in Hyderabad covers what to check before you sign.
Skipping the false ceiling in your Hyderabad home? Get the track runs, feed points, driver locations and dimming circuits designed before the conduits go in — on a slab ceiling there is no void to hide a mistake in later. Request a consultation →
Frequently asked questions
Can you have smart lighting without a false ceiling?
Yes, completely. A false ceiling hides fixtures; it is not a requirement for automation. Magnetic tracks, surface linear profiles, surface COB spots, wall lights and pendants all dim, tune and sit on scenes exactly as recessed downlights do, because the intelligence lives in the driver and the control system. What changes is planning rather than capability: you lose the void that hides drivers, junctions and cable runs, so those need named, accessible locations designed in before the electrical work starts.
How much ceiling height does a false ceiling actually take away?
A full gypsum ceiling built for recessed downlights typically drops the finished level by 200–350mm — roughly 100–150mm of clearance above the fixture body plus framing and board. In a Hyderabad flat with a 9ft 6in slab-to-slab height, that finishes you at about 8ft 6in. A surface-mounted magnetic track costs only the profile height, usually 25–40mm, and a suspended run can sit at any height you choose. That roughly 250mm difference is the main reason compact and older homes skip the false ceiling entirely.
How does a 48V magnetic track light system work?
An aluminium rail carries safe extra-low-voltage 48V DC on two conductors, fed by a remote driver of typically 100W, 150W or 200W sitting in an accessible service position. Spots, floods, grille heads, linear bars, wall washers and small pendants clip anywhere onto the rail by magnet, with no tools, and can be moved or swapped later in seconds. Size the driver to about 80% of connected load so it runs cool, and plan a second feed on runs beyond 4–5m to avoid visible voltage drop at the far end.
Where do the LED drivers go when there is no false ceiling?
This question decides whether the installation is a success or a permanent annoyance, and it belongs on the drawing rather than on site. Drivers fail long before LEDs do, so each needs to be reachable without breaking a wall or ceiling. What works: the loft above a wardrobe or kitchen overheads, a ventilated service box above a door or in a utility, a shallow local drop box over one corner, or the panel niche on short runs. What fails: casting drivers into the slab, sealing them behind fixed panelling, or stacking them into an unventilated pocket, since heat is what kills them. Pert names every driver position on the layout and photographs each at handover.