
In this guide
- What a 48V magnetic track actually is
- Recessed, surface or suspended — and the cutout numbers
- The module families and what each one is for
- Watts per run, drivers and voltage drop
- Where the track goes: layout rules that decide the room
- Six mistakes we are called in to fix
- Wiring it for dimming, tuning and scenes
- How Pert delivers it (designed, not DIY)
- FAQs
Ten years ago, a ceiling in a new Hyderabad flat had two options: a grid of downlights, or a grid of downlights with a cove. Magnetic track changed that, and it has moved quickly from showrooms into living rooms, dining areas and entrance foyers. This article is part of our wider coverage of home automation in Hyderabad, and it deals specifically with specifying a magnetic track system properly — the profile, the modules, the load and the control — rather than leaving it to whoever supplies the ceiling.
What a 48V magnetic track actually is
A magnetic track is an aluminium channel with two copper busbars running its full length, fed at 48V DC from a remote driver. Every light module has magnets and spring contacts on its back. You place the module anywhere along the channel, it snaps into position, and it powers up. There is no wiring at the fixture, no tool, and no fixed position — a spot that lights a painting today can be slid 400mm left next year when the painting moves.
Three practical consequences follow from that, and they are the real reasons to choose it:
- It is genuinely re-arrangeable. Unlike a downlight, which is a hole in the gypsum forever, a track module has no fixed home. Rooms whose furniture layout is not final — a living room, a foyer, a room that may become a study — benefit most.
- It is safe to touch. 48V DC is extra-low voltage. Re-positioning a module is not an electrical job, which matters because the whole point is that the layout can change after handover.
- One line, many fixture types. A single 1.5m run can carry a narrow spot on artwork, two wider floods over the seating, a linear bar washing a wall and a small pendant over a side table — with one visual language and one dimming behaviour instead of four different fittings.
What it is not is a cheaper downlight. Per point, magnetic track typically costs more than a good recessed COB spot, and it asks for more planning. It earns that back in flexibility and in the clean, single-line ceiling it produces — not in unit price. If you are still weighing formats generally, our guide to panel vs COB vs strip vs spot lights covers where each belongs.
Recessed, surface or suspended — and the cutout numbers
The same track comes in three mounting families, and this is the first decision because it is the one the ceiling contractor needs from you earliest.
Recessed (trimmed or trimless)
The channel sits inside the false ceiling with only its aperture visible. Typical profiles are 20-35mm wide and 50-75mm deep, which means the false ceiling needs at least 75-100mm of clear drop below the slab to swallow the profile plus the module bodies. A trimmed version has a small visible flange and is forgiving of a 2-3mm error in the cutout. A trimless or plaster-in version is set before the final skim and finishes as a pure slot in the ceiling with no visible edge — it looks considerably better and leaves no room for error, so the cutout width and the exact centre line must be on the reflected ceiling plan, not measured on site. If you have not seen one of those drawings before, how to read a reflected ceiling plan explains what to look for.
Surface-mounted
The profile screws straight onto the slab or onto an existing ceiling, and stands 25-40mm proud. This is the version that makes magnetic track viable in a flat with a 2.9m slab-to-slab height, where a full false ceiling would cost you 150-250mm and leave the room feeling low. It is also the retrofit answer in a finished home: a surface run needs a supply point and fixings, not a demolition. The related trade-offs are covered in how to light a home without a false ceiling.
Suspended
The same profile hung on steel wires at a chosen height — typically 700-900mm above a dining table, or 2.2-2.4m off the floor over an island or a console. Suspended runs read as a design object rather than as ceiling services, and they bring the light closer to the surface it is lighting, which means lower wattages do more work. They need the drop points and the ceiling anchors fixed on the drawing, because moving them later means patching the ceiling.
One number to settle at the same time: run length. Profiles usually come in 1m and 2m sections joined by connectors, so a 3.2m run is a 2m plus a 1m plus a cut, and the joint should be planned to land somewhere unremarkable rather than in the middle of the sightline from the sofa. L-shaped and T-shaped corner connectors exist and work well, but every corner is a point where the busbar continuity, and therefore the voltage drop, needs checking.
The module families and what each one is for
The catalogue is where most homeowners lose the plot, because a magnetic track supplier will show you forty modules. In a house, five families do almost all the work.
- Spot modules (15-24° beam). The workhorse. Narrow enough to put a defined pool of light on a painting, a stone texture, a console or a dining centrepiece. Typically 6-12W. This is the module that justifies the system — use it on things worth lighting, not on empty floor.
- Flood modules (36-60° beam). Wider and softer, for general fill over a seating area or a walkway. Typically 8-15W.
- Grille or honeycomb spots. A spot with a deep anti-glare baffle, recessing the LED 20-30mm inside the body so you see the light and not the source. In a living room where people sit and look up, this is the module that keeps the ceiling from becoming a row of bright dots. Worth the small extra cost almost everywhere at seated eye level.
- Linear or bar modules. A short diffused strip, usually 200-600mm long at 10-20W, giving a soft continuous line instead of points. Excellent for a corridor, over a kitchen counter, or as the ambient layer alongside spots on the same run.
- Pendant and magnetic-mount decorative modules. A small hanging fixture that clips to the same track, so a dining pendant can move when the table moves. Keep these to one or two per run — the charm disappears when a track looks crowded.
Two specifications apply across all of them. Insist on CRI 90+, because track light is usually accent light landing on wood, stone, art and fabric, and poor colour rendering shows up worst exactly there. And decide early between fixed 2700-3000K and tunable white modules — tunable costs more per module but lets a dining run sit at 4000K for homework and 2700K at dinner. For choosing beam angles against ceiling height, the arithmetic in downlight spacing and beam angles applies to track spots unchanged.
Watts per run, drivers and voltage drop
This is the section that gets skipped, and it is the one that produces complaints six months later.
A magnetic track run is fed by a remote 48V constant-voltage driver, usually sitting in the automation panel or in a service location above the ceiling. Three rules:
- Size the driver with headroom. Add up the module wattages and keep the total at roughly 80 percent of the driver rating. A run of six 9W grille spots plus one 15W linear bar is 69W, which wants a 100W driver rather than a 75W one. A driver run permanently at its ceiling gets hot, and heat is what decides whether it is still working in year four.
- Respect the per-feed limit. On domestic runs, plan around 100-150W of modules per feed point. Beyond that, either split the run into two circuits or inject power at a second point along the channel.
- Watch voltage drop on long runs. 48V DC over a 3m or 4m busbar loses voltage along its length, and the symptom is that modules at the far end are slightly dimmer and marginally cooler in colour than those near the feed. On runs beyond about 3m, feed from both ends or add a mid-run injection. This is the single most common cause of "why is that end of the track different?" after handover.
The driver must also be dimmable and matched to the control system — a non-dimmable 48V driver turns an expensive flexible system into an on-off switch. Driver quality is also what decides whether the track flickers at low levels, which we go into in why LED lights flicker when dimmed. Finally, every driver needs an accessible service point. Sealing a 48V driver into a closed ceiling with no hatch means that when it fails — and drivers fail long before LEDs do — the repair involves cutting gypsum. How these loads are grouped into channels at the panel follows the same logic as the rest of the house, set out in dimmer channels and lighting loads.
Where the track goes: layout rules that decide the room
A track is a line, and a line drawn in the wrong place is far more visible than a downlight in the wrong place. Five rules we apply on every plan:
- Run it parallel to what it lights, 600-900mm off the wall. A track 300mm from a feature wall produces a steep, scalloped graze with hot patches at the top. A track 600-900mm out lets a 24° spot cover the wall evenly from skirting to ceiling. If the wall is the point of the room, this number matters more than any other on the page — the technique is covered in wall washing and accent lighting.
- Align the track with architecture, not with the furniture of the day. A run should follow a wall line, a ceiling joint, or the axis of the room. Furniture moves; a slot in the ceiling does not.
- Keep the track out of the TV reflection zone. No module should be positioned where its image can land in the screen — practically, keep the run at least 600mm clear of the area directly in front of the television, as covered in TV wall lighting and automation.
- One or two runs per room, not four. The clean ceiling is the whole aesthetic argument for magnetic track. Three or four parallel lines makes a home look like a retail showroom.
- Leave 20-30 percent of the run empty. This is the rule people resist and later thank us for. A track filled end to end with modules has no flexibility left, which is the one thing you paid for. Empty channel also reads as intentional; a crowded one reads as a lighting shop.
On a typical 3BHK we end up with a 2m recessed run in the living room, a 1m suspended run over the dining table, a short 1m surface run in the entrance foyer, and conventional recessed spots or a cove everywhere else. Magnetic track is a tool for the rooms where flexibility and display matter — it is not a whole-house strategy, and a supplier who proposes it in every bedroom is selling profile by the metre.
Six mistakes we are called in to fix
- The track was ordered before the layout was drawn. A 2m profile arrives on site and gets fitted where it fits, which is usually centred on the ceiling — the one place it lights nothing in particular.
- No anti-glare modules at seated eye level. Plain spots in a living-room track are directly visible to anyone on the sofa. Grille or deep-baffle modules solve it and cost a few hundred rupees more each.
- Undersized or non-dimmable driver. The system works on day one at full output, then flickers at low levels, or the driver runs hot and fails in the second summer.
- No driver access. The driver is above a sealed gypsum ceiling. A component worth a couple of thousand rupees becomes a ceiling-cutting, re-painting job.
- Mixed colour temperatures on one run. Modules bought at different times, from different batches, in a single visible line. On a track, unlike scattered downlights, the difference sits side by side and is impossible to un-see. Buy the full complement, plus one or two spares, in one batch.
- Ganged onto the room's main light switch. The track comes on with everything else at 100 percent, which throws away both the accent role and the scene behaviour.
Wiring it for dimming, tuning and scenes
Magnetic track is an accent and ambience layer, which means its value is almost entirely in being at 30 percent when the room is at 30 percent. That requires four things fixed at drawing stage: a dimmable 48V constant-voltage driver with 20 percent headroom, correctly gauged low-voltage cabling for the run length, an accessible service point for every driver, and a control cable back to the automation panel so the track is its own addressable circuit.
We normally split a living-room track into two or three circuits rather than one, so the accent spots, the linear wash and any pendant move independently. A typical Hyderabad living room ends up roughly like this:
- Morning — track floods at 70% and cooler around 4000K, accent spots off, curtains open.
- Evening — accent spots on the stone wall and art at 80% at 2700K, floods at 35%, cove at 45%.
- Movie — everything on the track off except one linear module at 10%, curtains closed.
- Good Night — track off, pathway light at 5%, curtains closed, security armed.
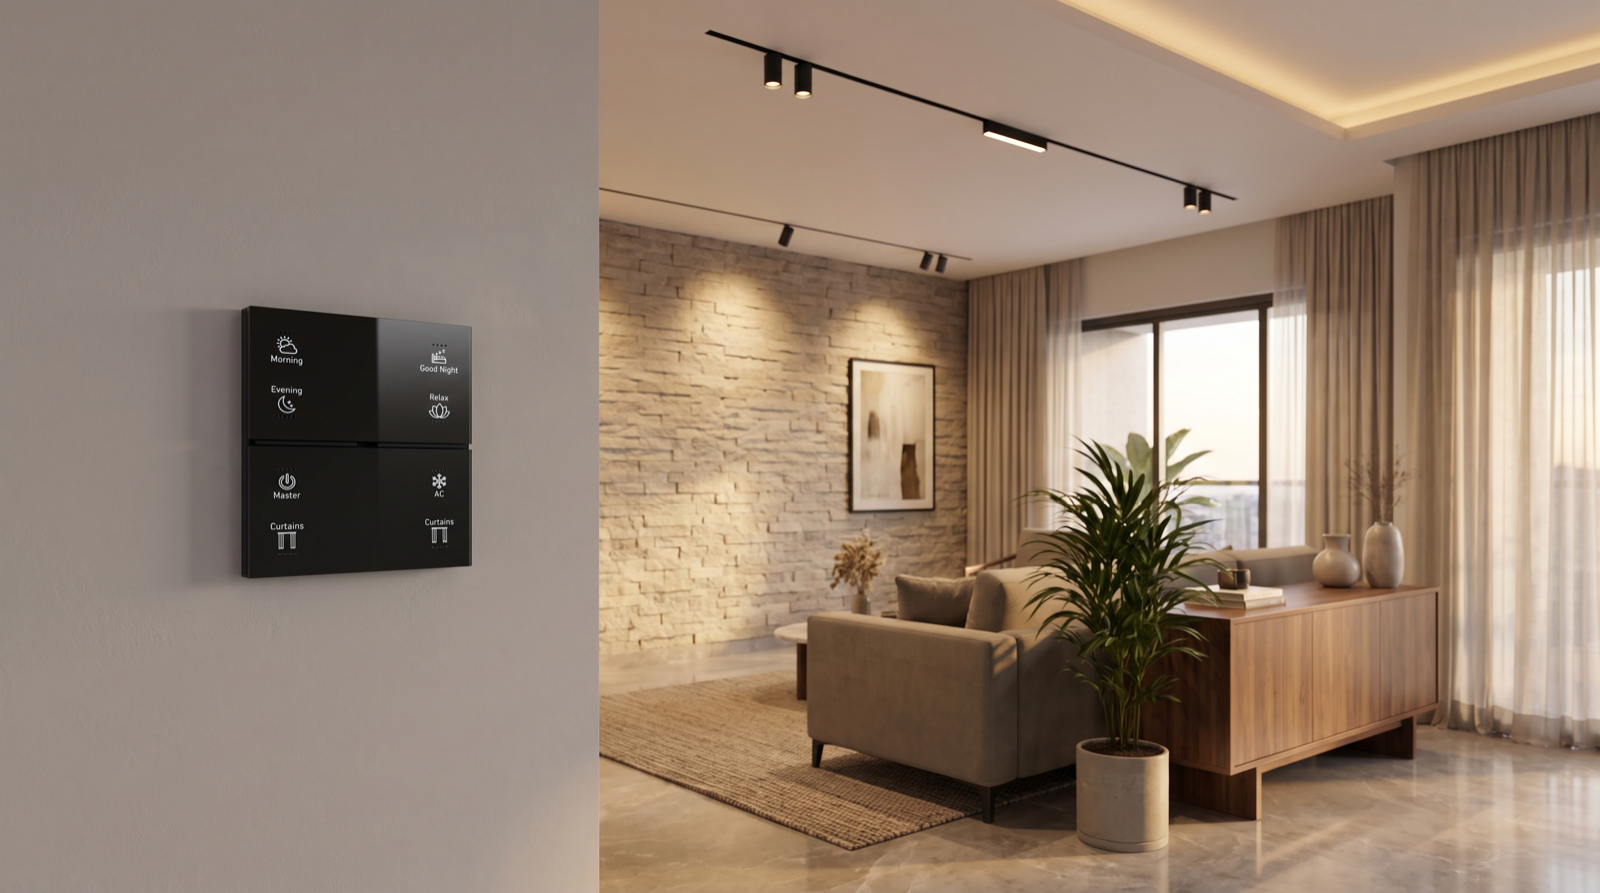
That is driven from a wall keypad at the room entrance rather than only from a phone, so that guests and grandparents use the room as easily as you do. The same scenes bring in motorised curtains and home security, and the underlying dimmable, tunable smart lighting is what lets one track serve a bright weekday morning and a low-lit dinner without changing a single module.
How Pert delivers it — a designed solution, not a DIY kit
Pert is a solutions company: we design and install, we do not hand over a box of profiles and modules. On a magnetic track project that means a site visit to measure slab heights, window positions and the walls worth lighting; a lighting layout that fixes the track centre lines, cutout widths, module types and beam angles, driver locations and feed points on the same drawing your ceiling contractor and electrician work from; coordination with your interior designer before the gypsum is skimmed, because a trimless slot cannot be moved afterwards; professional installation and commissioning; and then scene configuration done in the finished room at night, aiming each module by hand — because the angle that looks right on a plan almost never looks right on the actual painting.
If you are comparing providers before you commit, our guide to the best home automation companies in Hyderabad covers what to check before you sign, and how to read a home automation quotation explains what should be itemised — including whether track profiles, modules, drivers and dimming are priced separately or bundled into a single vague line.
Planning a ceiling in Hyderabad? Get the track centre lines, cutout widths, module schedule and driver feeds designed before the gypsum is skimmed — a trimless slot costs nothing to move on a drawing and a great deal to move afterwards. Request a consultation →
Frequently asked questions
What is magnetic track lighting and how is it different from normal track lights?
A magnetic track is a slim aluminium channel carrying 48V DC on two copper busbars; each module clips on magnetically anywhere along the run, with no tools and no wiring at the fixture. Conventional track lights run at 230V mains with a mechanical twist-lock adaptor. In practice, the 48V system is safe to touch and re-arrange after handover, the profile is much slimmer at 20-35mm wide, and one run can mix spots, grille spots, floods, linear bars and pendants.
How much power can a magnetic track run carry, and what driver do I need?
Plan on roughly 100-150W of modules per driver feed on a domestic run, and keep the total at about 80 percent of the driver rating. Typical modules are 6-12W per spot and 10-20W per 300mm linear bar, so a 2m living-room run of six spots and one bar lands near 70-80W. Runs beyond about 3m should be fed from both ends or injected mid-run, or the far end will look dimmer and slightly cooler.
Does magnetic track lighting work without a false ceiling?
Yes. A surface-mounted profile stands only 25-40mm proud, against the 150-250mm a false ceiling costs you, and a suspended run can sit at any height. Recessed and trimless versions do need a false ceiling or a gypsum pelmet, but the surface and suspended versions are exactly what we specify in older buildings and low-slab apartments.
Can magnetic track lights be dimmed and put on scenes?
Yes, if the driver is a dimmable 48V constant-voltage unit matched to the control system and a control cable runs back to the automation panel before the ceiling closes. Pert then configures the track as its own addressable layer — usually split into two or three circuits — inside scenes such as Morning, Evening, Movie and Good Night, run from a wall keypad.