
In this guide
- How far daylight actually reaches into a room
- What each window orientation does in Hyderabad
- Splitting circuits into daylight zones
- Lux sensors: thresholds, deadbands and where they go
- The two curtain layers and how they should move
- Four daylight scenes with real numbers
- The points to leave before the ceiling closes
- Six daylight mistakes we are asked to fix
- How Pert delivers it (designed, not DIY)
- FAQs
This guide is for homeowners, architects and interior designers working on a home where the windows have already been fixed by the builder or the elevation, and it is part of our wider coverage of home automation in Hyderabad. It assumes nothing about the glass you have; it is about what to do with the light that comes through it.
How far daylight actually reaches into a room
The single most useful number in daylight planning is the one almost nobody measures: useful daylight penetrates roughly 1.5 to 2 times the height of the window head into the room. Not the sill, the head — the top edge of the glass, because that is what sets the angle light enters at. With a typical 2.1m window head, the first 3 to 4m of the room is genuinely daylit and everything beyond that is not, no matter how bright the window looks from inside.
Put real numbers against it. On a clear Hyderabad afternoon, with a light-coloured room and clear glass, you will typically measure something close to this:
| Distance from the glass | Typical daylight (clear afternoon) | What that means |
|---|---|---|
| 0.5m | 2,000 – 5,000 lux | Far above any indoor target. Glare risk on screens and polished surfaces. |
| 1.5m | 800 – 2,000 lux | Comfortably above task level. Artificial light here is pure waste all day. |
| 3m | 300 – 800 lux | Around task level. This is the zone where dimming, not switching, earns its keep. |
| 5m | 80 – 250 lux | Below task level. Needs artificial light even at noon. |
| 7m+ / internal rooms | under 80 lux | Effectively no daylight. Plan as if there were no window. |
Compare that against the levels a room actually needs — roughly 100 to 150 lux for circulation, 150 to 300 lux for general living, 300 lux for dining and kitchen general light, and 500 lux on a desk or worktop — and the picture is stark. For most of the day the front third of a room has five to ten times more light than it needs, and the back third has too little. Those are two different lighting problems in one room, and a single dimmer channel cannot solve both.
Two things reduce the depth in practice and are worth checking on site before you plan anything. A deep balcony or a projection over the window can cut effective penetration by a third or more — very common in Hyderabad apartments, where the "large" living room window opens onto a 1.8m balcony with a slab above it. Dark interiors absorb bounce: a room with a dark wooden ceiling and charcoal walls holds far less daylight at 4m than the same room in off-white, because most of the light that reaches the back of a room has bounced off the ceiling to get there.
What each window orientation does in Hyderabad
Hyderabad sits at about 17.4°N, which gives the sun a steep path: at solar noon in May it is nearly overhead, around 85° above the horizon, while in late December it is closer to 49°. That difference is the whole reason orientation behaves the way it does here, and it is why the same overhang that shades a south window perfectly in summer lets sun in through winter.
| Orientation | When sun enters | Behaviour | What it needs |
|---|---|---|---|
| East | ~6:00 – 9:30am | Low-angle direct sun deep into the room, then bright indirect light all afternoon. Heat load is mild because the house is still cool. | Sheer on a morning trigger; blackout for bedrooms so early sun does not decide when the family wakes. |
| West | ~3:00pm – sunset | The problem orientation. Low-angle sun at eye level, severe glare, fading of fabric and timber, and the peak heat load of the day arriving at the hottest hour. | Two layers, automated. Sheer closing on an afternoon sun trigger, heavier drape available behind it. Non-negotiable in April and May. |
| South | Midday, mostly Nov – Feb | The best-behaved orientation. High summer sun is easily blocked by a 600mm overhang or a deep pelmet; winter sun comes in low and is usually welcome. | Sheer for diffusion. Often needs no automation beyond a comfort trigger. |
| North | Almost no direct sun | Steady, soft, shadow-free indirect light with the lowest heat gain. The most valuable light in the house. | Put desks, study tables and work surfaces here if you have the choice. Sheer optional; blackout only for privacy. |
Two practical consequences follow. First, a home office or study belongs on a north or east wall if the plan allows it, with the desk side-on to the window rather than facing it or backing onto it — the detail is in how to plan home office lighting for work from home. Second, a west-facing living room needs its shading budgeted at the start, not discovered at handover. It is the most common retrofit request we get from families who have already moved in: the room is beautiful and unusable from 4pm to 6pm.
One caveat that matters in Hyderabad's high-rises and gated communities: the tower opposite. A west window with a building 20m away behaves nothing like an open west window, and a north window facing a white tower can get strong reflected glare at specific hours. Stand in the room at 10am and again at 4pm before you finalise anything.
Splitting circuits into daylight zones
This is the decision that makes everything else possible, and it costs almost nothing if it is made before the wiring goes in. Group fixtures by how much daylight they receive, not by how they look on the ceiling plan.
In a room with windows on one side, that means three bands running parallel to the glass:
- Band 1 — the window zone, from the glass to about 1.5m in. This group spends most of the day off or at 10 percent. On its own channel, it can stay off from 9am to 5pm without touching the rest of the room.
- Band 2 — the middle zone, roughly 1.5 to 3.5m in. The interesting one: it needs partial output that tracks the sky. This is where automatic dimming actually saves energy and, more importantly, keeps the room visually even.
- Band 3 — the back zone, beyond about 3.5m, plus any internal corridor or passage off the room. Effectively a windowless room. It runs close to full output whenever the room is in use.
The failure mode when this is not done is familiar: at 3pm the family switches on the living room lights because the sofa at the back is dim, and the downlights over the window-side console come on too, adding nothing and looking odd against a bright window. Split into bands, the same touch brings up only what is needed. The channel-count and load implications are covered in how to plan dimmer channels and lighting loads; as a rule this costs one or two extra channels per major room, which is far cheaper before plastering than after.
Two more grouping rules worth applying at the same time. Coves and downlights stay on separate channels even within a band, because a cove at 20 percent plus downlights off is a completely different daytime look from the reverse. And wall washers on the window wall itself are nearly useless during the day — the wall is already backlit — so they belong with the evening circuits, not the daytime ones.
Lux sensors: thresholds, deadbands and where they go
Daylight control fails for two reasons, and neither is the sensor's quality. It fails because the thresholds were set as a single number, and because the sensor was mounted somewhere that does not represent the room.
Set two thresholds, never one
If a sensor is told "switch at 300 lux", a passing cloud takes the reading across 300 in both directions every few minutes and the lights hunt — the most irritating failure in the whole system, and the reason many families end up disabling automation entirely. Use a gap instead:
| Setting | Typical value | Why |
|---|---|---|
| Upper threshold (dim down / off) | Target lux + 20%, e.g. 360 lux for a 300 lux room | Daylight must clearly exceed the need before the lights give way. |
| Lower threshold (dim up) | Target lux − 10%, e.g. 270 lux | Lights return before the room is visibly dim, not after. |
| Deadband between them | 15 – 20% of target | The gap a cloud has to cross twice before anything happens. |
| Delay before acting | 5 – 10 minutes | Rides out clouds, birds, a passing vehicle's reflection. |
| Fade time | 10 – 30 seconds | Slow enough that the eye adapts and nobody notices the change happening. |
| Minimum output | 10 – 20%, or clean off | Avoids the flicker zone at the bottom of a driver's range. |
Prefer dimming over switching wherever the fixture allows it. A channel sliding from 60 to 35 percent over twenty seconds is genuinely invisible; the same channel switching off is an event the whole room notices. That only works if the drivers hold their output smoothly at low levels, which is a specification question rather than a programming one — why LED lights flicker or buzz when dimmed covers what to insist on.
Where the sensor goes
A daylight sensor should see what the room sees, not what the sky or a lamp is doing.
- Mount it on the ceiling, looking down at a representative work surface — typically 1.5 to 2.5m in from the window, roughly over the middle band.
- Never let a direct sunbeam land on it at any hour. Check the 4pm patch on a west-facing room specifically; a sensor sitting in that patch reads 4,000 lux while the rest of the room sits at 250.
- Keep it at least 1m from any fixture it controls, and never directly above a table lamp, a floor lamp or a cove, or it reads its own output and chases itself.
- Avoid mounting over a glossy or mirrored surface — a polished granite worktop or a glass table sends a moving reflection straight back up into it.
- One sensor per daylight zone, not one per room. A living room with a west window and a deep back wall needs its middle band sensed; the back band does not need sensing at all because its answer never changes.
Where a room has occupancy sensing as well, the two work in series rather than in parallel: occupancy decides whether the lights may be on at all, and the daylight reading decides how bright. Both should always sit under a manual override, which is covered below.
The two curtain layers and how they should move
Shading is the other half of daylight planning and, on a west window, the more important half. You cannot dim the sun, so the only control you have is the fabric in front of it.
Any window that receives direct sun needs two layers on two separate motors. They do unrelated jobs and putting them on one track forces a choice between a dark room and a glaring one:
- The sheer takes a harsh 4,000 lux beam and turns it into a soft, even 600 lux wash across the room while keeping the view and the sense of daylight. This is the layer that does the daytime work, and the one most homes are missing.
- The blackout or dim-out layer is for sleep, screens, privacy and afternoon heat. It is closed rarely, deliberately, and usually for a reason other than light level.
Two tracks need a pelmet or ceiling pocket of roughly 250 to 300mm depth, and that dimension has to be agreed before the false ceiling is closed — it is the most common irreversible mistake on this subject. How to plan curtain pelmets and ceiling pockets has the depths, stack allowances and power positions; how to measure windows and choose tracks and motors covers sizing the motorised curtain itself.
Positions, not just open and closed
A motorised track can hold any percentage, and daylight planning uses that. Useful positions:
| Situation | Sheer | Blackout | Effect |
|---|---|---|---|
| Bright morning, east window | 100% closed | Open | Diffuses low sun; room stays bright and glare-free. |
| Midday, any orientation | Open or 30% | Open | High sun rarely enters; keep the view and the light. |
| 3 – 6pm, west window, summer | 100% closed | 40 – 60% | Cuts glare and a real part of the heat load while keeping the room usable. |
| Daytime video call | 100% closed | Open | Soft frontal light, no blown-out window behind the head. |
| Afternoon nap / bedroom | Closed | 100% closed | Dark room without touching any other window in the house. |
Fabric choice decides whether any of this works. A sheer that is too open does nothing against low western sun; a dim-out lining that is 90 percent opaque is not blackout and will disappoint anyone who asked for a dark bedroom. Weights, fullness and stack are set out in how to choose curtain fabrics for motorised curtains. The cooling-load side — what automated shading is actually worth on a Hyderabad electricity bill — is covered in smart curtains and energy savings.
What should trigger the curtains
In order of how well they work in practice: an astro-clock offset (a fixed number of minutes relative to actual sunrise and sunset for Hyderabad, which drifts correctly through the year, unlike a fixed clock time); an outdoor or window-side sun sensor for bright-day versus overcast-day behaviour; and manual scene buttons for everything else. Keep the automatic triggers few and predictable. A curtain that moves for reasons the family cannot explain gets switched off permanently within a month, which wastes the whole investment.
Four daylight scenes with real numbers
These are worked starting points for a west-facing Hyderabad living room with a 2.1m window head, three lighting bands and two curtain tracks. Exact values get tuned on site with the family; the structure is what matters.
| Scene | Band 1 (window) | Band 2 (middle) | Band 3 (back) | Cove | Sheer / Blackout |
|---|---|---|---|---|---|
| Morning (astro sunrise +30 min) | Off | Off | 40% @ 3000K | Off | Open / Open |
| Daylight (day default, sensor-driven) | Off | 0 – 40%, tracking | 70% @ 4000K | Off | Auto / Open |
| Afternoon Shade (west sun, ~3:30pm Mar – Jun) | Off | 30% | 70% @ 4000K | 20% @ 3000K | Closed / 50% |
| Evening (astro sunset −20 min) | 35% @ 2700K | 50% @ 2700K | 60% @ 2700K | 60% @ 2700K | Closed / Closed |
Three principles are doing the work here. Colour temperature follows the sky — cooler during the day so artificial light does not look orange and dingy against daylight, warm after sunset. That progression is the subject of how to plan circadian lighting at home, and it is the single change families notice most. The back band is always the busiest channel, because it never gets help from the window. And the Evening scene is the first one where Band 1 comes on at all, which is exactly the point: for nine hours a day those fixtures had nothing to contribute.
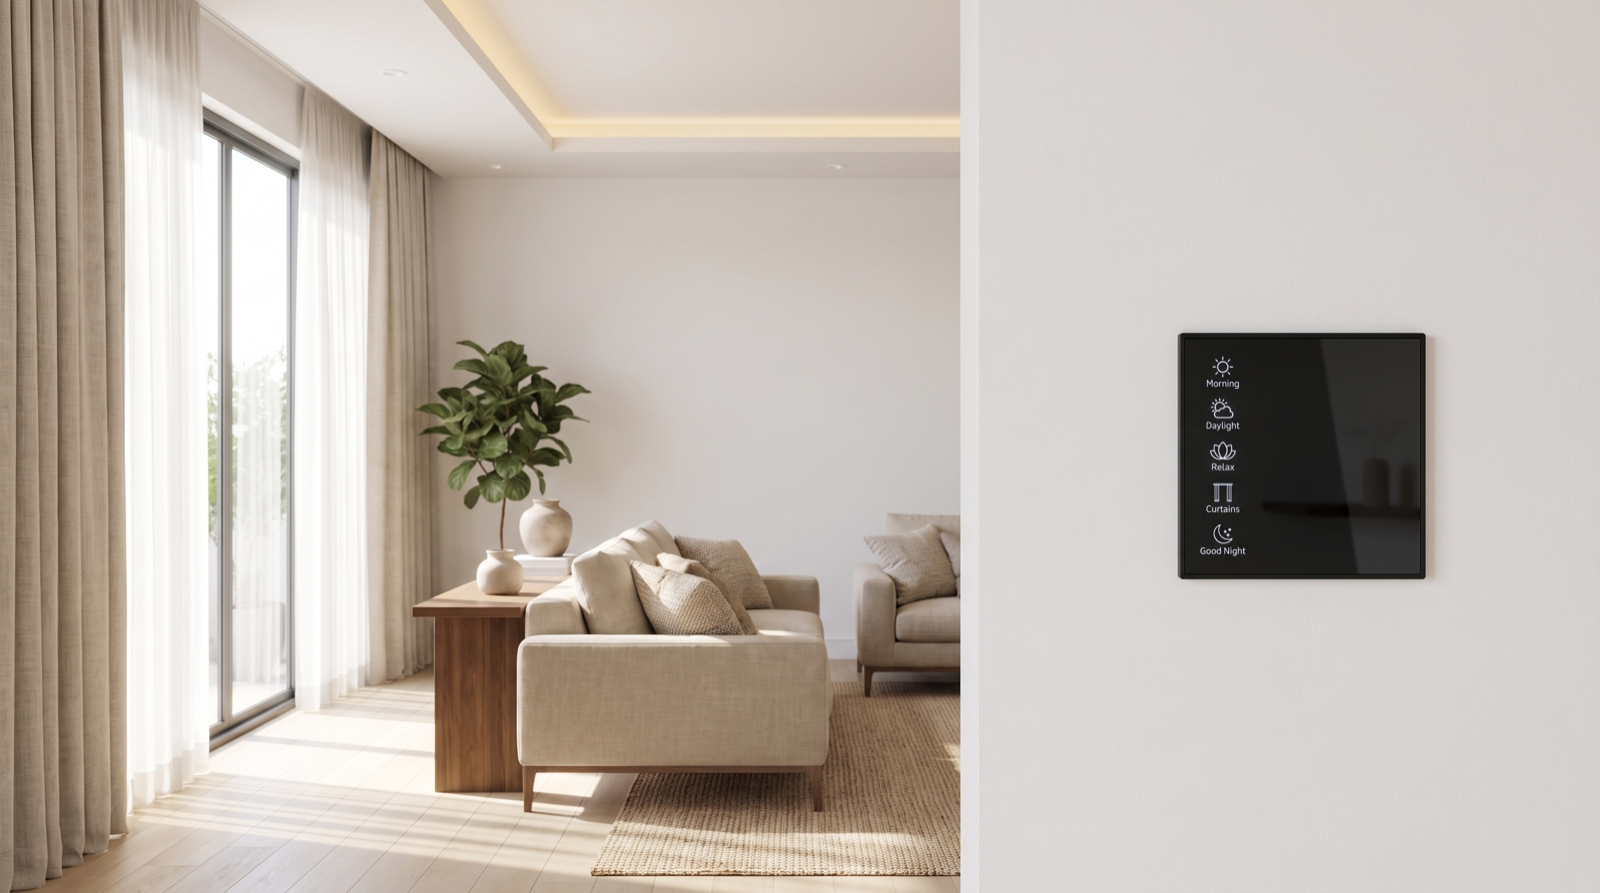
Every automatic behaviour needs a manual way out. A Stella keypad by the main seating with Morning, Daylight, Relax, Curtains and Good Night gives the family a one-touch override that holds until the next scheduled scene — the working compromise between a house that runs itself and a house that argues with you. More worked examples are in how to design home automation scenes.
The points to leave before the ceiling closes
Daylight planning is unusually unforgiving about timing. Almost everything on this list is cheap before plastering and either expensive or impossible afterwards.
- A pelmet or ceiling pocket 250 to 300mm deep on every window that may ever get two curtain layers, with the ceiling drawn around it. Retrofitting a second track into a 150mm pocket is not possible without opening the ceiling.
- A 5A or 16A point inside the pocket at one end of each track, on the side where the motor will sit, along with a spare conduit to the control panel. Decide the motor end now: moving it later means re-cutting the ceiling.
- Separate circuits for each daylight band — window, middle, back — in every room with a significant window. Two extra cables at wiring stage; a rewire afterwards.
- A ceiling point for a daylight sensor 1.5 to 2.5m in from the glass in the main rooms, clear of any 4pm sun patch and at least a metre from the fixtures it will control.
- Conduit for an external sun sensor if the home has a terrace, balcony or accessible façade — one well-placed outdoor sensor can drive shading for a whole west elevation.
- Keypad boxes at the room entries and by the main seating, at the same height as the other switch plates.
- Driver and motor access: a serviceable route to every curtain motor and every dimmer driver, whether that is a removable ceiling panel or a routed path back to the panel. Motors do eventually need attention.
The full pre-plastering list for a new home is in the electrical points checklist for home automation, and if the ceiling drawing is already with you, how to read a reflected ceiling plan shows how to check the band split and the pocket depth before you sign it off.
Six daylight mistakes we are asked to fix
- One curtain track on a west window. The family gets a choice between a glaring room and a cave, picks the cave, and runs the lights at 4pm in a room with a spectacular view they have stopped looking at.
- Downlights over the window band on the same circuit as the room. Guarantees waste and a visually odd room whenever the lights are used during the day.
- A daylight sensor in the sun patch. The system concludes the room is brilliantly lit while the sofa at the back sits at 120 lux, and the family decides "the sensors don't work".
- A single switching threshold with no deadband. Lights hunt on a partly cloudy day, somebody disables the automation, and the whole daylight strategy is lost to one missing setting.
- A shallow pocket decided by the ceiling contractor. The most expensive item on this list, because it is the only one that cannot be corrected without demolition.
- Fixed clock times instead of astro triggers. Sunset in Hyderabad moves by roughly 50 minutes between June and December. A curtain set to close at 6:30pm is right for a few weeks a year and visibly wrong the rest of the time.
How Pert delivers it — a designed solution, not a DIY kit
Pert is a solutions company: we design and install. Daylight is not something you buy a product for — it is a set of decisions taken in the right order, most of them before the ceiling closes. On a typical project we walk the flat or villa at two times of day and note which windows take direct sun and when; mark the daylight bands on the ceiling plan and split the circuits accordingly; specify the lighting for each band with the right drivers and dimming range; set the pelmet or ceiling-pocket depth with the interior designer so two tracks fit; position the motorised curtain motors, power points and sheer and blackout layers; place the daylight sensors where they read the room rather than the sun; commission the thresholds, deadbands, delays and astro offsets on site; and programme the day's scenes onto a Stella keypad so the family always has a one-touch way to overrule any of it. Where the home also has cameras, sensors or a smart main door, the security side shares the same schedule, so shading, lighting and away-mode behaviour stay consistent instead of fighting each other. Then we come back after a season change and re-tune, because a setting that is right in December is not right in May.
If you are still deciding who should design and install this, best home automation companies in Hyderabad sets out what to check — including asking to see a finished west-facing living room at four in the afternoon, not just a night-time photo.
Planning a home in Hyderabad with big windows or a west-facing living room? Send us the floor plan with orientation marked. We will identify the problem windows, split the lighting into daylight bands, set the pelmet depths you need before the ceiling closes, and design shading and scenes that keep the rooms usable all day. Request a consultation →
Frequently asked questions
How far into a room does daylight actually reach?
As a planning rule, useful daylight reaches roughly one and a half to two times the height of the window head into the room. With a 2.1m window head, the first 3 to 4m from the glass is genuinely daylit and the rest is not. Measured on a bright Hyderabad afternoon you will typically see over 2,000 lux within half a metre of clear glass, 300 to 800 lux at 3m in, and under 100 lux at 5m. That is why fixtures near the window and fixtures at the back of the room should never share a dimmer channel — one group has nothing to do at midday while the other still has work to do.
Which window orientation causes the most problems in Hyderabad?
West, by a wide margin. Hyderabad is at about 17.4°N, so from roughly 3pm to sunset a west window takes low-angle sun straight into the room at eye level, and no overhang or pelmet can block it because the sun is below the projection. It brings glare on screens, fading of fabric and timber, and the day's peak heat load at its hottest hour. West glass is the clearest case for automated shading: a sheer that closes on an afternoon trigger with a heavier drape behind it. East windows have the same geometry from about 6 to 9am, but the heat matters less because the house has cooled overnight.
Why do daylight-controlled lights keep switching on and off?
Because the control has no deadband or delay. Set to act at a single value, a passing cloud pushes the reading across it repeatedly and the lights hunt. The fix is a gap between the two thresholds, typically 15 to 20 percent, a delay of 5 to 10 minutes before acting, and fades of 10 to 30 seconds instead of steps. Dimming rather than switching helps too: a light moving from 60 to 40 percent goes unnoticed, while one switching off is obvious. Placement matters as much as settings — a sensor in a direct sunbeam or above a lamp reads its own light and never settles.
Do I need sheer and blackout curtains on separate motors?
For any window that gets direct sun, yes. The layers do different jobs: the sheer diffuses harsh sun into usable light while keeping the view, and the blackout or dim-out layer cuts light for sleep, screens and privacy. On one track you must choose between a dark room and a glaring one. Two tracks on two motors let a scene say sheer closed, blackout open at 4pm and both closed at night. It needs a pelmet or ceiling pocket deep enough for two tracks, typically 250 to 300mm, decided long before the false ceiling is closed.