
In this guide
- Why one ceiling light always fails
- The numbers: lux, CRI, CCT and heights
- Lighting the mirror properly
- The other three layers: ambient, shower, WC
- IP ratings, wet zones and where controls can go
- The night layer, sensors and the exhaust interlock
- Scenes and keypads for a bathroom
- Points to leave before the tiling starts
- How Pert delivers it (designed, not DIY)
- FAQs
A four-bedroom home in Hyderabad usually has four or five bathrooms, and on a typical lighting drawing they carry one fixture each. This article is part of our wider coverage of home automation in Hyderabad, and it deals with the smallest, most scrutinised, most frequently botched room in the house.
Why one ceiling light always fails
A bathroom looks like a simple room to light because it is small. It is actually one of the hardest, because it asks a single space to do four unrelated jobs within about four square metres.
- Grooming at the mirror needs bright, even, colour-accurate vertical light on a face — the only place in a house where the target surface is vertical rather than horizontal.
- Bathing wants the opposite: low, warm, indirect light with no source visible when you are lying down or looking up under a shower.
- Cleaning needs flat, bright, boring light in every corner, once a week.
- The 3am visit needs almost no light at all — and getting this one wrong costs an hour of sleep.
One fixture on one switch cannot serve four briefs whose requirements directly contradict each other. The fix is not more light; it is separately controlled layers, which is the same principle we apply in kitchen lighting and automation, where task and ambient light also pull in opposite directions.
The specific failure of a downlight above the mirror is worth spelling out because it is so common. Light arriving from directly overhead hits the brow ridge, the nose and the chin, and every one of those features casts a shadow downward onto the exact area you are trying to see: the eye sockets, the upper lip, the underside of the jaw. Photographers call the result raccoon eyes and go out of their way to avoid it. Bathroom electricians install it by default, because the ceiling is where the wiring already is.
The numbers: lux, CRI, CCT and heights
Fix these on a drawing and most of the installation resolves itself.
1. Light levels — three targets
Aim for 100 to 150 lux of general ambient light at floor level, 300 to 500 lux measured vertically on the face at the mirror, and 100 to 150 lux in the shower. The vertical measurement at the mirror is the one that matters and the one nobody checks: a bathroom can read 250 lux on the floor and still leave a face badly underlit, because the light is all pointing the wrong way. For a shaving or makeup mirror specifically, the upper end of that range — 400 to 500 lux — is worth having, and worth being able to dim away the rest of the time.
2. CRI 90+, and check R9
Colour rendering matters more here than anywhere else in the house, because the object being lit is a human face. Specify CRI (Ra) of 90 or above, with an R9 value above 50. R9 is the deep-red index, it is excluded from the headline Ra figure, and it is what determines whether skin tone, a shaving nick or a foundation shade read truthfully. A CRI 80 fixture with a collapsed R9 makes everyone look faintly ill, and makeup matched under it looks wrong the moment its wearer steps outdoors. This is not a place to save ₹200 a fixture.
3. Colour temperature — 4000K to groom, 2700K to bathe
Grooming accuracy wants 4000K, because it is closest to the daylight you will be seen in. A relaxed evening bath wants 2700K to 3000K. Both are correct and they are mutually exclusive at any fixed setting, which makes the mirror one of the strongest cases in the house for tunable and dimmable fixtures: 4000K at 100 percent for the morning, 2700K at 30 to 40 percent in the evening, on the same hardware. Our colour temperature guide sets out how this fits the rest of an Indian home.
4. The heights that decide everything
- Vanity counter: 800 to 900mm above finished floor.
- Mirror bottom edge: roughly 1.05 to 1.15m — about 150 to 250mm of clear splashback above the counter.
- Mirror sconce vertical centre: 1.6 to 1.7m, which puts it at eye level for most adults. This is the single most important dimension on the page.
- Sconce spacing: inner edges 900mm to 1.1m apart, flanking an 800 to 900mm mirror. Wider than about 1.2m and the light starts side-lighting rather than front-lighting the face.
- Ceiling fixtures: set 300 to 400mm off the wall, never on the wall line and never directly over the mirror glass.
- Keypad: standard switch height, 1.2 to 1.3m, on the handle side of the door, in the dry zone.
Lighting the mirror properly
Everything else in a bathroom is forgiving. This part is not. There are three arrangements that work and one that does not.
Best: vertical bars flanking the mirror
Two slim vertical LED bars, 300 to 450mm tall, mounted at 1.6 to 1.7m centre on either side of the mirror. Because the source is tall and vertical, it washes a face evenly from chin to forehead instead of lighting one horizontal band of it, and because there are two of them the shadows from one are filled by the other. Use a fully diffused face — an exposed LED at eye level is a glare source you will see every morning — and around 6 to 9W each is plenty at this distance. This is what good hotel bathrooms do, and it is the reason people notice they look better in them.
Very good: backlit mirror halo, done properly
A continuous 6 to 10 W/m strip in a diffused aluminium channel behind the mirror perimeter, held 20 to 30mm off the wall so the light spreads into a soft halo rather than a hard line. The standoff is the whole trick: mount the mirror flat against the wall and the halo becomes a thin bright edge that does nothing for the face. A backlit halo alone gives beautiful ambience and roughly 150 to 200 lux on the face — enough to see by, not quite enough to shave or do detailed makeup by. Treat it as the mood layer and pair it with the bars. The channel-and-diffuser logic is the same as in our guide to planning cove lighting in a false ceiling.
Acceptable: a wide-beam fixture above, pulled forward
If joinery or a full-wall mirror rules out side lighting, use a wide 60° to 90° beam mounted 300 to 400mm forward of the mirror face — above where the person stands, not above the glass. Light then arrives at a shallow angle onto the face rather than straight down the forehead. Add the backlit halo to fill what remains. Never use a narrow 15° to 24° spot here: it is the fixture that creates the hollow-eyed effect in the first place. Our comparison of panel vs COB vs strip vs spot lights covers where each type genuinely belongs.
Wrong: one downlight directly above the mirror
Covered above, and worth repeating because it is what will be installed unless a drawing says otherwise.
One more thing at the mirror: flicker
Bathroom mirrors are where phones get pointed at faces, and a dimmed LED running on a poor driver produces banding on camera and low-level eye strain in person. Any dimmed fixture at a mirror should be on a driver with a high PWM frequency and a flicker percentage low enough to be invisible to a camera. This is a driver decision, not a fixture decision, and we cover it in detail in why LED lights flicker when dimmed.
The other three layers: ambient, shower, WC
With the mirror solved, the rest is straightforward — provided each layer is on its own circuit.
Ambient
Two to four wide-beam recessed fixtures set 300 to 400mm off the walls, or better, a warm cove line around the false-ceiling perimeter. In a bathroom, indirect ceiling light is worth the extra effort because it bounces off pale tile and stone and produces almost no glare for someone lying in a bath looking up. Budget roughly 10 to 12W per square metre of floor area for this layer.
Shower
One IP65 downlight, positioned 300 to 400mm out from the wall at the shower-head end so you are not standing in your own shadow — a light directly overhead puts your head between the source and everything you are trying to see. If the enclosure is glazed, keep the fixture inside the glass line; a shower lit from outside the enclosure is a dim shower. A dimmable shower light at 20 percent and 2700K is also an underrated luxury on a late evening.
WC and niches
A single small warm fixture is enough. Where there is a shower niche or a recessed shelf, a short run of IP65 strip inside it does more for how the bathroom feels at night than another ceiling downlight ever will, at about 4W.
Windows and privacy
Bathroom windows in Hyderabad apartments frequently look onto a shaft or a neighbouring block, and the usual answer is frosted glass that kills the daylight permanently. A better one is clear glazing with a motorised sheer or blackout blind on a discreet track: full daylight when you want it, full privacy on a button, and no fabric to reach for with wet hands. Specify a moisture-tolerant fabric and keep the motor and track outside the direct spray zone.
IP ratings, wet zones and where controls can go
This section is about safety, and unlike most of this guide it is not a matter of taste. Bathroom electrical zoning follows the well-established IEC 60364-7-701 scheme, mirrored in Indian practice under IS 732 and the National Building Code, and it defines what may be installed where.
- Zone 0 — inside the bath tub or shower tray itself. Requires IPX7 fittings, on 12V SELV supply only. In practice: nothing but a purpose-made submersible fitting belongs here.
- Zone 1 — directly above the bath or within the shower enclosure, up to 2.25m above the floor. Minimum IPX4; specify IP65 in a real shower, because a rating that survives splashing is not the same as one that survives a steam-filled room and a jet from a handheld head.
- Zone 2 — a band extending 600mm horizontally beyond zone 1, and the area around a wash basin. Minimum IPX4.
- Outside the zones — ordinary IP20 fittings are permitted. IP44 near the vanity is inexpensive insurance against long-term steam ingress.
Two rules follow from this and are worth stating plainly. First: switches, keypads and sockets are not permitted in zones 0, 1 or 2. The wall control goes in the dry area beside the door, or immediately outside the bathroom door — which is where you want it anyway, because you reach for it as you walk in rather than after crossing a dark room. Second: drivers and control gear do not belong inside the wet area. Put them above the false ceiling of the adjacent corridor or dressing area, behind an access hatch, on the dry side of the wall. Drivers fail years before LEDs do, and a driver buried above a tiled bathroom ceiling turns a ten-minute replacement into a demolition job.
Earthing and supplementary bonding of metallic pipework and fittings is your electrician's responsibility under the same standards, and it is not optional in a room where people stand wet and barefoot. Any competent installer will do this without being asked; ask anyway.
The night layer, sensors and the exhaust interlock
If you take one automation idea from this guide, take this one. It costs very little and it is the feature homeowners mention first, a year later.
The 2200K night path
A short run of warm strip under the vanity overhang or at skirting level, delivering roughly 10 to 20 lux at floor level at 2200K, triggered automatically after a set hour when someone enters. That is enough to see the floor, the WC and the basin, and not enough to disturb dark-adapted eyes. The alternative — 400 lux of 4000K white at 3am — constricts your pupils, suppresses melatonin, and is the reason people lie awake for half an hour after a bathroom trip. Wire it as its own circuit so it can run without any other fixture in the room being live.
Presence, not PIR, if the main lights are automated at all
A plain passive-infrared sensor detects movement, not occupancy. In a bathroom, where people sit still, that produces the single most infuriating fault in home automation: the lights going out on someone who is still there. If the main lights are to be sensor-controlled, use a millimetre-wave presence sensor, which detects micro-movement such as breathing, mount it clear of the extract fan airflow, and set a generous timeout. Our own preference in most homes is simpler: automate only the night layer, and leave the main lights on a keypad. The night layer failing to trigger costs nothing; the main lights failing costs a great deal of goodwill. The same sensor layer that handles this is the one that feeds occupancy into the wider security and sensor system when the house is armed and empty.
The exhaust fan, done properly
Interlock the extract fan with a humidity threshold of around 65 to 70 percent RH rather than with the light switch, and give it a 10 to 15 minute run-on after the room empties. A fan tied to the light switch runs for two minutes while someone uses the WC and stops the moment a long hot shower ends, which is precisely backwards. Humidity-linked extraction is the difference between a bathroom ceiling that stays clean and one that grows black mould along the grout line in the second monsoon — a real consideration in Hyderabad, where indoor RH sits high from June through September.
Where this matters most
Bathrooms are where most falls at home happen, and older residents are disproportionately affected. An automatic warm night path, a light that never needs a switch found in the dark, and a bathroom that is never fully dark when occupied are among the highest-value things automation does for anyone over seventy — a point we develop in home automation for elderly parents in Hyderabad.
Scenes and keypads for a bathroom
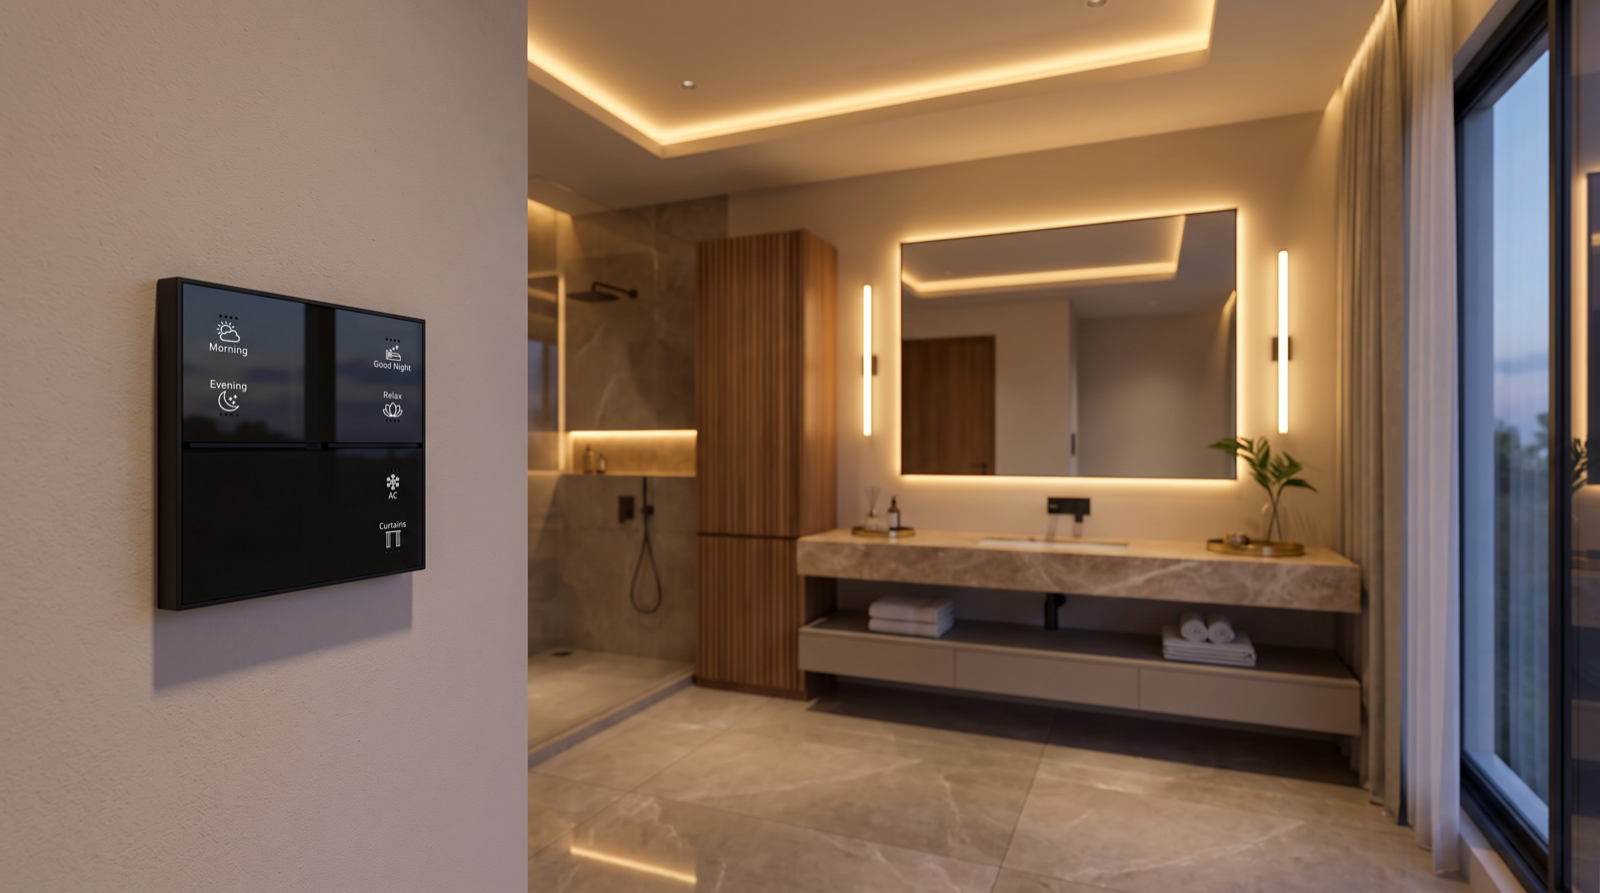
A well-planned bathroom might have four or five circuits: mirror bars, backlit halo, ambient ceiling or cove, shower, night strip. Five switches on a wall is not an improvement on one. Four scene buttons on a single wall keypad is.
- Morning — mirror bars 100 percent at 4000K, ambient 70 percent, halo off, shower on. The full-accuracy grooming setting.
- Relax — halo on at 40 percent 2700K, ambient at 20 percent, mirror bars off, shower at 15 percent. For a bath, or simply for the evening.
- Clean — everything to 100 percent at 4000K. Once a week, and genuinely useful when it exists.
- Off — everything down, night layer re-armed automatically.
Place the keypad on the handle side of the door at 1.2 to 1.3m, in the dry zone, and engrave the labels — an unlabelled scene button is a button nobody else in the household ever presses. The full placement logic is in how to plan keypads in a home, and the argument for scenes over per-device app control in why scene-based automation beats app-only devices. The bathroom is also the clearest illustration of why the app is the wrong primary interface: nobody unlocks a phone with wet hands.
Points to leave before the tiling starts
Bathrooms are the least forgiving room in a house to change later, because every wall is tiled and every chase is behind stone. Almost everything on this list is trivial before tiling and effectively impossible after it.
- Two wall points at 1.6 to 1.7m, flanking the mirror position, set to the exact spacing on the drawing. Fix the mirror width first; the light positions follow from it, not the other way round.
- A concealed point behind the mirror centre for a backlit halo, with the conduit terminating where the mirror back panel will sit.
- Separate dimmable circuits for mirror, halo, ambient, shower and night strip. Five circuits sounds excessive until you try to build the scenes above out of two.
- A night-strip point under the vanity overhang or at skirting level, on its own circuit, not looped off the ambient.
- An IP65 fixture cut-out in the shower ceiling, 300 to 400mm off the wall at the head end, coordinated with the false-ceiling contractor before the grid goes up.
- Driver locations outside the wet room, above an adjacent corridor or dressing-area ceiling, behind an access hatch.
- A keypad back-box in the dry zone beside the door at 1.2 to 1.3m, with a neutral — non-negotiable for dimming or automation.
- A fan point with a neutral and a controllable supply, so humidity-linked run-on is possible at all.
- A curtain or blind track point above the window, with power at the track end, if there is any chance of motorising it later.
The sequencing for all of this — and for the rest of the house — is in when to plan home automation during construction and how to plan smart lighting for a new home.
How Pert delivers it — a designed solution, not a DIY kit
Pert is a solutions company: we design and install. For bathrooms, that starts with a site visit and the mirror, because the mirror width and the vanity height fix every other dimension in the room. We measure the actual space, confirm the wet-zone boundaries against the sanitaryware layout, and then issue a drawing that fixes the mirror sconce positions and mounting height, the backlit-halo detail and its standoff, fixture type, beam angle and IP rating for every position, the circuit split across mirror, halo, ambient, shower and night layer, sensor and extract-fan logic, driver locations with service access, and the keypad position and engraving — handed to your electrician, plumber, false-ceiling contractor and joiner together, before tiling, rather than one trade at a time. We supply the CRI 90+ tunable and dimmable fixtures, smart COB and strip lighting, sensors, motorised blinds for bathroom windows and the wall keypads, install and commission them, and then tune the result in the finished room — checking vertical lux on a face at the mirror, setting the night level, and adjusting the fan threshold across a real week of use.
That final step is what separates a designed installation from a box of parts. If you are comparing providers, ask each of them what vertical illuminance they are targeting at the mirror and how they intend to achieve it — it is a fast and revealing test of whether they design or merely resell. Our guide to the best home automation companies in Hyderabad covers the rest of what to check before you sign.
Building or renovating in Hyderabad? Mirror light points, halo conduits and driver access have to be set before the walls are tiled — this is the one room where "we'll add it later" genuinely means "we won't". Request a consultation →
Frequently asked questions
Where exactly should mirror lights be mounted, and at what height?
Light the face, not the top of the head. The correct arrangement is two vertical light sources flanking the mirror at roughly eye level, with their vertical centre at about 1.6 to 1.7m above finished floor and their inner edges 900mm to 1.1m apart for a standard 800 to 900mm wide mirror. Vertical bars 300 to 450mm tall work better than round wall lights because they wash the face evenly from chin to forehead rather than lighting one band of it. A single downlight in the ceiling directly above the mirror is the single most common bathroom lighting mistake in Indian homes: it drops light vertically onto the forehead, nose and brow, throwing hard shadows into the eye sockets and under the chin, which is why so many people look tired in their own bathroom mirror and fine everywhere else. If a ceiling fixture is genuinely the only option, pull it forward so it sits above where the person stands rather than above the mirror glass, and add a backlit halo behind the mirror to fill the shadows.
What colour temperature and CRI should bathroom lighting be?
At the mirror, use CRI 90 or above with an R9 value above 50, because R9 is the deep-red component that determines whether skin tone, makeup and shaving irritation read accurately. A cheap CRI 80 fixture makes skin look grey and makeup applied under it looks wrong the moment you step into daylight. For colour temperature, 4000K is the most accurate for grooming and makeup because it is closest to daylight, while 2700K to 3000K is what you want for a bath in the evening. That conflict is exactly why the mirror is a strong case for tunable fixtures: the same lights run at 4000K and full brightness for the morning routine, and drop to 2700K at 40 percent in the evening. Our room-by-room colour temperature guide covers how this sits alongside the rest of the house.
What IP rating do bathroom lights need, and where can switches go?
IP ratings are decided by zone, not by the room. Zone 0 is inside the bath tub or shower tray itself and needs IPX7 fittings on 12V SELV supply only. Zone 1 is directly above the bath or inside the shower up to 2.25m, and needs a minimum of IPX4 — in practice specify IP65 for a shower downlight, since it will be hit by spray and steam. Zone 2 extends 600mm horizontally beyond zone 1 and around a basin, and also needs IPX4. Beyond that, ordinary IP20 fittings are acceptable, though IP44 near a vanity is cheap insurance against steam. Switches, keypads and sockets must not be installed in zones 0, 1 or 2 at all. In practice that means the wall keypad goes in the dry area beside the door, or just outside the bathroom door — which is also where you actually want it, because you reach for it as you walk in.
Is a motion sensor in a bathroom a good idea?
Yes, but only for the night layer, and only with a presence sensor rather than a plain PIR. The setup worth having is a low warm light — roughly 10 to 20 lux at 2200K from an under-vanity or skirting-level strip — that comes up automatically after about 10pm when someone walks in, and nothing else. It means a 3am trip to the bathroom never involves finding a switch or being hit with 400 lux of cool white light that wrecks your sleep for the next hour. What you must avoid is putting the main lights on a plain PIR: passive infrared detects movement, not occupancy, so it will switch the bathroom off on someone sitting still, which is the most reliably infuriating fault in a home automation system. Use a millimetre-wave presence sensor if the main lights are to be automated at all, keep a keypad override, and never automate the lights off while a door is closed and occupied.