
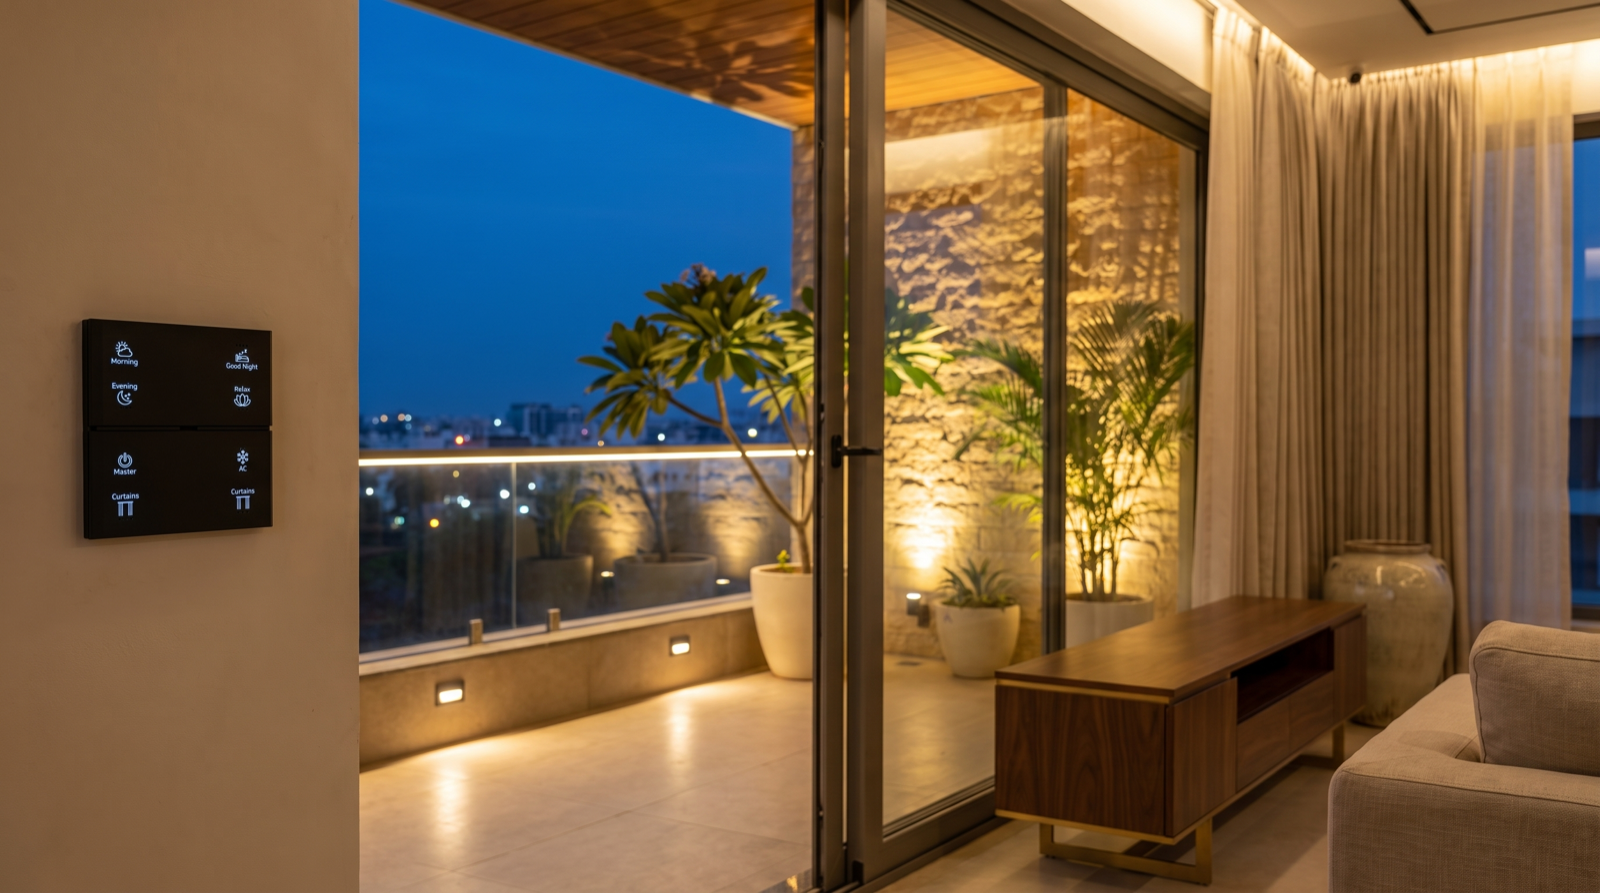
In this guide
- Why outdoor lighting fails more often than any other layer
- IP ratings by position — and what actually kills outdoor fittings
- The five techniques that do all the work
- Numbers: lux, wattage, beam angles and heights
- Colour temperature, glare and the insect problem
- Astro clocks, sensors and how outdoor circuits should be controlled
- Where lighting meets security
- Conduits and points to leave before plaster and paving
- How Pert delivers it (designed, not DIY)
- FAQs
Most homeowners plan interiors in enormous detail and then treat everything past the glass line as an afterthought handled by whoever is doing the compound wall. This article is part of our wider coverage of home automation in Hyderabad, and it deals with the balcony, terrace, garden and façade — the parts of a home that are seen by more people than any room inside it.
Why outdoor lighting fails more often than any other layer
An indoor downlight lives in a dry, dust-controlled, temperature-stable, easily reachable position and will run for a decade without complaint. An outdoor fitting has none of those advantages, and four specific things go wrong.
- Water gets in, eventually. Not through the lens, usually, but through the cable gland or the joint in a badly made connection. Hyderabad's monsoon delivers most of its rain in short violent bursts with wind behind it, which drives water sideways under soffits and into anything with an upward-facing seam.
- Thermal cycling breaks seals. A fitting on a west façade can sit at 60°C at 4pm in May and drop 25 degrees within two hours of a storm arriving. That expansion and contraction is what pumps moisture past a cheap gasket, and it is why a fitting can pass a factory water test and still fog up in its second monsoon.
- Drivers die first, in the worst possible place. LED chips outlast their drivers by a wide margin. A driver potted into a fitting three metres up a façade, or buried in a lawn, converts a routine component replacement into scaffolding and excavation.
- Nobody plans it before civil work closes. This is the big one. Once the façade is plastered and the driveway is paved, every remaining option is surface conduit, and surface conduit on a façade looks exactly like what it is.
The consequence is that outdoor lighting rewards planning more than any other layer, and punishes improvisation harder. The same reasoning applies to timing your whole automation scope, which we set out in when to plan home automation during construction.
IP ratings by position — and what actually kills outdoor fittings
The IP code has two digits: the first is solid ingress — dust — and the second is water. For outdoor use in India, treat IP6X (dust-tight) as the baseline for anything exposed, because Hyderabad's dust load is high and fine dust inside an optic dims a fitting steadily over years without ever making it fail outright. Then set the second digit by position, not by the room.
- Covered balcony soffit, deep porch, under a chajja — never directly rained on. IP54 is the technical minimum; specify IP65 anyway. It costs very little more and wind-driven rain reaches a metre or more under a soffit.
- Open terrace, parapet, exposed wall, façade — IP65 minimum, IP66 for anything that will be hosed down during cleaning. Balcony and terrace cleaning in Indian homes is done with a bucket and a hose, and an IP65 fitting is rated for jets, not for a direct hose at close range.
- In-ground uplights in paving, lawn or planter beds — IP67 minimum, IP68 correct. An in-ground fitting sits in a pit that fills during a downpour and stays wet for days. IP67 means temporary immersion; IP68 means continuous. Anything less than IP67 here will fail in its first monsoon, without exception.
- Water features and pool surrounds — IP68 on low-voltage supply.
- Drivers and control gear — ideally not outdoors at all. See below.
The specifications that matter more than the IP number
Two fittings can both say IP65 on the box and have entirely different lifespans. What separates them:
- Body material. Die-cast aluminium with a marine-grade powder coat, or better, low-copper LM6 aluminium. Never mild steel with paint on a Hyderabad terrace — it will show rust bloom within two monsoons.
- Gaskets. Silicone, not rubber. Rubber hardens and cracks under UV and heat cycling; silicone stays elastic for years.
- Fasteners. Stainless steel, SS304 minimum. A stainless fitting held on by mild-steel screws is a fitting that will be stuck to its bracket in three years.
- A breather membrane. A small Gore-type vent that lets pressure equalise while blocking liquid water. Without one, a sealed fitting that heats and cools daily will pull moist air past its gasket and condense it on the inside of the lens. Lens fogging on a two-year-old outdoor light is almost always this, not a failed seal.
- Serviceable, relocatable drivers. Put drivers indoors wherever the run length allows — in the electrical niche, above an internal false ceiling, or in an IP66 enclosure at low level behind a planter with a hinged door. A driver you can reach is a fifteen-minute job; a driver potted three metres up is a day with scaffolding.
- Surge protection. Outdoor and façade circuits are the most exposed to lightning-induced surges. A modest surge protection device on the outdoor distribution board is cheap relative to replacing a dozen façade drivers after one storm.
The five techniques that do all the work
Good outdoor lighting is not about more fittings. Almost every well-lit home you have admired uses some combination of five moves, and the skill is in choosing which surface gets which.
1. Grazing — for texture
A narrow-beam fitting placed 100 to 300mm from the wall face, aimed almost straight up. Because the light travels nearly parallel to the surface, every ridge in the stone throws a small shadow and the texture becomes the subject. This is what makes a random-rubble or ledge-stone feature wall look expensive at night. Grazing only works on genuinely textured surfaces — try it on smooth plaster and it produces nothing but scallops and a hot spot.
2. Washing — for smooth surfaces
The opposite move: a wide-beam fitting set 600mm to 1m out from the surface, producing an even field of light with no visible scallops. Use it on smooth plaster, painted walls, and large flat façade planes. The distance is what does the work; a wash fitting mounted tight to a smooth wall becomes a graze fitting, and reveals every plastering defect in the wall as a result.
3. Uplighting trees and planting
One or two narrow to medium beams at the base of a tree, aimed into the canopy. For a mature frangipani, gulmohar or a tall areca cluster, two fittings at roughly 120° apart around the trunk give depth rather than a flat silhouette. Aim so the beam terminates inside the canopy — a beam that shoots past the leaves into the sky is wasted light and, from a neighbour's upper floor, a glare source. Leave slack in the cable and use adjustable fittings: the tree grows, and the aim needs revisiting every couple of years.
4. Step, path and parapet lighting — light the surface, hide the source
Recessed step lights in the riser of every second or third step, or a linear strip tucked under the nosing or under the parapet handrail. This is the layer that makes a terrace feel designed rather than lit, and it is also the one that prevents falls. The principle is absolute: you should see the lit tread, never the lamp. A visible source at ankle height in a dark garden destroys night vision and makes everything beyond it look darker than it is.
5. Downlighting from above — the moonlight effect
Fittings mounted high in a tree or under a high soffit, aimed down through branches or a pergola, casting dappled shadows on the ground. It is the most natural-looking outdoor light there is, and the most under-used in Indian homes because it requires a mounting point at height — which means planning a conduit up a tree or into a pergola member before the pergola is finished.
What is not on this list: a floodlight bolted above the porch, aimed outward. It flattens everything it hits, glares directly into anyone approaching, and lights the underside of the visitor's chin. If a bright general light is genuinely needed for occasional tasks, put it on its own circuit and its own button so it is off the other 360 evenings of the year. The distinction between fixture types — spot, COB, strip, panel — and where each belongs is covered in our guide to panel vs COB vs strip vs spot lights.
Numbers: lux, wattage, beam angles and heights
Outdoor light levels are far lower than people assume, because the eye is comparing against darkness rather than against a bright room. The most common error in Indian outdoor installations is not too little light — it is roughly double what is needed.
Target light levels
- Balcony and terrace seating: 20 to 50 lux. That is enough to read a phone, see a face across a table and pour a drink. Anything above about 80 lux and you stop being able to see the city or the garden beyond, because your eyes adapt to the terrace.
- Outdoor dining table: 50 to 100 lux on the table surface, from a shielded pendant, a downlight in the pergola, or candles plus a low wash. On its own dimmer.
- Steps and level changes: 20 to 30 lux on the tread. Uniformity matters more than the number — a bright step followed by a dark one is more dangerous than two dim steps.
- Paths and driveways: 10 to 20 lux. Enough to see the edge and the surface.
- Façade and feature walls: 30 to 75 lux on the lit surface for a light stone or plaster, more for dark granite, which can absorb 70 to 80 percent of what you throw at it. Dark cladding is the one place where you genuinely need more wattage.
- Overnight security layer: 3 to 10 lux at 2200K. Very low, warm, and permanently on from dusk to dawn.
Beam angles — the parameter nobody specifies and everybody should
- 10° to 15° — tall narrow targets: a column, a palm trunk, a three-storey façade element from ground level.
- 24° to 30° — the workhorse for grazing a textured wall or uplighting a medium tree.
- 40° to 60° — washing a smooth wall, lighting a wide planter bed, general soffit downlights.
- 90° or wider — only for low-level path and step lighting, where the fitting is close to what it lights.
A single change of beam angle transforms a façade more than doubling the wattage does. If a supplier's quotation lists wattages but no beam angles, they are selling fittings rather than designing lighting.
Wattages that are actually enough
- In-ground or surface uplight, wall graze up to 3m: 6 to 9W. Up to 6m: 12 to 18W. A 30W uplight on a single-storey wall is comically over-specified and will produce a blinding hot spot at the base.
- Tree uplight: 9 to 12W for a medium tree, 18 to 24W for a large mature canopy.
- Step light: 1 to 3W. Genuinely.
- Parapet or handrail strip: 4 to 7 W/m in an IP66 aluminium channel with a diffuser — the same channel-and-diffuser logic set out in our guide to planning cove lighting in a false ceiling, but in a sealed outdoor profile.
- Balcony soffit downlight: 5 to 7W at 40° to 60°, spaced 1.2 to 1.8m apart.
Heights and setbacks
- Wall graze fitting: 100 to 300mm from the wall face, at or just above finished ground level.
- Wall wash fitting: 600mm to 1m out from the surface.
- Shielded wall light on a balcony or porch: 1.9 to 2.1m above finished floor — above eye level so the source is never in view.
- Step light in riser: 100 to 150mm above the tread below, centred or offset consistently on every step.
- Bollard: 600 to 900mm. Taller than about a metre and the light source starts entering the field of view of anyone walking past.
- Tree uplight: 300 to 600mm from the trunk for a medium tree, further for a wide canopy; leave cable slack for growth.
Colour temperature, glare and the insect problem
Go warm, and keep it consistent
Use 2700K as the default outdoors, and 2200K to 2400K for very low-level path, step, parapet and overnight security lighting where the light should read as a glow rather than as illumination. Cool white outdoors — 4000K and above — is the most common and most damaging mistake in Indian outdoor lighting. It renders warm-toned stone, wood, terracotta and brick grey and lifeless, turns foliage a blue-green that looks unhealthy rather than lush, and makes a well-built villa read like a commercial building. There is no premium home anywhere in the world lit in 6500K outdoors, and there is a reason for that.
The second rule is consistency. Every fitting visible in a single sightline should share one colour temperature. A terrace with 3000K step lights and a 2700K wall wash reads as visibly wrong even to people who could not name the problem. This gets broken most often when fittings are added a year later from a different supplier — which is an argument for specifying the exact CCT and binning tolerance in writing at the start. Our room-by-room colour temperature guide covers how the outdoor palette relates to the rest of the house.
Glare: see the light, never the lamp
Glare is what separates a designed exterior from a lit one, and it costs nothing to avoid. The rules:
- Recess step lights, and use louvred or honeycomb accessories on in-ground uplights. A honeycomb louvre adds a few hundred rupees per fitting and removes almost all direct view of the source.
- Aim every uplight so the beam terminates on the target — on the wall face or inside the canopy — rather than continuing past it. A beam that overshoots a parapet lands in a first-floor bedroom or a neighbour's balcony, which in a gated community is how lighting disputes start.
- Never place an unshielded uplight where someone will look directly along its axis: at the head of a path, in a lawn people cross, or at the base of a wall people walk beside.
- Dim everything. If the façade looks better at 60 percent — and it usually does — then 60 percent is the correct setting, and you have also just cut that circuit's energy use by a third. This is exactly the kind of measure that makes a real difference in practice, as we discuss in can home automation save electricity.
Insects
An outdoor lighting scheme that is unusable in the monsoon because of insects is a failed scheme, and the fix is mostly colour temperature. Insects are attracted overwhelmingly to short-wavelength blue and ultraviolet output; a 2200K to 2700K LED with no UV component draws a small fraction of what a 6500K fitting does. Three further moves help: keep the brightest fittings at the boundary rather than over the seating and dining area, so insects gather away from people; use fully sealed fittings with no open gaps, because an insect that gets inside an optic and dies there is a permanent shadow on the lens; and put the dining and seating layer on a dimmer so it can be run very low during peak monsoon weeks.
Astro clocks, sensors and how outdoor circuits should be controlled
Outdoor lighting is the strongest automation case in the whole house, because nobody wants to walk around the garden switching things on at dusk and off at midnight, and because the correct switching time changes every single day.
Why a fixed timer is always wrong
Hyderabad's sunset moves by roughly 45 minutes between its earliest in early December (around 5:45pm) and its latest in mid-June (around 6:50pm). A timer set for 6:30pm leaves the façade dark for the best part of an hour on winter evenings, and burns it in full daylight through the summer. An astronomical clock calculates sunrise and sunset from the date and the site's latitude and longitude and shifts every schedule automatically, all year, without anyone touching it. Every outdoor circuit in a properly designed system runs on one.
Three outdoor layers, three different schedules
- The display layer — façade washes, feature-wall grazes, tree uplights. On at sunset minus 15 minutes, off at 11pm. Nobody is looking at your façade at 2am, and running it all night is pure waste and light pollution.
- The amenity layer — balcony, terrace, seating, dining, pergola. Not scheduled at all: this runs on scenes from a wall keypad when people go outside, and switches off automatically at a late hour as a catch-all.
- The security and path layer — low 2200K step, path, parapet and gate-approach light. On from sunset to sunrise, all night, every night. At 3 to 10 lux and a few watts per fitting, the running cost of this is negligible, and it is the layer that means nobody ever walks into a dark garden.
Where sensors belong — and where they do not
Motion sensors are right for the side setback, service path, utility yard and gate approach: places that should be dark until someone is there, then bright for two or three minutes. The best pattern is a two-stage one — the low overnight layer sits at 10 percent, and motion takes that same circuit to 100 percent for 120 seconds before fading back. It reads as deliberate rather than as a light being startled on.
Sensors are wrong on the façade and the display layer. A façade that flicks on every time a street dog crosses the compound is worse than no façade lighting, and in a gated community it will irritate the neighbours before it irritates you. For the same reason, use sensors with adjustable sensitivity and a lux threshold so they do nothing during daylight, and mount them where they will not stare at a road or a swaying tree.
Scenes and keypads for the outdoors
A well-planned villa exterior might have six to ten outdoor circuits. Nobody manages that from ten switches, and nobody manages it from a phone in the rain either — the argument we make at length in do you need an app, a keypad, or both. Four scene buttons on a keypad near the balcony or garden door will cover essentially every evening:
- Evening — façade and feature graze at 70 percent, tree uplights at 60 percent, step and path layer at 40 percent, terrace seating at 30 percent. The default look, on automatically at sunset.
- Entertain — terrace and pergola up to 60 percent, dining pendant at 70 percent, façade held down to 40 percent so the garden reads as the brighter space, indoor curtains open.
- Dine — dining table only at 60 percent, everything else at 15 to 20 percent. The one people use most, and the one that looks the most expensive.
- Night — display layer off, security and path layer at 2200K low, motion zones armed. Usually triggered automatically at 11pm rather than pressed.
Engrave the labels on the keypad. An unlabelled outdoor scene button is a button that only one person in the household ever presses. Placement logic for the keypad itself — which should sit beside the balcony or garden door, on the handle side, at 1.2 to 1.3m — is in how to plan keypads in a home, and the case for scenes over per-device control in why scene-based automation beats app-only devices.
One more integration worth having
Tie the motorised curtains on the balcony-facing glazing into the same outdoor scenes. An Entertain scene that opens the sheers as the terrace lights come up makes the inside and outside read as one space, and a Night scene that closes the blackouts as the display layer switches off does the reverse. It is a small piece of logic and it is the sort of thing people remember.
Where lighting meets security
Outdoor lighting and home security overlap more than most homeowners expect, and a few decisions taken together are worth far more than either taken alone.
- Cameras need the right light, not more light. A bright unshielded floodlight in a camera's field of view blows out the exposure and makes everything behind it darker on the recording than it would have been with no light at all. Keep sources out of camera sightlines and light the surfaces the camera watches — the gate, the approach path, the compound wall face — evenly and at low level.
- Even, low, all-night light beats bright and intermittent. Deep shadow beside a bright pool is more useful to an intruder than uniform dim light everywhere, because the eye and the camera both adapt to the bright part.
- Warm low light still works for cameras. 2200K at 5 to 10 lux across an approach is enough for a modern camera to record usable colour footage, which is far more useful than infrared black-and-white.
- An away pattern is genuinely useful. Façade and a couple of interior circuits running on an astro schedule with slight nightly variation is a much better deterrent than a house that is either fully dark or obviously running on a rigid timer.
- Motion at the perimeter can drive both. The same sensor that lifts the side-setback light to 100 percent can flag a camera event, so the recording and the light happen together.
The wider picture — locks, cameras and sensors working as one system rather than three apps — is in smart home security in Hyderabad.
Conduits and points to leave before plaster and paving
This is the section to act on if you are building or renovating right now. Every item below is inexpensive before the façade is plastered and the driveway is paved, and effectively impossible afterwards.
- A dedicated outdoor sub-circuit board with its own RCD/RCBO protection and a surge protection device, fed separately from the interior lighting. Outdoor faults should never trip the house.
- Conduits to every façade uplight position, set 100 to 300mm off the wall face for grazing positions, marked on a drawing and photographed before plastering. Photograph every conduit run with a tape measure in frame — it is the single most useful thing you can do for whoever services the system in five years.
- Sleeves under the driveway and paving before it is laid — oversized, with a draw wire left in, and at least one spare. Cutting a paved driveway later costs more than the entire lighting scheme.
- Points at every step and level change, coordinated with the civil contractor before the risers are clad, because a step light must be cast or chased into the riser, not stuck on it.
- A parapet or handrail channel detail agreed with the fabricator, with a concealed cable route to the end of the run. Retrofitting a strip to a finished handrail almost always looks retrofitted.
- Balcony soffit points at 1.2 to 1.8m spacing, set before the soffit is plastered or the false ceiling closed.
- Tree and planter points with generous cable slack, in draw pits with covers rather than direct-buried joints. Planting moves; buried joints fail.
- Driver enclosure locations — indoors, or in a serviceable IP66 enclosure at low level with a hinged door and an access route. Decide this on the drawing, not on site with a fitting in hand.
- Keypad back-boxes with a neutral beside the balcony door and the garden door, at 1.2 to 1.3m on the handle side.
- Sensor positions on the side setback, service path and gate approach, with the height and aim marked so they do not end up pointed at the road.
- Weatherproof outdoor sockets — IP66, one per balcony and two in the garden. You will want them for a lamp, a fan, string lights at Diwali, or a pressure washer, and nobody has ever regretted having them.
If your interiors are already finished and this list has arrived too late, the position is not hopeless — surface-mounted and low-voltage garden systems can achieve a great deal, and we cover the retrofit route in adding home automation during renovation.
How Pert delivers it — a designed solution, not a DIY kit
Pert is a solutions company: we design and install. For exteriors, that starts with a site visit at dusk rather than midday, because the only way to judge a façade is to stand where people will actually see it — from the gate, from the road, from the neighbouring plot — as the light goes. We survey the elevation and the landscape, identify which surfaces deserve light and which should stay dark, and then issue a drawing that fixes fitting positions with setbacks from wall faces, beam angles and wattages per position, IP rating per position, mounting heights for every wall light, step light and bollard, the circuit split across display, amenity and security layers, driver locations with service access, conduit and sleeve routes for the civil contractor, sensor positions and aiming, and keypad locations with the engraved scene labels. That drawing goes to your electrician, civil contractor, landscape contractor and fabricator together, before plastering and paving, rather than to each of them separately after the fact.
We then supply and install the tunable and dimmable lighting, outdoor-rated fittings, motorised curtains on the balcony glazing, sensors and cameras and the wall keypads, and commission the system on site after dark — aiming every adjustable fitting by eye, setting the astro offsets, dialling in the scene levels from the position people will actually stand, and coming back once the planting has grown in to re-aim the tree uplights. That last step is the part a box of parts cannot give you: an outdoor scheme is aimed, not just installed.
If you are comparing providers, ask each of them for the beam angle and IP rating at every position, and ask whether the commissioning visit happens after sunset. Both answers tell you quickly whether you are talking to a designer or a reseller. Our guide to the best home automation companies in Hyderabad covers the rest of what to check before you sign, and the questions to ask before you hire puts them in order.
Building or landscaping in Hyderabad? Façade conduits, driveway sleeves and step-light points have to be set before the plaster and the paving go down — after that, every option is surface conduit. Request a consultation →
Frequently asked questions
What IP rating do outdoor lights need in Hyderabad?
The rating depends on the position, not on the word outdoor. Under a covered balcony soffit or a deep porch that never sees direct rain, IP54 is technically sufficient, though IP65 costs very little more and is worth specifying anyway because wind-driven rain reaches further under a soffit than people expect. On an open terrace, parapet, exposed wall or façade, specify IP65 as the minimum and IP66 for anything that will be hosed during cleaning. For in-ground uplights set into paving or lawn, IP67 is the minimum and IP68 is the correct choice, because an in-ground fitting sits in a pit that fills with water during a Hyderabad monsoon and stays wet for days; an IP65 fitting in that position will fail in its first season. Also look past the IP number to the things that actually kill outdoor fittings here: a marine-grade or powder-coated aluminium body rather than mild steel, silicone rather than rubber gaskets, stainless fasteners, a breather membrane to equalise pressure so the lens does not fog, and driver electronics housed indoors or in a serviceable enclosure rather than potted into the fitting.
What colour temperature should outdoor and façade lighting be?
Warm, and warmer than most people expect. Use 2700K as the default for balconies, terraces, seating areas and general façade washing, and 2200K to 2400K for very low-level path, step and parapet lighting where the light should read as a glow rather than as illumination. Cool white 4000K to 6500K outdoors is the single most common mistake in Indian homes: it makes granite and stone look grey and lifeless, turns warm-toned wood and terracotta muddy, renders foliage a sickly blue-green rather than a healthy green, and makes an expensive villa façade look like a parking structure. The only defensible use for cool white outdoors is in a service yard or utility area where nobody sits. One further rule matters more than most people realise: keep every fitting in a single sightline at the same colour temperature. A terrace where the step lights are 3000K and the wall wash is 2700K reads as visibly mismatched even to people who cannot say why.
Should outdoor lights be on a timer, a sensor, or an astro clock?
An astronomical clock, with sensors used only for specific jobs. A fixed timer set to switch on at 6:45pm is correct for about three weeks a year: Hyderabad sunset moves by roughly forty-five minutes between the December and June extremes, so a fixed schedule leaves the façade dark on winter evenings and burning in daylight in summer. An astro clock derives sunset and sunrise from the date and the site latitude and longitude and shifts the schedule automatically, which is why every outdoor circuit in a properly designed system runs on one. The practical setup is a three-stage evening: the display and façade layer comes on at sunset minus fifteen minutes and switches off around 11pm because nobody is looking after that; the amenity layer for balconies and seating runs on the keypad and scenes; and a low security and path layer at 2200K runs from sunset to sunrise all night, drawing very little power. Motion sensors belong on the side setback, the service path and the gate approach, where lights should be off until something moves, not on the façade, where a façade that flicks on every time a street dog walks past is worse than no façade lighting at all.
How do I stop outdoor lights from attracting insects and glaring into bedrooms?
Both problems come from the same two causes: colour temperature and unshielded optics. Insects are drawn overwhelmingly to short-wavelength blue and ultraviolet output, so a 2200K to 2700K LED with no UV attracts a fraction of what a 6500K fitting does, and it is the single most effective change you can make on a Hyderabad terrace in the monsoon. Beyond that, keep the brightest fittings away from where people sit and eat, so the insects gather at the boundary rather than over the dining table, and avoid open uplights that shine directly at an unshielded lamp. For glare, the rule is that you should see the lit surface, never the source. Use recessed step lights, shielded and louvred wall lights, and in-ground uplights fitted with honeycomb louvres or glare shields, and always aim an uplight so its beam terminates on the wall or the tree canopy rather than continuing past it into a first-floor bedroom window or a neighbour's balcony. Lastly, dim: most Indian outdoor installations run at roughly double the brightness they need after dark, and a façade at 60 percent almost always looks better than the same façade at 100 percent.